WinCatalog 2026 User Manual
WinCatalog 2026 Online User Manual
Generated August 22, 2026
WinCatalog.com Website
Main Pages
-
Buy a License for Disk Catalog and File Organizer Software WinCatalog
-
WinCatalog Disk and File Catalog Software Reviews From WinCatalog Customers
Technical Support, User Manual
Other Links
Export from WhereIsIt or Advanced Disk Catalog and Import to WinCatalog
System Requirements
64-bit (current) version
To run WinCatalog 2026 you will need a 64-bit computer with one of the following 64-bit operating systems installed:
-
Windows 7
-
Windows 8
-
Windows 8.1
-
Windows 10
-
Windows 11
Windows 11 is recommended.
32-bit version
WinCatalog 2026 is a 64-bit application and requires a 64-bit version of Windows. If you need a 32-bit (x86) version, the latest available x86 release is WinCatalog 2026.1.1.
.NET Framework 4.8
.NET Framework 4.8 is highly recommended for the new scanning module and for the updated Scanning Options UI.
WinCatalog can still work without .NET Framework, but in that case it will use the old scanning module and the Scanning Options window may not fit displays with a scaling factor of 150% and higher.
Visual C++ Redistributable Packages
You may need to install one or both of the following packages:
-
Visual C++ v14 Redistributable (X64) — required to run WinCatalog 2026.
-
Visual C++ 2015 Redistributable — required by GhostScript for PDF thumbnail extraction.
AI Bridge — Local AI Features (Optional)
This feature is entirely optional. AI Bridge enables local AI features in WinCatalog using a locally running AI model. To use it, you need LM Studio or Ollama installed and running on your computer.
Local AI models have higher hardware requirements than WinCatalog itself. AI processing runs on your local machine using the CPU or GPU. Performance depends on your hardware:
| Component | Minimum | Recommended |
|---|---|---|
| RAM | 8 GB | 16 GB or more |
| Disk Space | ~3-5 GB for smaller models | ~8 GB for larger models |
| GPU | Not required (CPU works) | Any GPU for faster processing |
Where the Catalog File is Located
WinCatalog keeps all the data for a catalog inside a single file on a disk (the file itself is an SQLite database). You can place the file anywhere you want, including a removable media or a network drive. But you should know that network access may reduce program speed because WinCatalog needs to send a large amount of information over the network.
When you start WinCatalog first time, you will be asked to create new or open an existing catalog file. Once again, the catalog file may be located anywhere on a local, removable or a shared network drive.
If you already created a catalog file but do not know where it is located, please run WinCatalog (it will open most recently used catalog file), and click the Catalog button (left from the Main tab of the Ribbon toolbar):
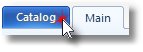
On top of the Catalog page, you will see the catalog filename and the full path to the catalog file. If you make a double click on the filename, the containing folder will be open in the File Explorer.
If you want to move the catalog file, please first close WinCatalog, move the file and then open it again but from a new location.
To open a catalog file, just make a double click on the file in the File Explorer.
Or, alternately, run WinCatalog. On startup, WinCatalog will try to load the catalog file from a previous location. If you moved the file, it fails and display the standard Startup choice dialog where it will ask you to Create new or Open existing catalog file. Click the second option to open the catalog file from a new location. However, if you copied your catalog file, on startup WinCatalog will open the catalog from ‘old’ location. That’s not a problem, to open a catalog from a new location, please click the Catalog button (see above), then Open Existing and select the catalog file from the new location. On every next run, WinCatalog will automatically open the catalog file from the new location (if it is available on the PC or until you open or create another catalog file).
Using WinCatalog you can have as many catalog files as you want*. To create a new catalog file, please click the Catalog button and then click Create New.
- Note: you can’t open then simultaneously in one instance of WinCatalog, if you need to open more than one catalog file at a time, please run several instances of WinCatalog opening different catalog files.
Difference Between Personal and Professional Licenses
Both types of licenses include the same features and allows installation on any number of computers per a license, but Personal license is restricted to non-commercial or educational use only whereas Professional / Business license includes all types of use including enterprise, professional and managed IT, non-profit and government use, plus priority technical and maintenance support.
In other words, if you plan to use WinCatalog at home, it is enough to buy a personal license. But if you want to use it at work or for your business, you should buy a professional license.
Quick Start with WinCatalog
Read the topics bellow to immediately start using WinCatalog 2026 software and to learn its main features and functions.
First Run
Start WinCatalog 2026
Click WinCatalog 2026 icon to start the program

Create a New Catalog File
If you are running WinCatalog 2026 for the first time, you will be asked to create a new catalog file or to open an existing one.
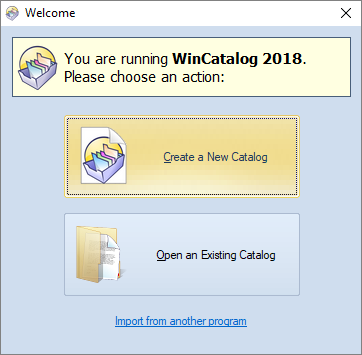
Select Create a New Catalog.
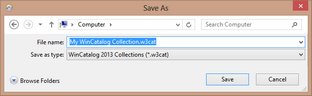
You will be asked for a filename for the new catalog file. You may change the default value if you want, or just click Save.
Ready
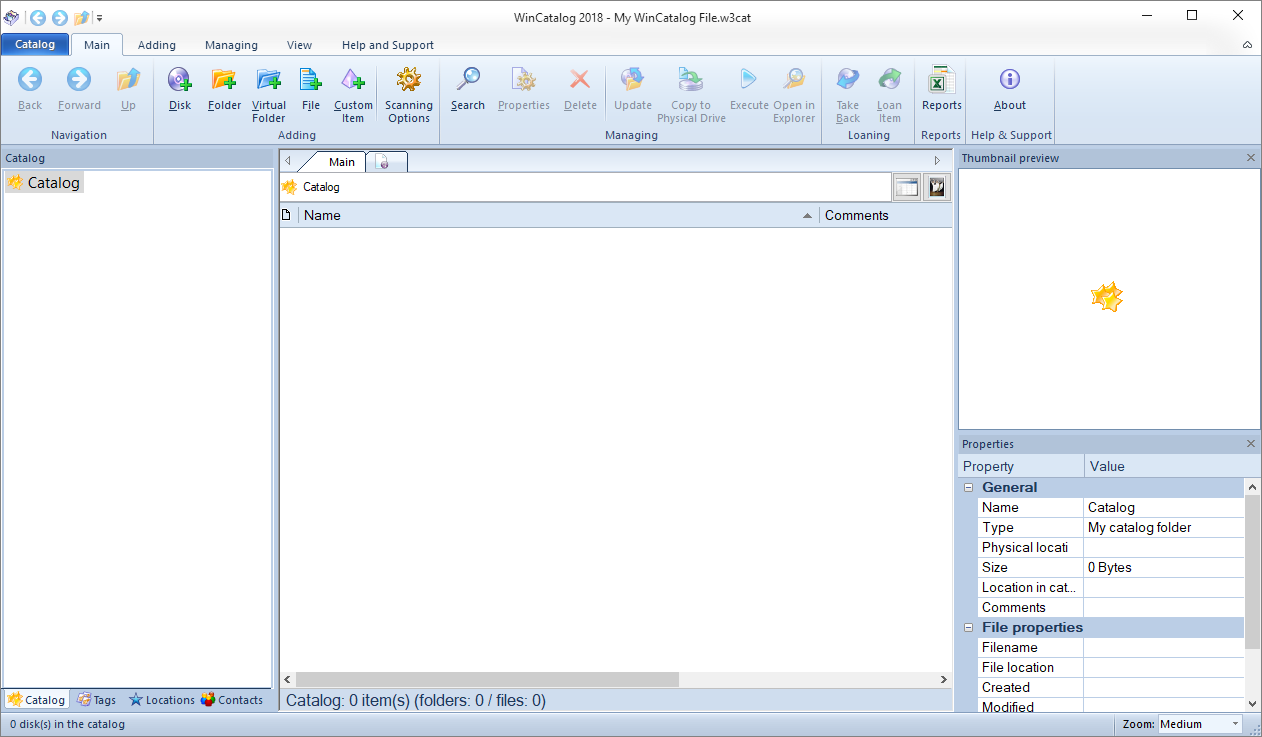
After the new catalog file is created, it will be opened with WinCatalog 2026:
Read next: Indexing a Disc
Indexing a Disk
Click Add Disk
On the Main tab click Disk button on the Adding panel to index a new disc.

Select a Disk to Add
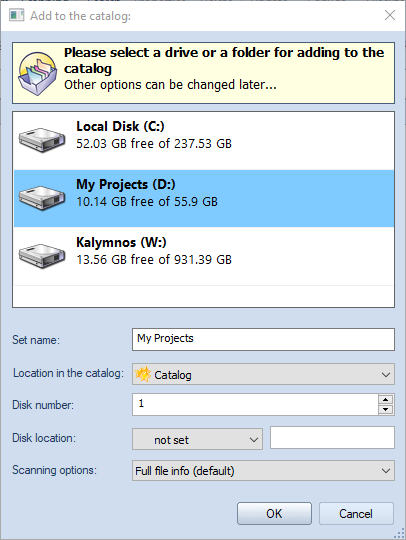
Select a disk you want to index. In our example it will be a DVD with photos. Click OK when done.
Wait the Process is Finished
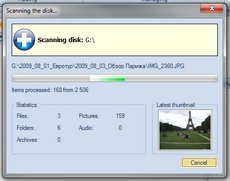
Please wait while WinCatalog scans the disc. The disc scanning process can take some time. It depends on a number of files on the disc and on the file types. On finishing WinCatalog will play “tada” sound.
The Disk is Added
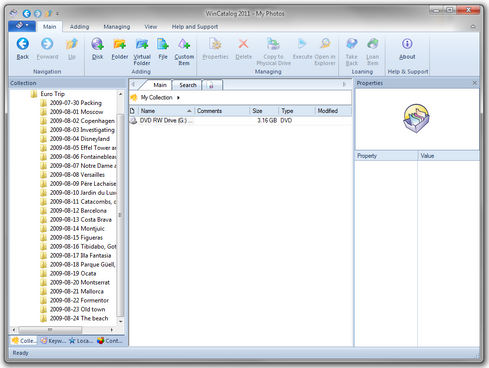
The newly added disc will be displayed in the program. You do not need to click Save button: WinCatalog 2026 saves all changes automatically.
Unplug or Eject the Drive
You can eject the disc from the computer. WinCatalog no longer needs the disc.
Loop
Repeat steps 1-5 for each drive you want to index.
Read next: Indexing a Folder
Indexing a Folder
You may want to index just a folder but not the whole disc. Indexing folder is very similar to Indexing a Disc.
Click Add Folder
On the Main tab click Folder button on the Adding panel to index a new disc.

Select a Folder to Add
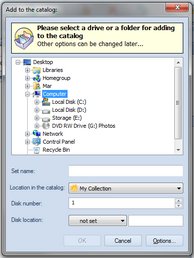
Select a folder for indexing, click OK when done.
Wait the Process is Finished
Please wait while WinCatalog scans the folder. The disc scanning process can take some time. It depends on a number of files in the folder and on the file types. On finishing WinCatalog will play “tada” sound.
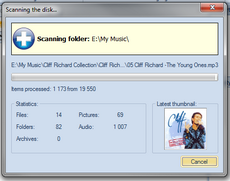
Ready
The newly added folder will be displayed in the program. You do not need to click Save button: WinCatalog 2026 saves all changes automatically.
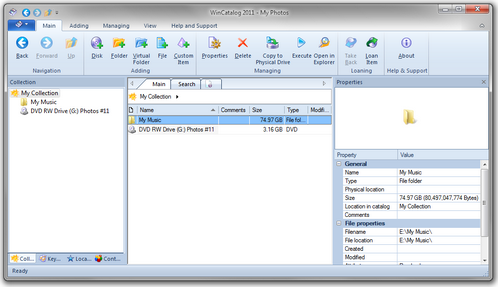
Repeat
Repeat steps 1-4 for each folder you want to index.
Simple Search
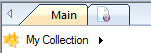
Open a New Search Tab
Click New Search tab to create a new search tab.
Type a Search Query
Type something you want to find. For example, if you want to find all indexed pictures, type “.jpg " (without quotes) and press Search button. This will start search process and all items which match the criteria will be displayed below. “.jpg” (without quotes) means find entries (files and folders) containing “.jpg” in any position. For more explanation of the search rules, please read the Search Function topic.
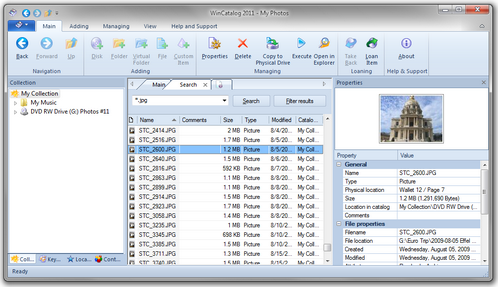
Your Search Results Are Ready
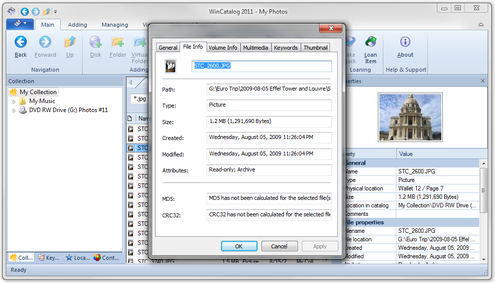
Double click on any file and you will see file properties, including the information about the disc where the file is stored. The thumbnail preview (if available) is displayed on the Properties panel of the main window.
Actualizing (Updating) a Disk or a Folder
The contents of drives and folders change. You can add new files, delete files that you no longer need, move files from one folder to another, or simply rename files.
To reflect all the changes you made, please select the previously cataloged disk or the folder you want to actualize and click the Update button on the toolbar or in the context menu.

The Update process will search for changes on the disk and update the catalog: WinCatalog will add files that have been added, it will remove deleted files from the catalog, and it will update files that have been modified since the last scan/update session.
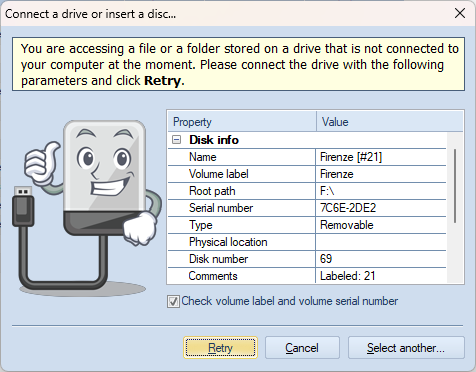
If the drive isn’t connected to your computer, before starting the process WinCatalog will ask you to connect the drive:
The update process is much faster than the initial scanning process because by default WinCatalog skips files that weren’t modified since the last session.
Read more: Actualizing/Updating a Drive or a Folder (detailed)
Search Function
The search function in disk catalog software is of paramount importance as it empowers users to swiftly access and organize vast amounts of data. With digital information growing exponentially, finding specific files can become a daunting task. The search function streamlines this process by allowing to locate files based on keywords, metadata, or content (for certain types of files). This feature not only saves time but also enhances productivity and efficiency.
The search function in WinCatalog includes simple search, advanced search queries, searching by specific fields for various types of files (Exif tags, ID3 tags, etc), and duplicate file finding.
Starting a New Search
Read the Simple Search topic for the beginning.
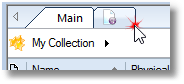
Click New Search tab to open a new search tab:
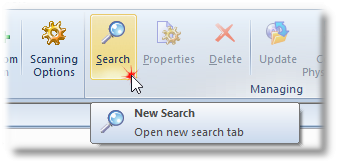
Another way to open a new search tab is to click the Search button on the toolbar:
Type a search query according to the search rules (described here), then click the Search button. WinCatalog will find all items matching the search query.
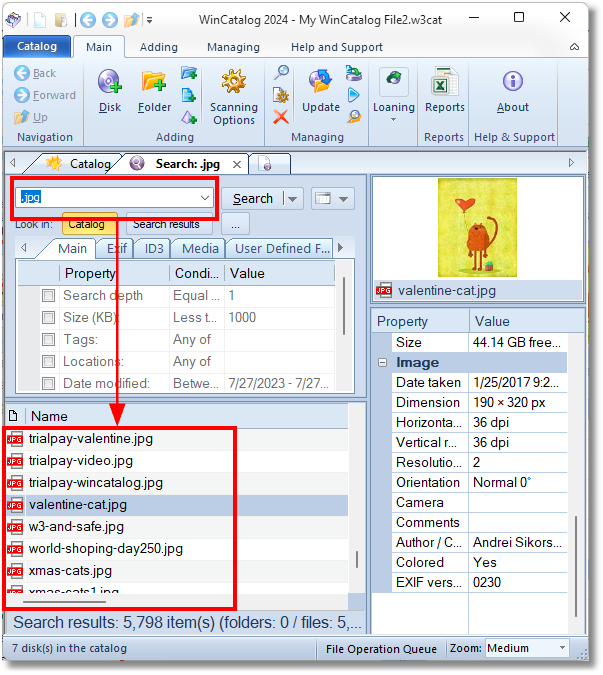
How WinCatalog Understands Search Queries
This article describes the search syntax (what you enter in the Search box) and how WinCatalog interprets it.
All searches are case insensitive: “Text” equals to “TEXT” and “text”.
Simple Search Queries
Simple search queries contain one or more words (elements) separated by a space character. WinCatalog finds catalog entries (files and folders) containing all words starting with elements in any order.
If the search query contains one or more dots like “img.jpg”, it will be split into two elements “img” and “.jpg” (both without quotes), so the search query “img.jpg” equal to “img .jpg”.
Changes in the 2023.2 version: If the search term starts with a dot, it is treated as an extension. WinCatalog will look for entries containing the search term at the end of filenames. For the example above, the search phrase “img.jpg” (without quotes) will be split into “img” and “.jpg”. The second part starts with a dot and means “extension”.
Examples
Search query:
report
Results:
Report.xlsx
My Report s
Report age.mp4
The following entries will NOT be found:
MyReport.xlsx (the “Report” part is not located at the beginning. To include this filename to search results, prepend the search term by an asterisk: “*report” without quotes)
Search query:
img.jpg
Results:
img.jpg
img 2452**.jpg**
img _6515**.jpg** -backup
The following entry will NOT be found:
img.jpg**.tmp** (the file has the .tmp extension, to include it in the search results, change the search query to “img.jpg*” without quotes)
jpg img.png
Important notice: the file “img _6515**.jpg** -backup” in the example above is included in the results because the extension starts with .jpg. If you want to exclude such results. use the “end of the word” operator $ (described below), so the search query should be “img.jpg**$** " (without quotes).
For each entry in the catalog, WinCatalog divides filenames to words by splitting them using spaces, underscores, dashes, dots, comas, tildes, square brackets, and others.
Search query:
man
Results:
Rain.Man.1988.avi
User_man ual.pdf
The following entry will NOT be found:
Kingsman The Secret Service.mkv
Search query:
Bob
Results:
Bob Marley - Kaya.mp3
Bob cat.jpg
Sponge Bob.mp4
Wildcards
In most cases, there is no need to use wildcards in simple queries. However, if you want to find entries containing search terms in any position , prepend them with asterisks.
Search query:
*man
Results:
Rain.Man.1988.avi
User_man ual.pdf
Kingsman The Secret Service.mkv
The asterisk character (”*") substitutes for any zero or more characters, and the question mark ("?") substitutes for any one character.
The character may be omitted for some terms. For example, to find all files having the jpg extension, you may type “*.jpg” or just “.jpg”. Both search queries will return the same results.
Quotes (exact match operator)
Double quotes mean exact match for the whole word or a phrase. Use them to find the whole phrase as is. All wildcards inside double quotes are disables (in other words, they works as regular characters).
Search query:
“rain man”
Results:
Rain Man Poster.jpg
Search query:
“man”
Result:
Rain Man Poster.jpg
The following entry will NOT be found:
manual.pdf
Search query:
“my file.txt”
Result:
my file.txt
my file.txt.mp3 (the double quotes operator turns off the “extension rule” described above in the “Simple Search Queries” section)
The following entries will NOT be found:
my file123.txt
my main file.txt
Search query:
“my file*.txt”
Result:
(the double quotes operator turns off wildcards, and the asterisk in the search query is a regular character)
The following entries will NOT be found:
my file.txt
my file.txt.mp3
my file123.txt
my main file.txt
Square brackets (strict match operator)
The square brackets are similar to double quotes with a purpose to find the exact word or phrase, but square bracket do not turn off wildcards the search term enclosed in square brackets may be the beginning of the word.
Search query:
[man]
Results:
Rain Man Poster.jpg
man ual.pdf
Search query:
[my file.txt]
Results:
my file.txt
my file.txt.mp3
The following entry will NOT be found:
my file123.txt
Search query:
[my file*.txt]
Results:
my file.txt
my file.txt.mp3
my file 123**.txt**
The following entry will NOT be found:
my main file.txt
Begin of the Line Operator
As described above, when you perform a simple search, WinCatalog finds entries containing words that start with the entered search terms, regardless of the word order. For example, a search for “big app” (without quotes) will find both “big apple” and “the apple is big.”
In most cases, this is the desired behavior. However, there are times when you want to find elements whose names (or other data fields) start with the entered search query. In such cases, use the beginning-of-string operator: start the search term with the caret symbol (^) to ‘stick’ it to the beginning of the first word of each searchable field.
Search query:
^document
Results:
Document.pdf
Document s and Reports 2024.xlsx
The following entry will NOT be found because the filename doesn’t start with the ‘document’:
My Document.pdf
The beginning-of-string operator should be applied to individual terms rather than to a group of terms. For example, if you want to find files with filenames starting with ‘image’ or ‘photo’, the search query should be “^image OR ^photo” (without quotes).
For example, to find filenames starting with the letter ‘A’ followed by a space, use the square brackets (the strict match operator, described above) in combination with the beginning-of-string operator.
Search query:
[^A ] (notice the space between A and the closing bracket)
Results:
A Tale of Two Cities by Charles Dickens.pdf
A Passage to India by E.M. Forster.epub
A Tree Grows in Brooklyn by Betty Smith.fb2
The following entry will NOT be found, because the ‘A-space’ part is not located at the beginning:
To Kill a Mockingbird by Harper Lee.epub
End of the word operator
The end-of-the-word operator ($) requires the search term to end exactly where a word ends. Use it, for example, to find entries with a certain file extension.
The term anchored with $ matches when it ends at the end of a searchable field or at the end of a word inside it. For example, “img.jpg$” (without quotes) finds “img.jpg” and also “img.jpg Vacation photos” (the term ends where the word “img.jpg” ends), but not “img.jpg.tmp”.
Search query:
img.jpg**$**
Results:
img.jpg
img 2452**.jpg**
The following entry will NOT be found because it doesn’t end with ‘.jpg’:
img_6515.jpg**-backup**
Search query:
.xls**$**
Results:
Report**.xls**
My Movies Database**.xls**
The following entry will NOT be found:
My Expences**.xlsx**
Logical Search Operators
Use search operators AND, NOT and OR to logically combine search queries.
expr1 AND expr2
expr1 OR expr2
expr1 NOT expr2
Operators are case insensitive. “NOT” equals to “not”, “OR” equals to “or”, “AND” equals to “and”.
The space between two search terms works as an implicit AND: “rain man” equals to “rain AND man”.
Operator precedence. NOT binds strongest, then AND (including the implicit AND between adjacent terms), then OR:
rain man OR poster means (rain AND man) OR poster
NOT rain man means (NOT rain) AND man
Use parentheses (described below) whenever you want a different grouping — they always win over precedence.
NOT may also follow another operator: “expr1 OR NOT expr2” is a valid query and means expr1 OR (NOT expr2).
Quoted and bracketed terms combine with operators like any other term. For example, the search query ‘report “final” OR draft’ (with the double quotes) means (report AND “final”) OR draft.
Search query:
.jpg OR .png
Results:
photo**.jpg**
picture**.png**
Search query:
.jpg not portrait
Results:
panoramic.jpg
nature.jpg
The following entries will NOT be found:
my portrait.jpg
portraits.jpg
Search query:
man not .jpg
Results:
rain.man.1988.mkv
rain.man.1988.trailer.avi
rain.man.1988.srt
The following entry will NOT be found:
rain.man.1988.poster**.jpg**
Brackets
Use brackets () to combine search operators like in mathematics.
Search query:
rain.man not (.srt or .jpg)
Results:
rain.man.1988.mkv
rain.man.1988.trailer.av
The following entries will NOT be found:
rain.man.1988**.srt**
rain.man.1988.poster**.jpg**
Brackets can be nested, and NOT can be used inside brackets:
((draft or final) and report) not .tmp
report and (not draft)
Escape quotes and brackets
The escape character is defined by non-quoted backslash (\). It preserves the double quote character, round/square brackets, wildcards characters (*, ?), and the backlash itself, followed by this symbol.
Search query:
document\(*\)
Results:
document(1).docx
document(2024).docx
The following entries will NOT be found:
document 2024.docx (the filename doesn’t contain brackets)
Search query:
Archive\\(Books)
Results:
Archive\(Books).zip
The following entries will NOT be found:
Archive(Books).zip
Additional Search Options
The additional search options are located below the search field. It contains the “Look in” filter and tabs with basic and specific fields:
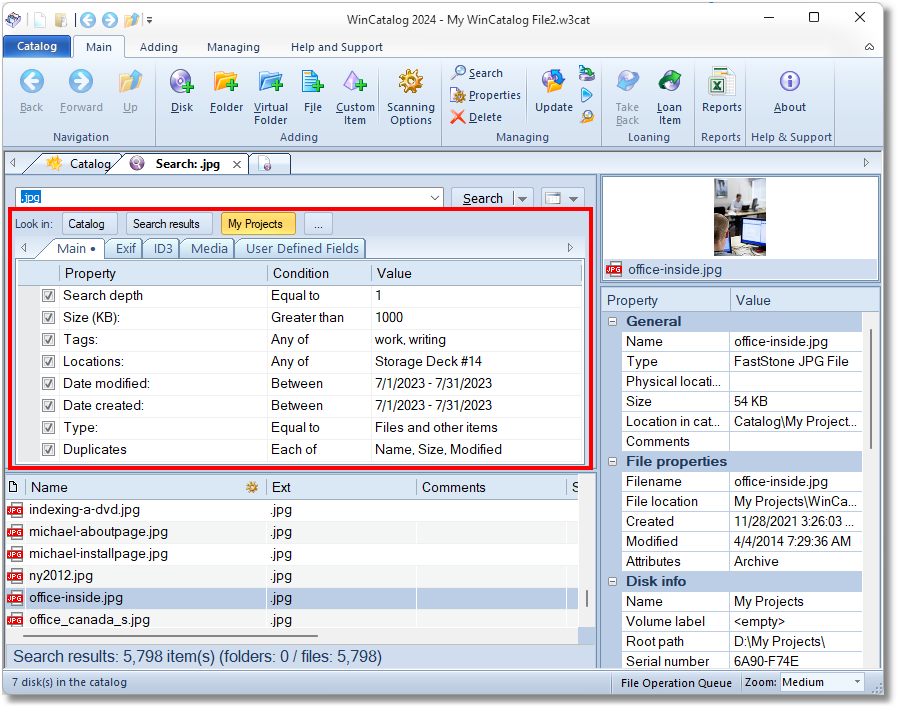
Mark rows to enable conditions, switch the value of the Condition column to change conditions (for example, Less than, Greater than, Between), and set the value in the Value column.
All the selected rows are combined using the AND logical conditions, meaning that the catalog entry should match all the selected filters to be displayed in the search results.
For text fields the “Contains” condition means a simple text match when the field should contain any occurrence of the entered text; the “Advanced query” condition enables all search syntax, including logical operators as described here.
The ● (dot) sign on the tab header (“Main ●” on the screenshot above) means that at least one condition from the page is turned on.
The Look In Filter
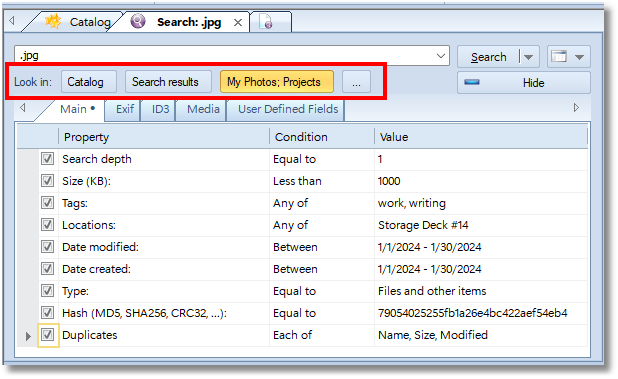
The “Look In” filter consists of three fields:

Catalog - perform the search within entire catalog file. The entire search scope is selected by default when you open a new search tab.

Search results - search within search results from the previous search. This option is hidden on a new search tab and appears after the first search ends.

The selected location (“My Projects” on the screenshot below) - limit the search scope by the selected catalog folder. When you open a new search tab by clicking the New Search Here context menu entry, the selected folder is set as the search scope by default.

[…] - click the ellipsis button to select another folder to look in. Using the ellipsis button, you can select several folders to search in (CTRL+Click for multi-select).

Show or hide the additional options panel.
Main Tab
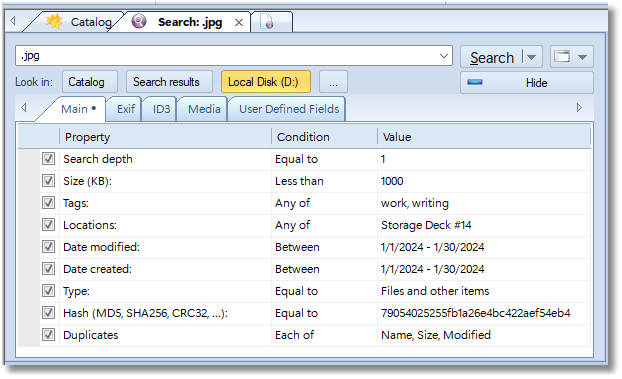
| Property | Conditions | Description |
|---|---|---|
| Search depth | Equal to | limits the depth of the search by the selected value. 1 means to look inside the selected location, 2 means to look inside the selected location and inside the first-level subfolders. And so on. |
| Size (KB) | Less than, Equal to, Between, Greater tha | filter search result matching the selected size. The size should be set in KB (kilobytes). |
| Tags | Any of Each of Only None of | associated tags. The “Any of” conditions means that at least one of the selected tags from the “Value” field should be assigned to the entry. The “Each of” condition means that all the selected tags must be assigned to the entry. The “Only” condition means that all the selected tags and no other tags should be assigned to the entry. The “None of” condition means that none of the selected tags should be assigned to the entry. |
| Path | Contains Advanced query | filters search results by the file path (the same value as the File Path column, built from the real folder structure). The “Contains” condition finds the entered text anywhere in the path, including fragments with backslashes such as “Backup\2019”. The “Advanced query” condition uses the regular search query syntax. See the “Searching by Path” section below for path-specific tips. |
| Locations | Any of | the Physical Location field of the selected entry should be set to one of the selected locations. |
| Date Modified, Date Created | Before, On, After Between | the file attribute “Date Modified” or “Date Created” should match the condition. |
| Type | Equal to | filters search results by internal catalog types. The Value field may be one of the following: Folders and disks - the search results should contain only disks and folders (in other words, to exclude files). Disks and root folders - the search results should contain only drive records or top-level (root) folders added via the Add Folder command. Files and other items - find only files and custom items (i.e. exclude folders and drive records from search results). |
| HASH (MD5, SHA256, CRC32, …) | Equal to Contains Advanced query | filters search results by the entered Hash (or checksum) value. In most cases, when searching using hashes, leave the search field blank (means find all files and folders) and paste the hash value into this field. |
| Duplicates | Each of | finding duplicates by the selected fields. Read the Finding Duplicates of Fields and Other Entries topic for details. |
Searching by Path
The Path filter matches the full file path of each entry, for example D:\Photos\Vacation 2023\IMG_0001.jpg. It is applied to the entries found by the search query, so you can leave the search box blank (find everything) and filter by path only.
The path is treated as one line of text where the backslash \ separates words, exactly like a space does in filenames. This gives you a few useful tricks in the “Advanced query” mode:
- A folder starting with a word. The query
Vacationfinds entries located under a folder (or having a file name) that starts with “Vacation” — it matchesD:\Photos\Vacation 2023\IMG_0001.jpg. Like everywhere in WinCatalog, it also matches “Vacation” starting any word, for exampleD:\Photos\Summer Vacation\.... - Strictly at the beginning of a folder name. The query
*\Vacation(asterisk, backslash, then the word) matches only paths where a folder name begins with “Vacation”:D:\Photos\Vacation 2023\...matches, butD:\My Vacation\...does not. - A folder ending with a word. The query
*Backup\(asterisk, the word, then a backslash) finds entries with a folder name ending in “Backup”: it matchesD:\Old Backup\2019\report.txt. - Consecutive folders. A fragment containing a backslash is matched literally, but in the “Advanced query” mode it needs a leading asterisk:
*Backup\2019(or*\Backup\2019for the exact folder name) finds only entries whose path contains the folder “2019” directly inside a folder named “Backup”. The “Contains” condition adds the asterisk automatically, so there you can simply enterBackup\2019. - The end of the path. The end-of-word anchor
$applies to the end of the whole path, not to every folder name. The queryReports$matchesD:\Work\Reports, but does not matchD:\Work\Reports\January.xlsx— in that path “Reports” is followed by more folders. To find entries with any folder ending in “Reports”, use*Reports\instead.
The “Contains” condition simply finds the entered text anywhere in the path: dev matches both C:\PHP\dev\test.php and C:\Devices\list.txt.
For a ready-made query built on this filter, see Excluding Archive and Container Contents from Search Results.
Exif Tab
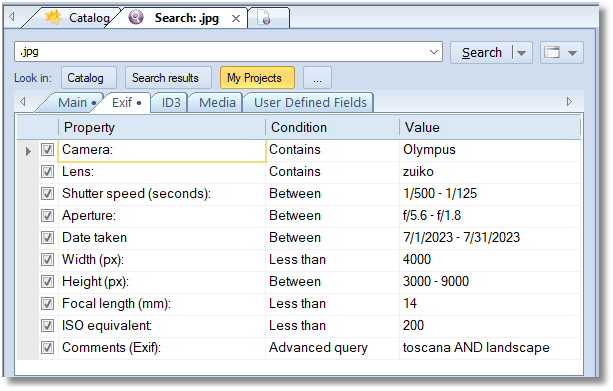
If any of the conditions from the Exif tab is turned on, only files having Exif tags will be displayed in the search results. If the file have no Exif fields, it will not be shown.
| Property | Conditions | Description |
|---|---|---|
| Camera | Contains, Advanced query | search in the “camera make” and “camera model” Exif tags. |
| Lens | Contains, Advanced query | search in the “lens”, “lens maker notes”, and “lens make” Exif tags. |
| Shutter speed (seconds) | Less than, Equal to, Between, Greater than | searching by the shutter speed value. To modify the Value cell, click inside the cell, then click the ellipsis button: 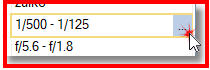
|
| Aperture | Less than, Equal to, Between, Greater than | searching by the Aperture value. To modify the Value cell, click inside the cell, then click the ellipsis button. |
| Date Taken | Before, On, After Between | searching by the Date Taken Exif field value. |
| Width (px), Height (px) | Less than, Equal to, Between, Greater than | searching by the height and the width (in pixels) taken from Exif tags. |
| Focal length (mm) | Less than, Equal to, Between, Greater than | searching by the Focal Length value. |
| ISO equivalent | Less than, Equal to, Between, Greater than | ISO equivalent. |
| Comments (Exif) | Contains, Advanced query | searching by the Comments grabbed from Exif tags |
| Has GPS coordinates | Yes/No | separates geotagged photos from the rest of the collection. Select “Yes” to find only the photos that carry GPS coordinates, or “No” to find the photos that do not. |
| Within a distance of a place | within | finds everything shot within a given radius of a spot. To set the place and the radius, click inside the Value cell, then click the ellipsis button. See the “Searching by Location” section below. |
Searching by Location
WinCatalog reads the GPS coordinates written by the camera or the phone into the photo and lets you search by them offline: no internet connection, no account, and nothing about your collection leaves the computer.
Coordinates are grabbed from regular images (JPEG, HEIC, TIFF, WebP) and from RAW files during the scan. If a photo was added to the collection by an older version of WinCatalog, update the disk to make its coordinates searchable.
Has GPS coordinates
The simplest of the two conditions: it just asks whether the photo carries coordinates at all.
- Yes — only geotagged photos are shown. This is the quickest way to see what part of the collection can be placed on a map.
- No — only the photos without coordinates are shown, which is useful when you are looking for the shots that still need to be geotagged by hand.
Cameras that failed to get a satellite fix sometimes write zeroes instead of real coordinates. WinCatalog treats such photos as having no GPS data, so they never show up as false positives.
Within a distance of a place
This condition finds everything shot around a given point: select the place, set the radius, and the search returns the photos taken inside that circle.
Clicking the ellipsis button in the Value cell opens the place picker, which offers three ways to set the point:
- A place from your collection. The picker lists the places where your photos were actually taken, each with the number of photos, for example “Paris, France (58 photos)”. Places are named using an offline database of world cities, so when a spot is far from any city it is shown honestly as, for example, “14 km from Salzburg (23 photos)”. Nothing is downloaded — the list is built from the coordinates already stored in your collection.
- A city. The same offline city database can be used to pick a place your collection has no photos of yet.
- Coordinates. Paste the coordinates directly, in the
48.8583, 2.2944form produced by the “copy coordinates” command of the online maps, or in the degrees-minutes-seconds form.
The radius is set in kilometers or in miles, depending on the regional settings of your computer: WinCatalog uses miles where the locale is imperial and kilometers everywhere else.
Related commands
Two commands in the right-click menu of a photo complement the search conditions:
- Show on map — opens the place where the photo was taken in the browser.
- Find photos taken nearby — starts a “Within a distance of a place” search centered on the selected photo, without setting the place by hand.
The Place and Map link rows of the properties panel show the same information for the selected photo, and the %gps_city% and %gps_link% tokens make it available as Dynamic Columns.
ID3 Tab
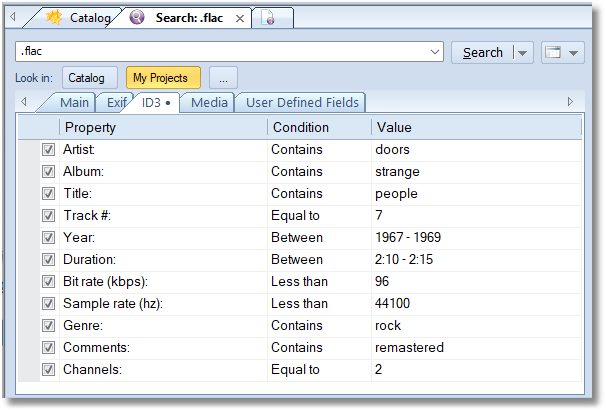
If any of the conditions from the ID3 tab is turned on, only files having ID3 tags will be displayed in the search results. If the file have no ID3 fields, it will not be shown.
| Property | Conditions | Description |
|---|---|---|
| Artist | Contains, Advanced query | search in the Artists tag. |
| Album | Contains, Advanced query | search in the Album tag. |
| Title | Contains, Advanced query | search in the Title tag. |
| Track # | Less than, Equal to, Between, Greater than | search by the Track number. |
| Year | Less than, Equal to, Between, Greater than | search by the Year tag. |
| Duration | Less than, Equal to, Between, Greater than | searching by the duration field. Click the Value field, then the ellipsis button to edit the value: 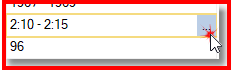
|
| Bit rate (kbps) | Less than, Equal to, Between, Greater than | searching by the Bitrate value. |
| Sample rate (hz) | Less than, Equal to, Between, Greater than | searching by the Sample rate value. |
| Genre | Contains, Advanced query | searching by the Genre field (as text). |
| Comments | Contains, Advanced query | searching in the ID3 Comments field. |
| Channels | Less than, Equal to, Between, Greater than | searching by the number of channels. 1 - mono, 2 and more - stereo. |
Media Tab
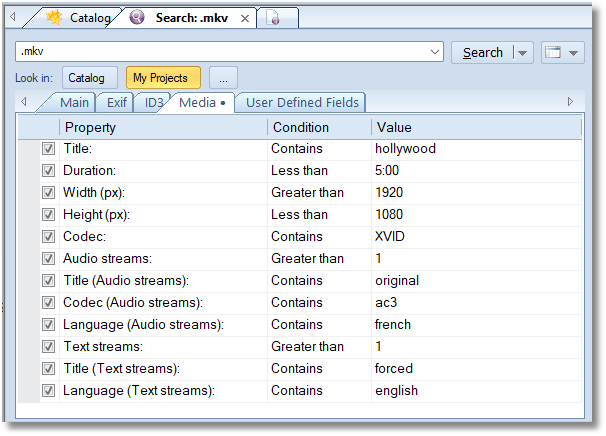
If any of the conditions from the Media tab is turned on, only files having Media Info will be displayed in the search results. If the file have no Media Info fields, it will not be shown.
| Property | Conditions | Description |
|---|---|---|
| Title | Contains, Advanced query | searching by the Title field grabbed from the MediaInfo processing module. |
| Duration | Less than, Equal to, Between, Greater than | searching by the Duration field. To edit the Value cell, click the cell, then click the ellipsis button: 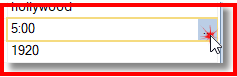
|
| Width (px), Height (px) | Less than, Equal to, Between, Greater than | searching by the Width and Height of the video in pixels |
| Codec | Contains, Advanced query | searching by the Video Codec field. |
| Audio streams | Less than, Equal to, Between, Greater than | searching by the number of the Audio streams. |
| Title (Audio streams) | Contains, Advanced query | searching by the Title of one of the audio streams. If a media file contains more than one audio stream, at least one of the streams should match the query. |
| Codec (Audio streams) | Contains, Advanced query | searching by the Codec of one of the audio streams. If a media file contains more than one audio stream, at least one of the streams should match the query. |
| Language (Audio streams) | Contains, Advanced query | searching by the Language of one of the audio streams. If a media file contains more than one audio stream, at least one of the streams should match the query. The language is stored as it was grabbed from the media file, in most cases it contains both full and short vaiants, for example: “English (en)”. The field is optional for media files and may contain no information about the language of the stream. |
| Text streams | Less than, Equal to, Between, Greater than | searching by the number of the Text streams. |
| Title (Text streams) | Contains, Advanced query | earching by the Title of one of the text streams. If a media file contains more than one text stream, at least one of the streams should match the query. |
| Language (Text streams) | Contains, Advanced query | searching by the Language of one of the text streams. If a media file contains more than one text stream, at least one of the streams should match the query. The language is stored as it was grabbed from the media file, in most cases it contains both full and short vaiants, for example: “English (en)”. The field is optional for media files and may contain no information about the language of the stream. |
User Defined Fields Tab
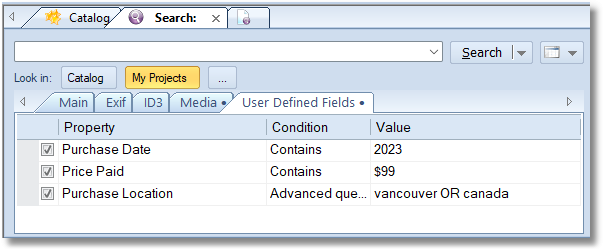
Searching by values stored in the User Defined Fields, one field per row as text. Please read more about user-defined fields here.
Saved Searches
Saved Searches is the ability to save search parameters and restart frequently used searches with just two mouse clicks. The Saved Searches functionality resides under the down arrow of the Search button. The feature comes with a set of pre-defined searches, you can delete the existing searches and save others on your own.
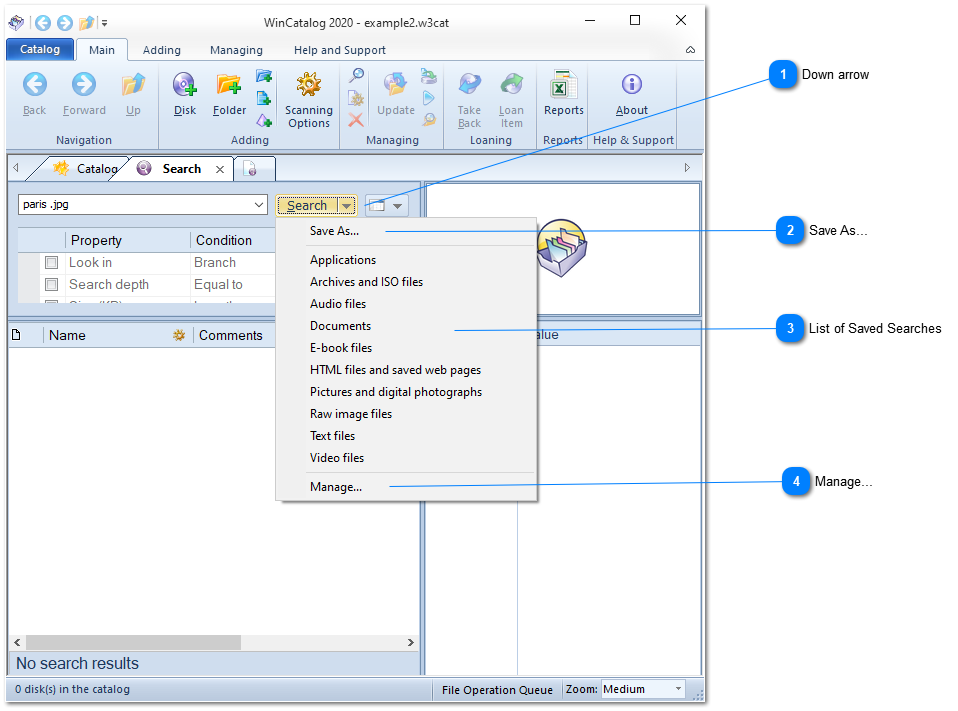

Down arrow

Click the down-arrow of the Search button to expand the Saved Searches menu
Top

Save As…

Click the Save As menu entry to save the current search configuration as new menu entry, or replace an existing configuration.
Top

List of Saved Searches
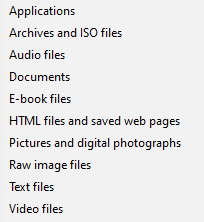
Select the Saved Search to load the configuration: search query, and additional search options.
Top

Manage…

Click Manage menu entry to open Save Searches Manger where you can review, rename, or delete saved searches.
Top
Saved Searches Manager
Click the Manage menu entry to open the Saved Searches manager where you can review, rename, or delete saved searches.
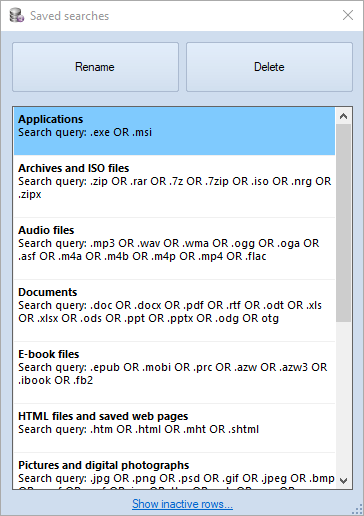
Saved Searches Managers displays all the saved searches you have in the catalog. By default, it displays only active options for each saved search. By clicking the Show inactive options link in the bottom you can switch between displaying only active options and displaying full list of options.
Click the Rename button to rename the selected Saved Search. Name (shown in bold) is how the Saved Search appears in the dropdown menu of the Search button (see above).
Click Delete button to delete the selected Saved Search from the catalog.
Save the search as…
To save the current search configuration, click the Save As… menu entry in the dropdown menu of the Save button. The Save As… prompt will appear.
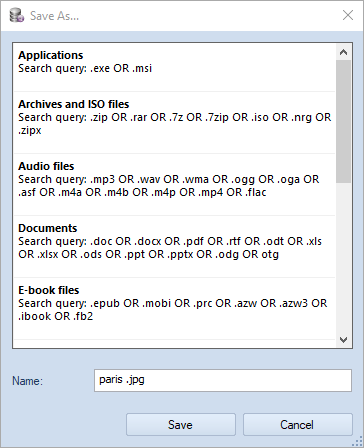
The search term will be suggested as the search name by default. You can use any name you wish. The name should be unique, if you type the name that already exists, WinCatalog will warn you.
To overwrite the existing saved search, type the name of the search or select if from the list. WinCatalog will warn you that the search already exists and will ask if you want to overwrite it.
Finding Duplicates of Files and Other Entries
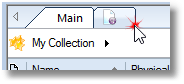
To start finding duplicates please run WinCatalog and open a new search tab by clicking the New Search tab:
In the Search field please type a word or a phrase (all duplicated entries should match that word or a phase), for example “*.jpg” (without quotes) to find duplicates only for jpg files.
Mark the Duplicates row in the additional search options and select fields that will compared during the duplicates finding process (other rows are optional and may be used as additional filters):
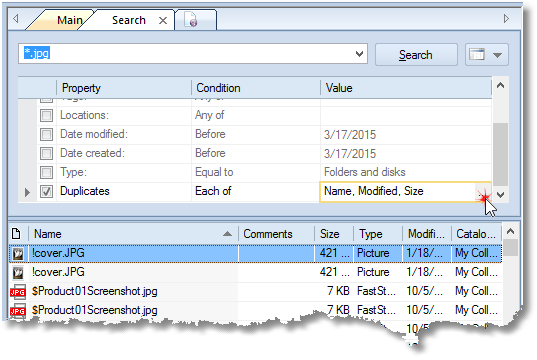
Click Search when done. WinCatalog will find all the files that match the query (*.jpg on the picture above) and then it will filter the results to show only the files where the selected fields (Name, Modified Date, and Size on the picture above) are the same.
If you sort the results by the Name column, all the duplicated entries will be grouped.
All the fields are optional. For example, you may want to select CRC32 (or MD5) field only, this will find duplicates of files that have different names. Please note that the option to calculate checksums (MD5/CRC32) is turned off by default.
If you want to find duplicates of files that have, for example, different size, you should exclude the Size column from the list of compared fields. If you want to find duplicates, that have the size larger or smaller than specified, you should use the “Size (KB)” filter. For example, to find files larger than 1MB you should mark the “Size (KB) row, select “Greater than” in the condition column and type 1024 into the value field. The same rule can be applied to other fields (dates created and modified, catalog path, type, tags, locations).
Selecting Duplicates in Search Results
When WinCatalog finds duplicates (see Finding Duplicates of Files and Other Entries), you usually want to keep one copy from each group and get rid of the rest. Picking the copies by hand works for a dozen groups, but not for hundreds. WinCatalog can do it for you.
There are two ways to run the selection commands: the selection toolbar shown above the duplicate search results, and the Select submenu of the right-click menu. Both offer the same commands.
The selection toolbar
As soon as a duplicate search finishes, a toolbar appears above the results:

The toolbar starts with the word “Select:” followed by drop-down buttons: “by position”, “by size”, “by date”, “by path”, “by depth”, “by location”, and “more”. Each button opens a small menu with the commands described below. The “by location” button also contains the commands for connected and disconnected disks, and the “more” button holds “Select all”, “Select none”, and “Invert selection”.
Please note that the toolbar is shown when the results are displayed as a table; in the thumbnails view, please use the right-click menu instead.
The Select submenu
Alternatively, right-click the duplicate search results and point to Select:

Each command goes through every group of duplicates and selects the entries that match its rule. The new selection replaces the previous one, so you can try one command after another until the result looks right. When two entries in a group tie (for example, two copies with the same date), WinCatalog selects the first one. You can also re-sort the results by clicking a column header at any point - the selection is kept.
Selecting by position
“Select first entry in each group” and “Select last entry in each group” pick one entry per group, based on the current sort order. “Select all but first” and “Select all but last” do the opposite: they select every extra copy and leave one entry per group unselected, which is usually what you want before deleting.
Selecting by date and size
“Select newest in each group” and “Select oldest in each group” compare the Modified date; “Select all but newest” and “Select all but oldest” select the complement. “Select largest in each group”, “Select smallest in each group”, “Select all but largest”, and “Select all but smallest” work the same way with the file size.
Note that if the Modified date is one of the fields compared during the duplicate search, all dates inside a group are identical, so the date commands are disabled. The same applies to the size commands when Size is among the compared fields.
Selecting by path
These commands look at where each copy is stored. The physical path is the real path on the disk (for example, D:\Backups\2023\Photos\img001.jpg). The catalog path is the path inside your catalog, so virtual folders count too.
- “Select longest physical path in each group” and “Select shortest physical path in each group” compare the length of the path in characters.
- “Select deepest physical path in each group” and “Select shallowest physical path in each group” compare the number of folder levels instead.
- The four catalog path commands apply the same rules to the catalog path.
A typical use: the copy with the shortest or shallowest path is often the original, while copies buried deep in backup folders are the ones to remove.
Selecting by location
The location commands compare every copy to a starting entry: the entry you right-clicked, or, when the commands are run from the toolbar, the currently focused entry (please click an entry first). “Select entries on this drive” and “Select entries on other drives” split the results by drive; “Select entries in this folder” and “Select entries in other folders” split them by folder. For example, click a copy on your main drive and choose “Select entries on other drives” to select all copies stored elsewhere.
Connected and disconnected disks
“Select entries on connected disks” and “Select entries on disconnected disks” check which cataloged disks are currently attached to your computer. This helps when part of your collection lives on external drives: you can limit the selection to copies you can actually reach right now.
Select all, none, invert
“Select all”, “Select none”, and “Invert selection” live at the bottom of the Select submenu and under the “more” button of the toolbar. Invert is useful after any of the commands above: select the copies you want to keep, invert, and the selection now covers everything else.
A safety note
If a command would select every copy in some group, WinCatalog warns you before applying the selection. Deleting a complete group removes the file everywhere, and that is rarely what you want.
After each command the status line below the search results reports how many entries are selected. If some entries were skipped because their path could not be resolved, the status line mentions that as well.
Fast Search Index
To provide a better search experience, WinCatalog maintains and uses a fast search index. This feature is optional and turned on by default for all catalog files.
Each modern computer has several processors, the high search speed is reached by iterating data in parallel threads on different processors. Best performance may be achieved when the catalog file and the search index are located on SSD drives.
The Fast Search Index is a subset of files located inside the “.wincatalog” folder. WinCatalog creates the folder automatically in the same folder where the catalog file is located. All index files are combined one level deeper under the folder named after the catalog file.
If you move or copy your catalog file to another location, please consider moving or copying the corresponding index folder with all the index files. However, if you don’t move or copy the index folder, it will be created automatically in the new location when you open your catalog file for the first time (if the new location is not read-only storage, like CD or DVD).
If the option to use the Fast Search Index is turned off, WinCatalog will use the catalog file for searching.
To configure the Fast Search Index, turn it on or off, please click the Catalog button (left from the Main tab of the Ribbon toolbar), and then click the Search Index button.
Search Index Options
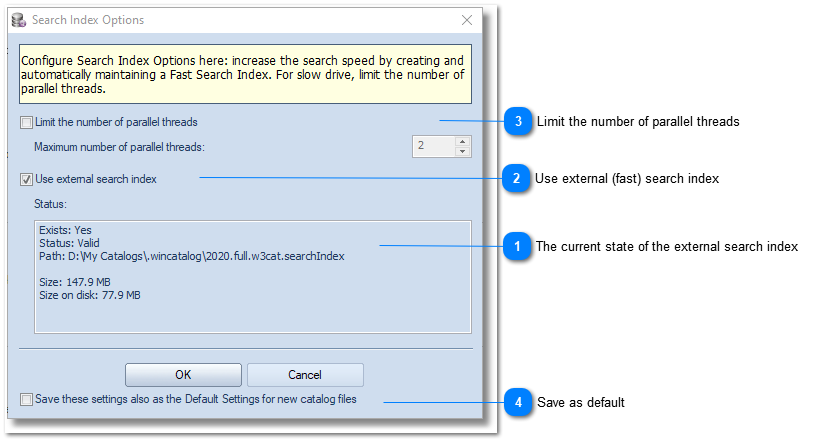
The current state of the external search index
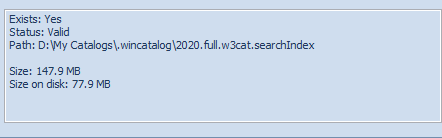
The current state, location, and size of the external (fast) search index.
Top
Use external (fast) search index

Mark or unmark the “Use external search index” checkbox to enable or disable the external (fast) search index.
If the external search index was not previously created, and you turn it on, the index will be created when you click the OK button.
If the external search index exists, but you turned it off, all files will be deleted from the disk and WinCatalog will perform searches using the catalog file only (works slower than using the external search index).
Top
Limit the number of parallel threads

Each modern computer has several processors, the high search speed is reached by iterating data in parallel threads on different processors. Best performance may be achieved when the catalog file and the search index are located on SSD drives.
When the catalog file is stored on slower drives, especially on optical drives (DVDs, CDs), or shared in a local network and accessed via a slow network connection, the high number of parallel threads may cause the search index to work slow because of low disk speed. In that case, you may want to limit the number of parallel threads to 2 for slow network drives and slow external hard drives or to 1 for optical drives.
Top
Save as default

Save these settings as default values for new catalog files. By default, when you create a new catalog file, WinCatalog will turn the external (fast) search index on and will not limit the number of parallel threads. Changing the settings and applying them as default values for new catalog files changes this behavior.
Top
Practical Search Use Cases
The topics in this section are recipes rather than reference: each one starts with a task people actually ask us about and shows the search query and the additional search options that solve it.
They all rely on the syntax described in How WinCatalog Understands Search Queries and on the filters described in Additional Search Options, so it is worth reading those two topics first.
Excluding Archive and Container Contents from Search Results
WinCatalog looks inside archives (ZIP, RAR, 7-Zip and others) and inside disk images (ISO, VHD, VHDX, VMDK and similar) and stores what it finds there as regular catalog entries. Most of the time this is exactly what you want: you can find a document without remembering which archive it was packed into.
Sometimes it gets in the way. Say your movie collection keeps the same film as Alien.iso, Alien.mkv and Alien.avi on three different disks. A search for “alien” returns the three files you were looking for, plus every .VOB, .IFO and .BUP file stored inside the ISO. The entries you actually need are buried under their own contents.
There is no single switch that turns this off, but the Path row on the Main tab of the additional search options does the job.
The query
Open the additional search options below the search field, go to the Main tab, tick the Path row, switch its Condition to Advanced query, and enter this as the Value:
NOT [.iso\] NOT [.nrg\] NOT [.vhd\] NOT [.vhdx\] NOT [.vmdk\] NOT [.vdi\] NOT [.wim\] NOT [.img\] NOT [.zip\] NOT [.rar\] NOT [.7z\] NOT [.cab\] NOT [.tar\]Then type your search query in the search box and run the search as usual. The container files themselves stay in the results, and everything stored inside them disappears, at any nesting depth. Like every search in WinCatalog, the query is case insensitive.
Copy the query exactly as it is, with the leading dots and the square brackets. Each of those three parts does something, as explained below.
The list covers the container formats WinCatalog opens most often. Add or remove formats to match your collection: the pattern is NOT [. + extension + \] per format, separated by spaces.
How it works
The Path row matches the whole path of an entry, the same value you see in the File Path column, for example D:\Movies\Alien.iso\VIDEO_TS\VTS_01_1.VOB. Files stored inside a container get a path that runs through the container’s own filename, exactly the way it would run through a folder name. That is what makes them possible to filter.
Search terms match at the start of a word. WinCatalog splits text into words at spaces, dots, commas, dashes, underscores, brackets, slashes and backslashes, so in a path both the folder names and the parts of a filename are separate words.
A character that a search term contains stops separating words for that term. This is the rule the whole query is built on. WinCatalog keeps a separate list of word separators for every search term and removes from it every character the term itself contains, so that character can be matched literally instead. The dot and the space are the two exceptions: they always stay separators.
Put together, the term .iso\ means “a word starting right after a dot, spelled iso, immediately followed by a backslash”:
- The backslash is part of the term, so for this term a backslash no longer starts a new word. The term cannot match a folder name that simply follows a backslash; it has to begin at a dot.
- The dot is still a separator, so the term does start at the dot in
Alien.iso. - The trailing backslash then requires something to be stored below that name.
NOT in front of the term removes the matching entries from the results.
| Path | Result | Why |
|---|---|---|
D:\Movies\Alien.iso |
kept | the container itself, nothing is stored below it |
D:\Movies\Alien.iso\VIDEO_TS\VTS_01_1.VOB |
excluded | “.iso” is followed by a backslash |
D:\Backup\photos.zip |
kept | the archive itself |
D:\Backup\photos.zip\2019\img001.jpg |
excluded | stored inside the archive |
D:\Archive.zip\inner.zip\file.txt |
excluded | nesting depth does not matter |
D:\ISO\Alien.mkv |
kept | “ISO” is a folder name, not an extension |
D:\Windows ISO\setup.exe |
kept | the same, the word “ISO” is not preceded by a dot |
D:\Site\img\logo.png |
kept | a folder named “img” is not a disk image |
D:\Downloads\ubuntu.iso.torrent |
kept | “.iso” is not the last extension here |
Why the leading dot
Because it limits the term to real file extensions. Without it, [iso\] still keeps the containers and still drops their contents, but it also matches folder names that merely end with the word “iso”, such as D:\Windows ISO\, D:\Old-ISO\ or D:\Backup_ISO\: the space, the dash and the underscore separate words, so “iso” starts a word there. Extensions like img, zip and tar are common folder names too, which makes the dot worth typing.
Why the trailing backslash
Because it is what separates “inside the container” from “the container itself”. NOT [.iso] without the backslash would throw away Alien.iso along with its contents, which is the opposite of what you want here.
Why the square brackets
Square brackets are the strict match operator: whatever stands between them is taken as one single term and read literally, and the term ends at the closing bracket.
Outside brackets the backslash is the escape character, which is a problem in a query like this one. In NOT .iso\ NOT .vhd\ the first backslash escapes the space that follows it, so the space no longer separates anything and the rest of the line is swallowed into one long term. The search then returns something entirely different, and no error message points at the cause. Inside brackets there is nothing to escape and nothing to swallow.
Things to keep in mind
Names, not file types
The filter reads the path, so it goes by what things are called. A folder that really is named Movie.iso would have its contents hidden as well, and a container renamed to another extension keeps its contents in the results until you add that extension to the list.
Paths are matched by the Path row only
The search box itself matches indexed text: names, comments, tags, ID3 and Exif data, but never paths. Path conditions belong in the Path row and nowhere else.
Also remember that a lone asterisk matches every entry, so a query built around it, such as NOT (*:\* OR *\*\*), means “not everything” and returns an empty result list.
Reports
Reports are built from the search results, so a search filtered this way produces a clean report too. The “archive contents” option of the report settings covers classic archives only (ZIP, RAR, 7-Zip and similar) and has no effect on ISO, VHD or other disk images. The Path filter covers all of them at once.
Save the query
There is no need to retype the query every time. Once the search works the way you want, use Save As… in the drop-down menu of the Search button to store it as a saved search with a name like “Containers only”, together with the search term and every other option you set.
Pair it with other rows of the Main tab when needed. For example, set Type to “Files and other items” to drop folders and disks from the results as well.
WinCatalog AI Bridge
WinCatalog AI Bridge is a companion application that generates text descriptions and keywords for images in your catalog. Once descriptions are generated, you can search your photo and image collection using natural language — for example, searching for “sunset on beach” or “birthday party” will find matching images even if those words are not in the file names.
Availability: AI Bridge is available starting with WinCatalog 2026.1.
How It Works
AI Bridge uses a local AI language model (running on your own computer) to analyze image thumbnails that are already stored in your WinCatalog catalog. For each image it processes, it generates:
-
A short caption describing the scene
-
A set of keywords relevant to the image content
-
A category label
-
A shot type (e.g., close-up, medium shot)
-
A number of people clearly detected on the image
All generated data is saved in the catalog database and is immediately available for full-text search in WinCatalog.
Please note: AI Bridge uses machine learning models that analyze images automatically. While the results are generally useful for searching and organizing your catalog, AI-generated descriptions may sometimes be inaccurate or incomplete. You should not rely on these descriptions in situations where precision is critical — for example, when working with medical imagery, legal or financial documents, or images containing culturally sensitive content (such as religious symbols, flags, or cultural artifacts) where a misidentification could be misleading. AI Bridge is designed as a search and discovery tool, not as a source of verified or authoritative image descriptions.
Important: AI Bridge can only process files that already have thumbnails generated in WinCatalog. Make sure to run a disk scan with thumbnail generation enabled before using AI Bridge.
AI Bridge processes any file that has a thumbnail in your WinCatalog catalog — primarily images (JPEG, PNG, TIFF, BMP, RAW formats) and video files with generated thumbnails, but also Office files, 3D Models, Album Covers, etc.
Requirements
-
Windows operating system
-
WinCatalog with an open catalog containing image thumbnails
-
One of the supported local AI providers installed and running:
-
LM Studio — https://lmstudio.ai/ — recommended for beginners
-
Ollama — https://ollama.ai/
AI processing runs entirely on your machine. No images or data are sent to the internet.
Hardware Recommendations
AI processing runs on your local machine using the CPU or GPU. Performance depends on your hardware:
| Component | Minimum | Recommended |
|---|---|---|
| RAM | 8 GB | 16 GB or more |
| Disk Space | ~3-5 GB for smaller models | ~8 GB for larger models |
| GPU | Not required (CPU works) | Any GPU for faster processing |
Smaller models (2-4B parameters) work well on most modern computers. Larger models (8B+) benefit significantly from a dedicated GPU.
Getting Started with AI Bridge
You need a local AI provider running on your computer before AI Bridge can do anything. It supports two: LM Studio and Ollama.
Step 1: Install a local AI provider
Option A: LM Studio (recommended for beginners)
LM Studio has a graphical interface for downloading and running AI models locally.
1. Download LM Studio from https://lmstudio.ai/ and install it
2. Launch LM Studio
3. Download a model:
Click the magnifying glass icon in the left sidebar (Model Search)

Type gemma-4-e2b in the search field or just leave this field blank, this model pops up as a recommended by LM Studio as well (this is the latest and most capable model from Google)
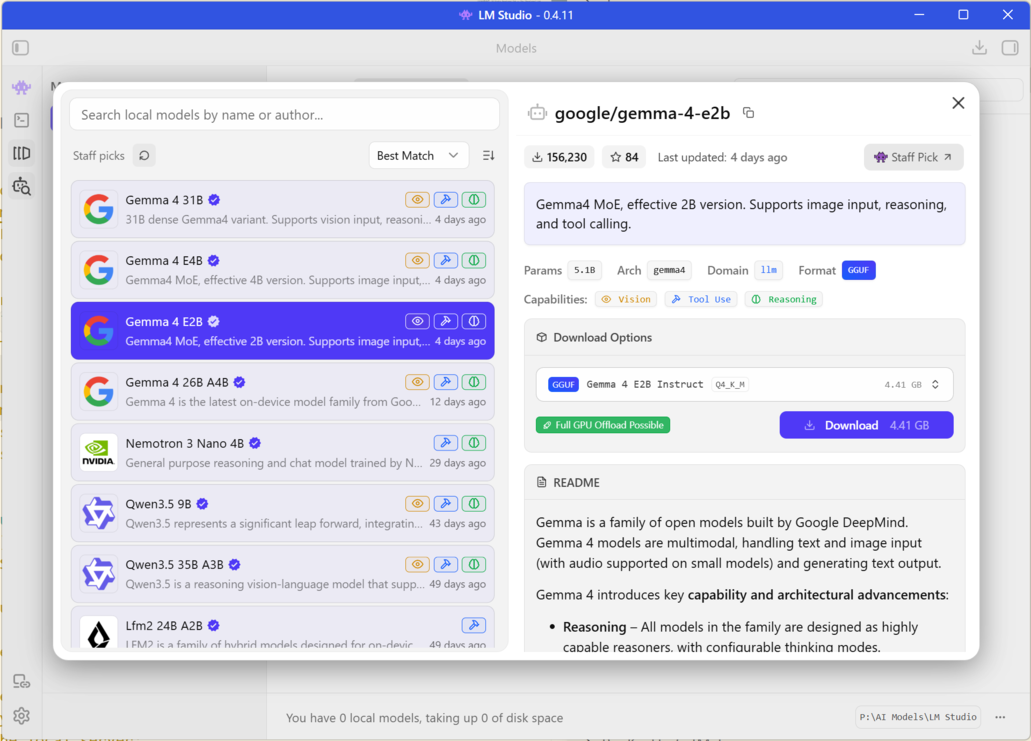
Select Gemma 4 E2B from the results. There are several download options for each model, the smallest Gemma 4 E2B Instruct Q4_K_M is enough:
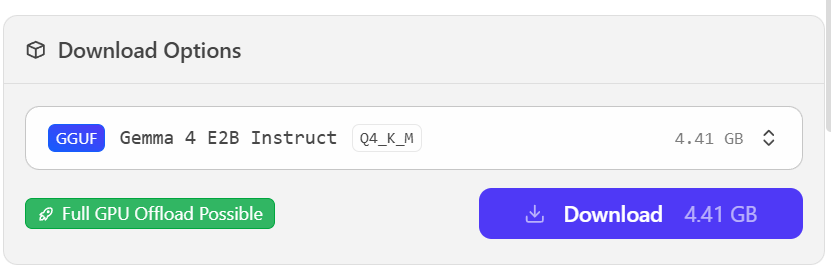
If LM Studio warns the model is “Likely too large” for your machine, search for LFM2.5-VL-3B (recommended alternative), qwen3 vl or gemma3 instead and pick LiquidAI/LFM2.5-VL-3B-GGUF, google/gemma-3-4b or qwen/qwen3-vl-4b.
Make sure the model has a yellow eye icon — that means it supports vision (image analysis), which AI Bridge requires

Click Download
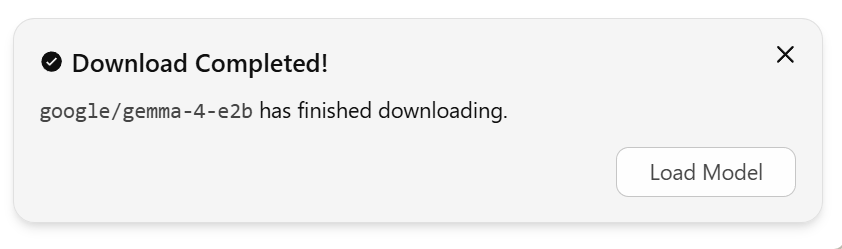
Once the download finishes, click Load Model to load the model into memory
Start the local server:
Click the Developer tab  (or Local Server section) in LM Studio
Click Start Server — the server runs on port 1234 by default

Step 2: Configure AI Bridge
Open WinCatalog AI Bridge and point it at your provider.
Opening settings
Start WinCatalog and open AI Tools tab on the Ribbon toolbar.
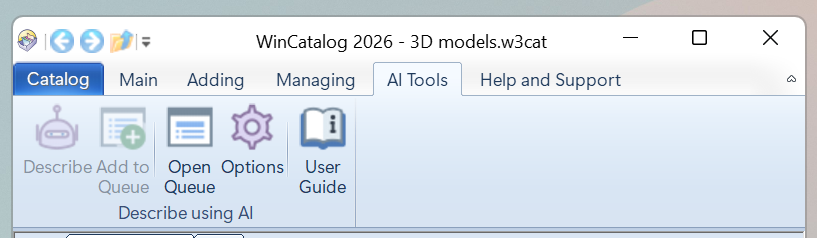
Click the Options button to open AI Bridge Options window.
Provider settings
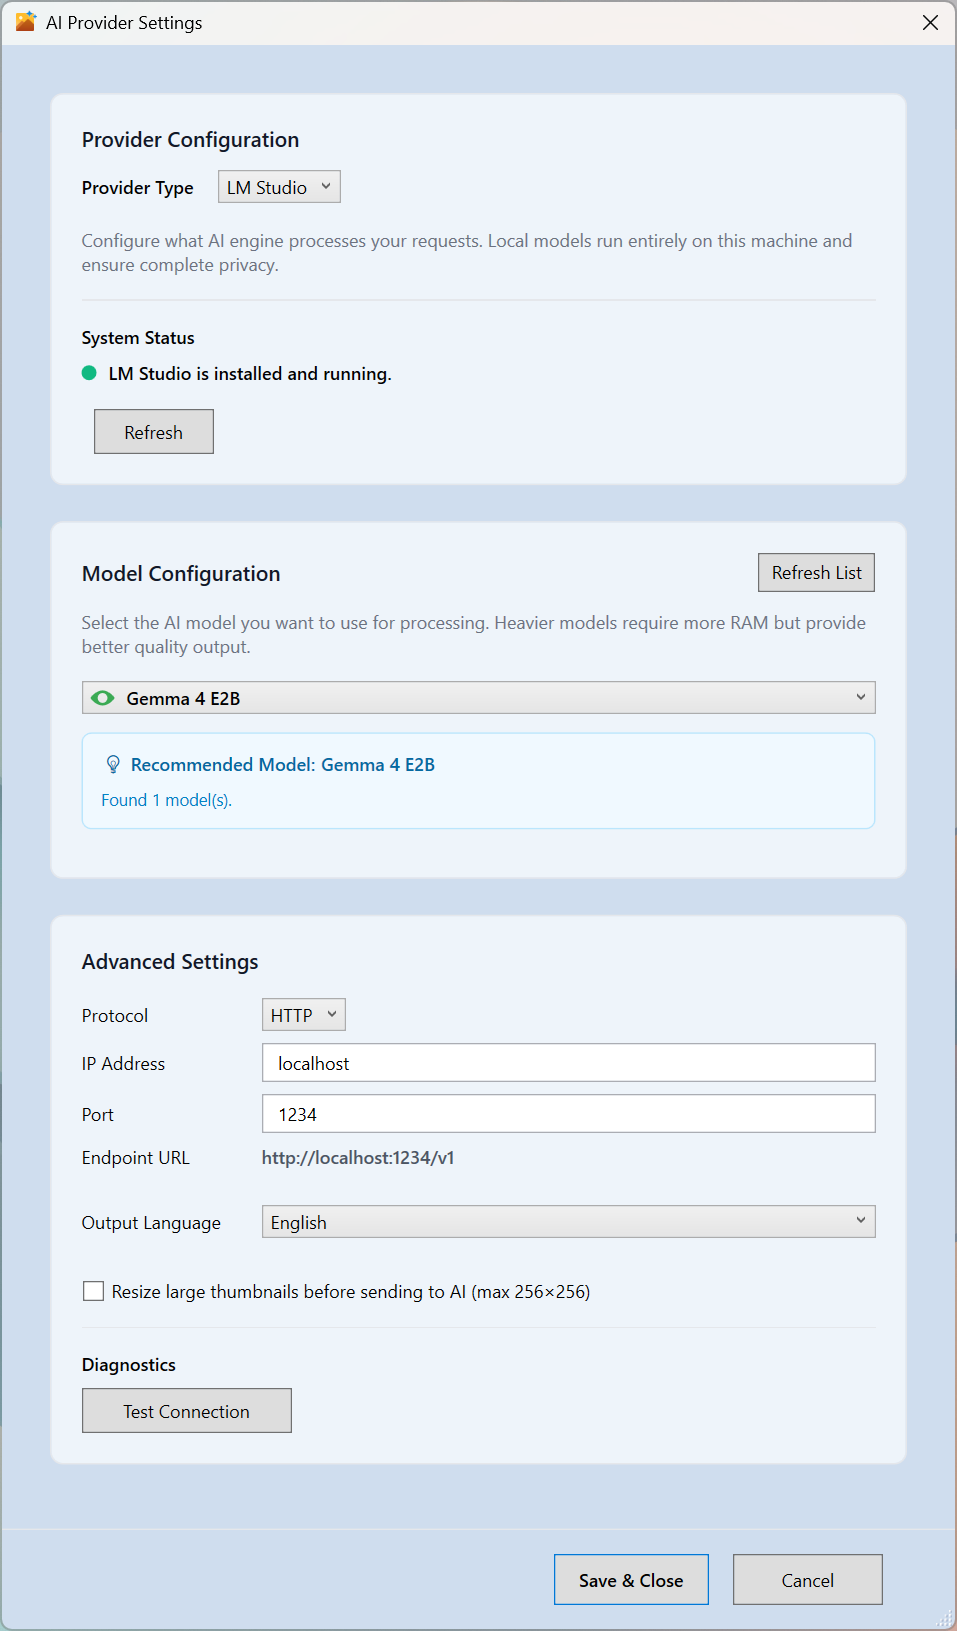
| Setting | Description |
|---|---|
| Provider Type | LM Studio or Ollama |
| IP Address | localhost by default; change this only if the provider runs on a different machine |
| Port | 1234 for LM Studio, 11434 for Ollama |
| Endpoint URL | Filled in automatically from the settings above |
Custom Instructions
What it does
Custom Instructions is an optional text box in the AI Bridge Options window. Whatever you type there is added to every AI request, on top of the built-in prompt. Use it to set standing preferences for how the image descriptions are written. For example:
- “Focus on lighting and composition.”
- “Always mention brand names and product models when visible.”
- “Keep descriptions short, one sentence.”
- “Describe the mood and color palette.”
How it works
Your text is passed to the model as extra user preferences. The AI is told to follow them wherever they don’t conflict with the structured output WinCatalog needs, so your guidance changes the wording and emphasis while the descriptions still come back in the right format. Leave the box empty to use the default behavior.
Status indicator
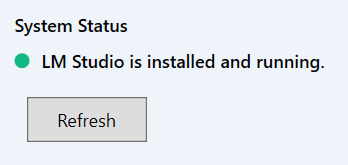
The status section shows whether your provider is reachable:
-
Green — installed and running
-
Yellow — installed but the server isn’t running (click Start Server to launch it)
-
Red — not installed or not reachable
Picking a model
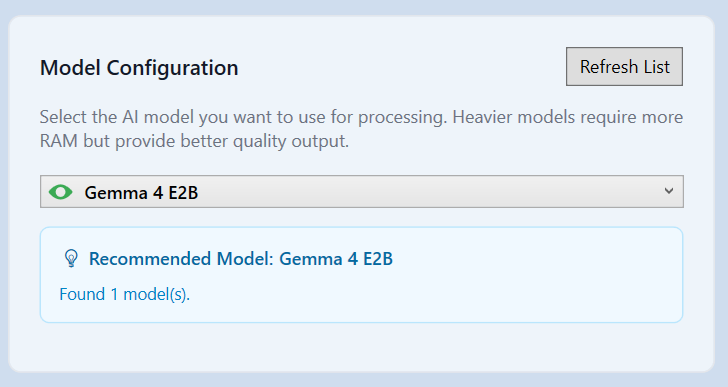
-
Click Refresh List (or wait for the list to populate on its own)
-
Pick a model from the dropdown
-
The green eye icon indicates that the model supports images
Output language

The preferred language is selected automatically based on WinCatalog UI language, bug you can override this selection and pick any other language for generated descriptions. If your language isn’t listed, select Other and type the language name.
Resize large thumbnails

To speed up an LLM when working with large images, you can reduce them to 256 pixels. That should still be enough to correctly recognize objects and scenes, while making the process faster.
Test the connection
Click Test Connection to check that AI Bridge can talk to the provider. You’ll see a confirmation if it works.
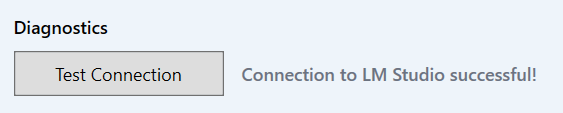
Step 3: Done
Once the status dot is green and you’ve picked a model, AI Bridge is ready. See Interface and workflow for how to queue images and start processing.
Interface & Workflow
WinCatalog AI Bridge has four tabs. Each tab’s header shows the number of items it contains.
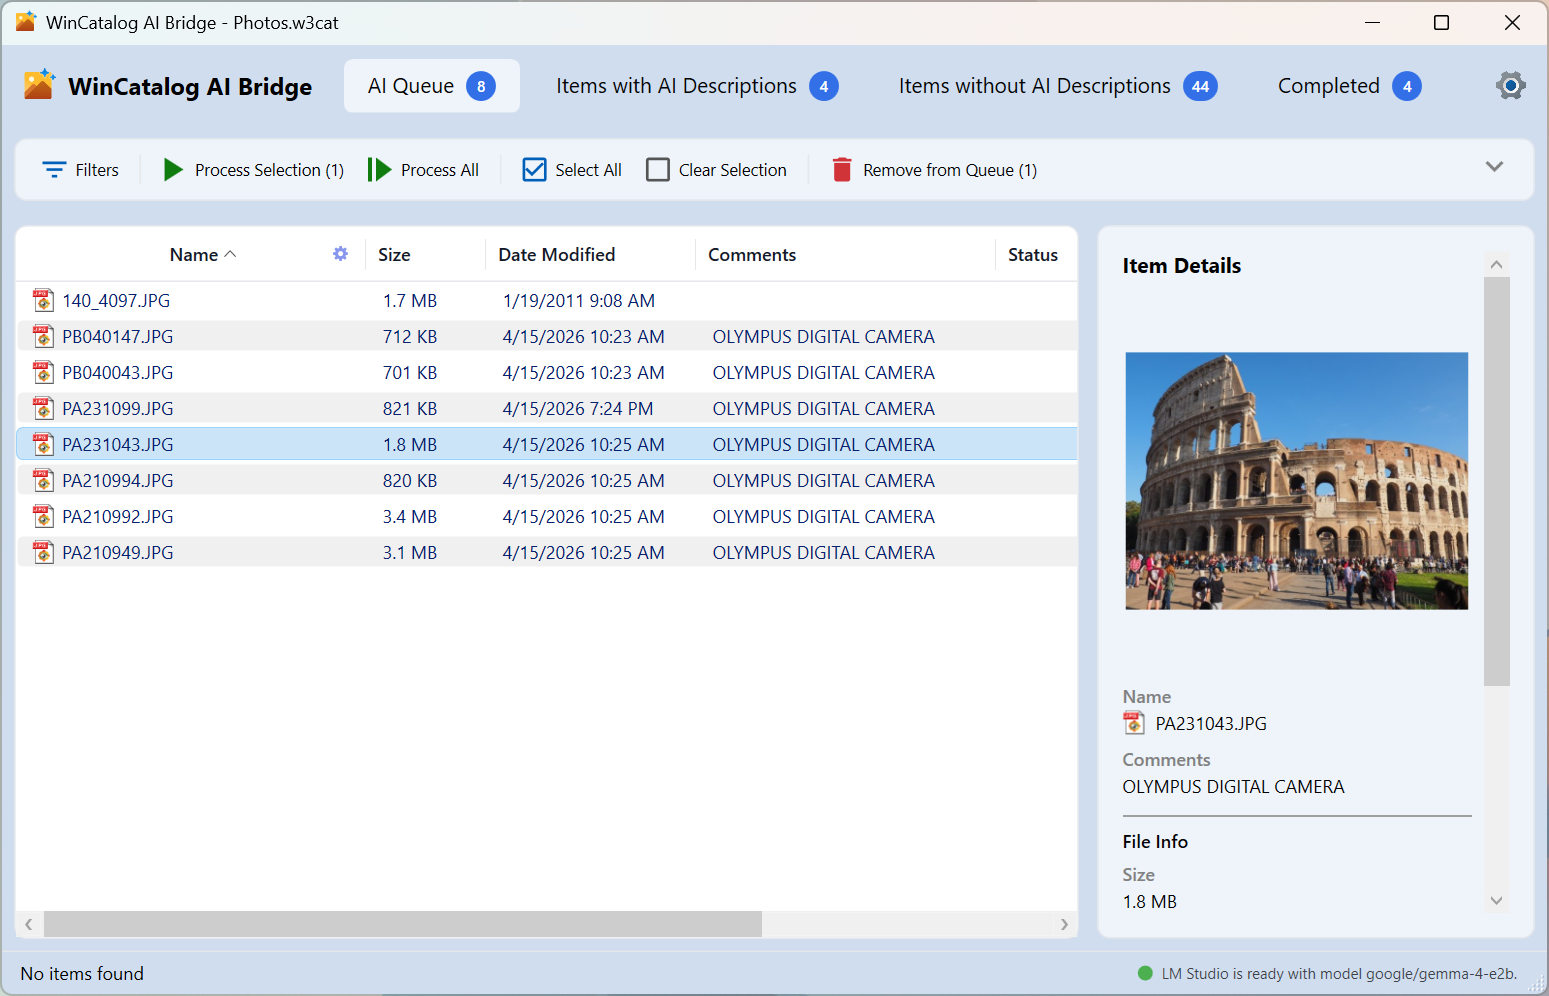
Tabs Overview
-
AI Queue: Files waiting to be processed
-
Items with AI Descriptions: Files that already have generated descriptions
-
Items without AI Descriptions: Files in the catalog that have no descriptions yet
-
Completed: History of successfully processed files
AI Queue Tab
The AI Queue tab is the main working area. It shows all files currently waiting for AI processing.
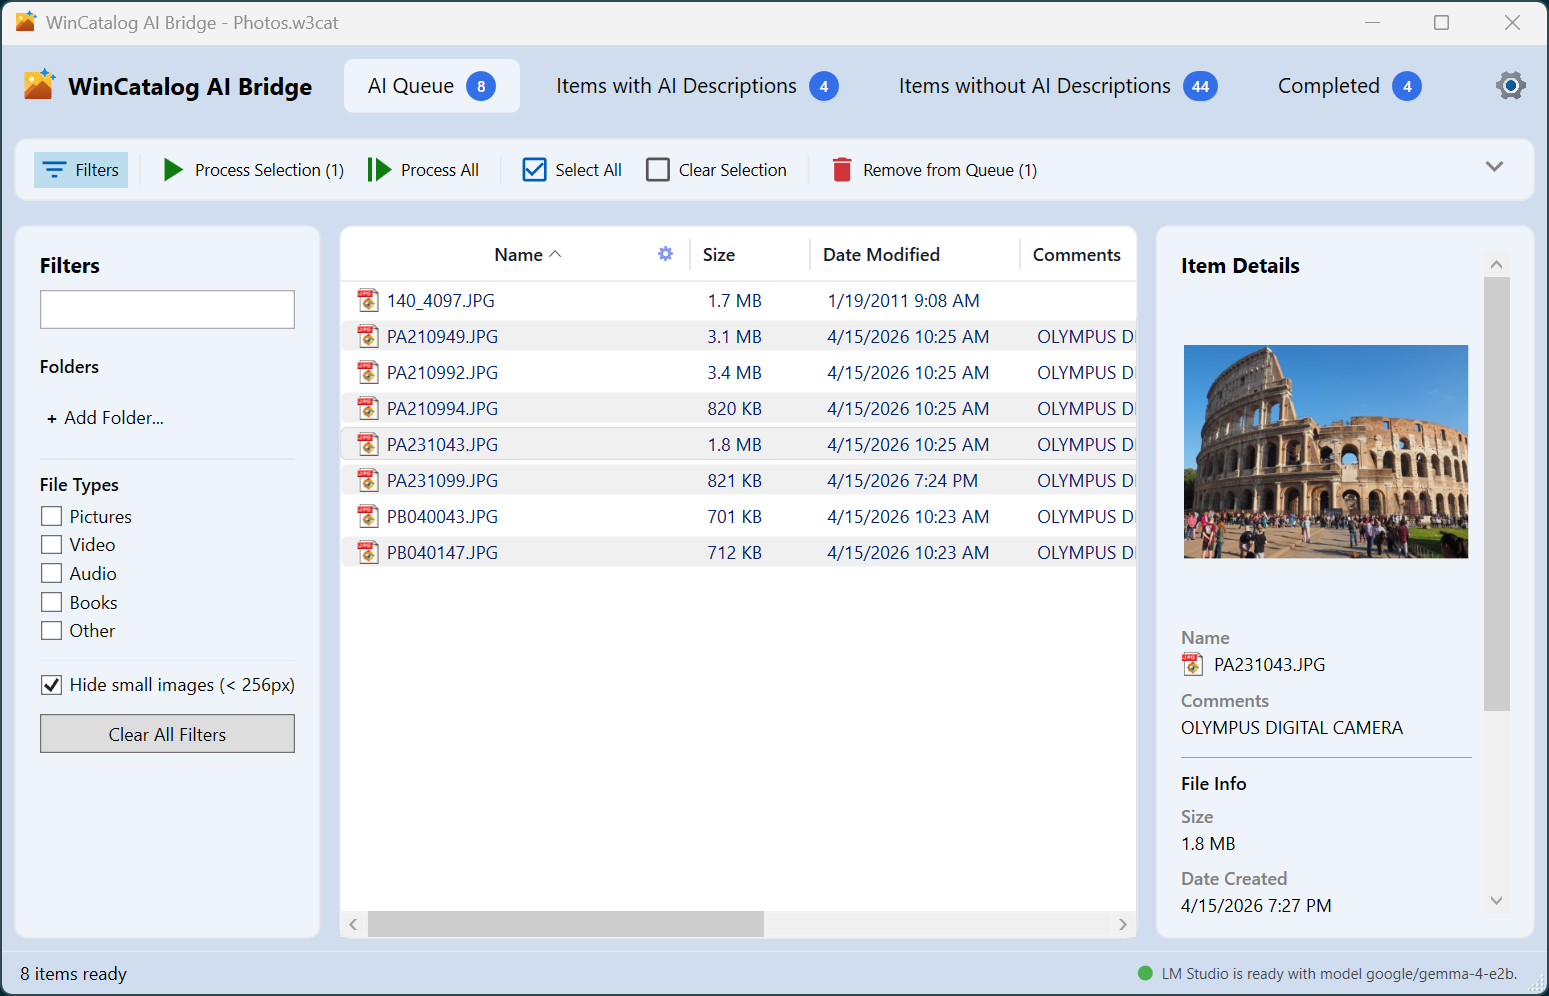
Toolbar Buttons
-
Process All : Start processing all items in the queue
-
Process Selection : Process only the currently selected items
-
Select All : Select all items in the list
-
Clear Selection : Deselect all items
-
Remove from Queue : Remove the selected items from the queue without processing them
During Processing
While processing is active, a progress panel appears at the bottom of the tab showing:
-
The name of the file currently being processed
-
A progress bar indicating overall batch progress (e.g., Processed 5 of 23)
-
A Cancel button to stop processing
Cancelled items are returned to Pending status and remain in the queue for later.
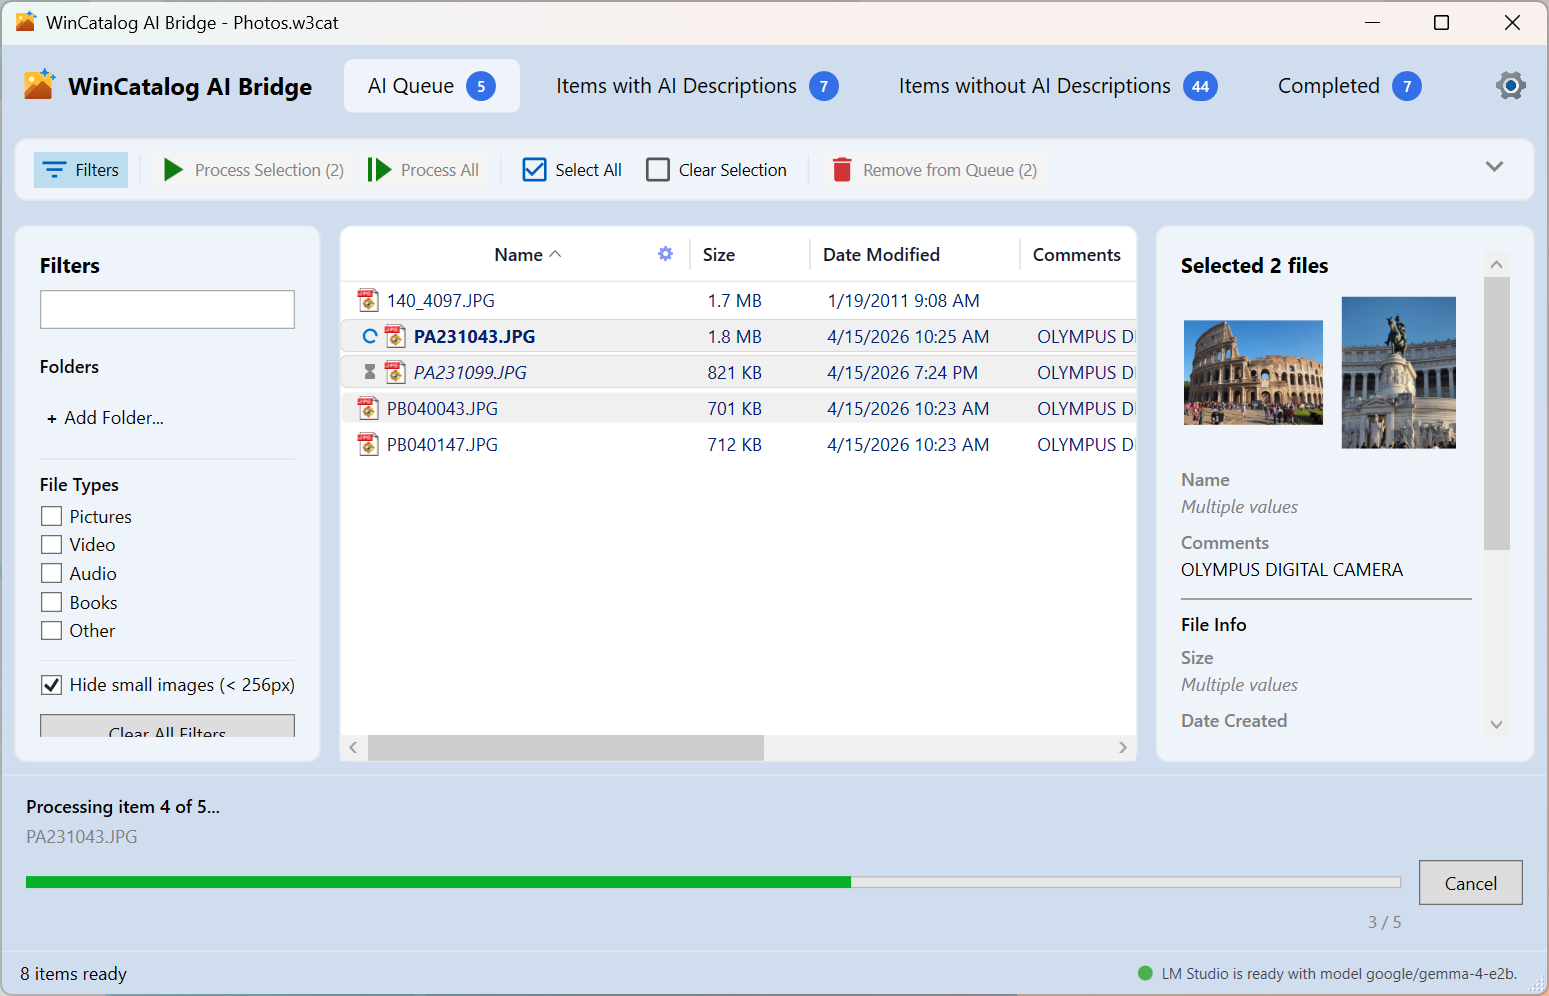
Item Status Indicators
Each item in the queue displays its current status:
-
Pending : Waiting to be processed
-
In Progress : Currently being processed
-
Failed : Processing failed — the item stays in the queue; see the error message for details
Filtering
Use the Filters button to show or hide the filter panel on the left side. Filters let you narrow the list by:
-
File type — Pictures, Video, Audio, Books, Other
-
Folder — Select a specific catalog folder
-
Hide small images — Exclude thumbnails smaller than 256 pixels
-
Text search — Filter by file name or path
Status Banner
A colored banner at the top of the window shows the provider connection status:
-
Green : Provider is ready — processing can start
-
Yellow : Provider has a warning (e.g., model not loaded)
-
Red : Provider is not reachable — check settings
-
Blue : Informational message
Click the banner or the status indicator dot to open Settings.
Items with AI Descriptions Tab
This tab lists all files in the catalog that already have AI-generated descriptions.
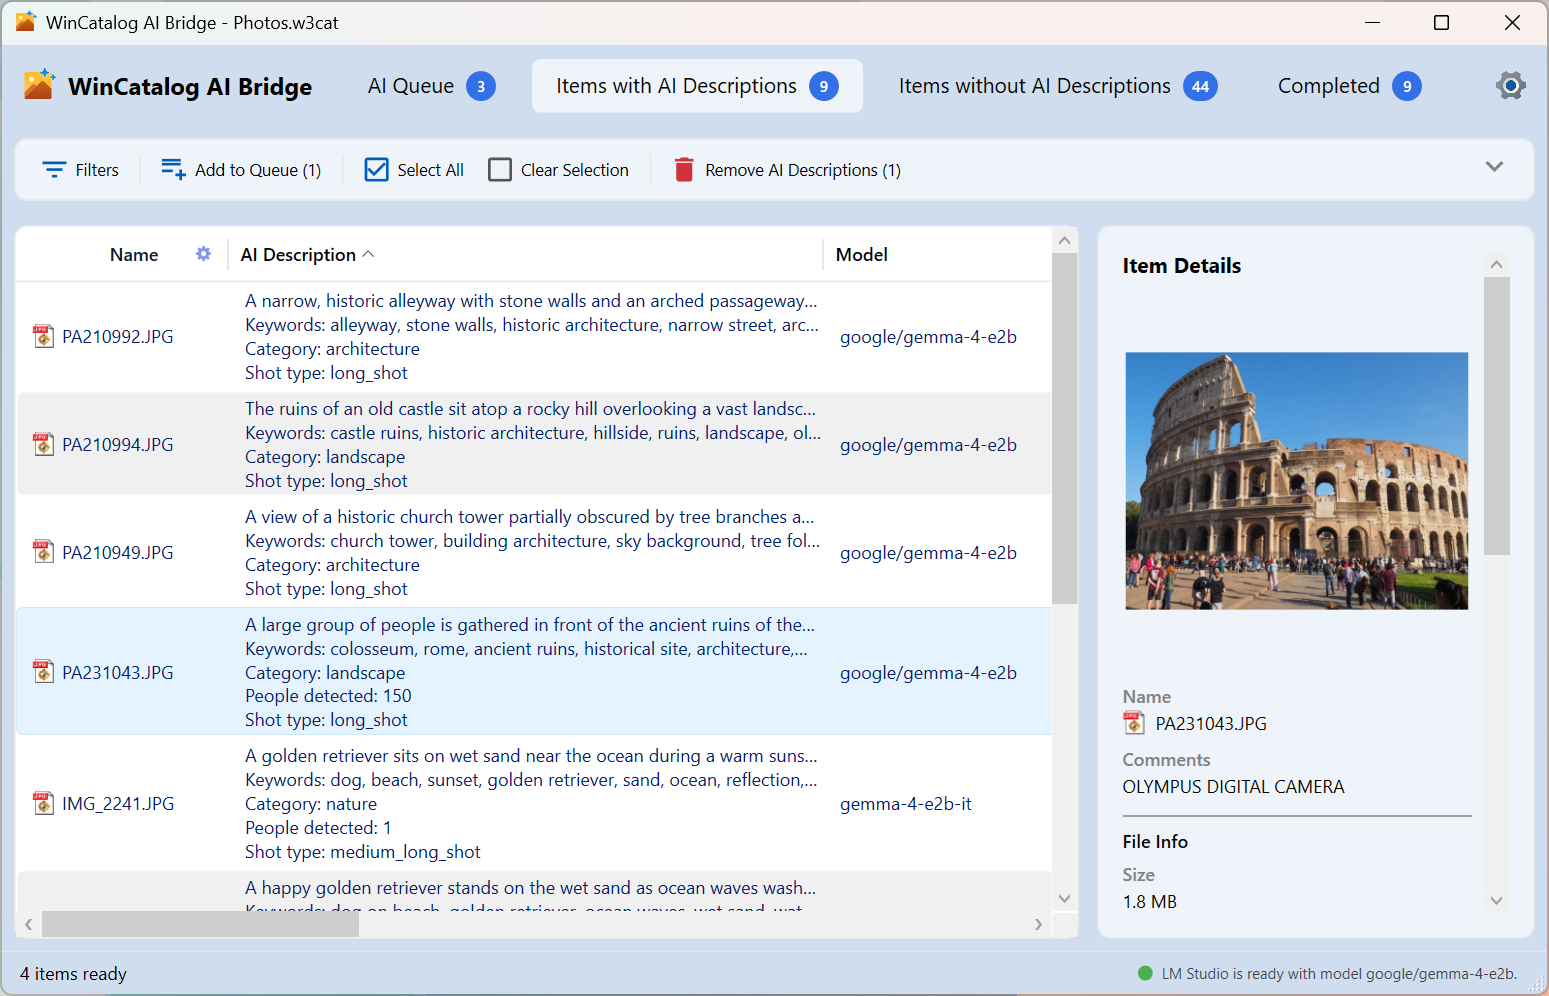
Available Actions
-
Add to Queue — Re-add selected files to the AI Queue to regenerate their descriptions
-
Remove AI Descriptions — Delete the AI-generated descriptions for the selected files. A confirmation dialog appears before deletion.
-
Select All / Clear Selection — Bulk selection helpers
Detail Panel
When you select an item, a detail panel on the right shows its properties:
-
General : Name, Comments, Size
-
File Info : Date Created, Date Modified, Disk, File Path, Catalog Path
-
AI Descrioption : Caption, Keywords, Category, People Detected, Shot Type, Model, Date Generated
Right-click any text value in the detail panel to copy it to the clipboard.
Items without AI Descriptions Tab
This tab shows all catalog files that have thumbnails but no AI-generated descriptions yet. This is where you start when processing a catalog for the first time.
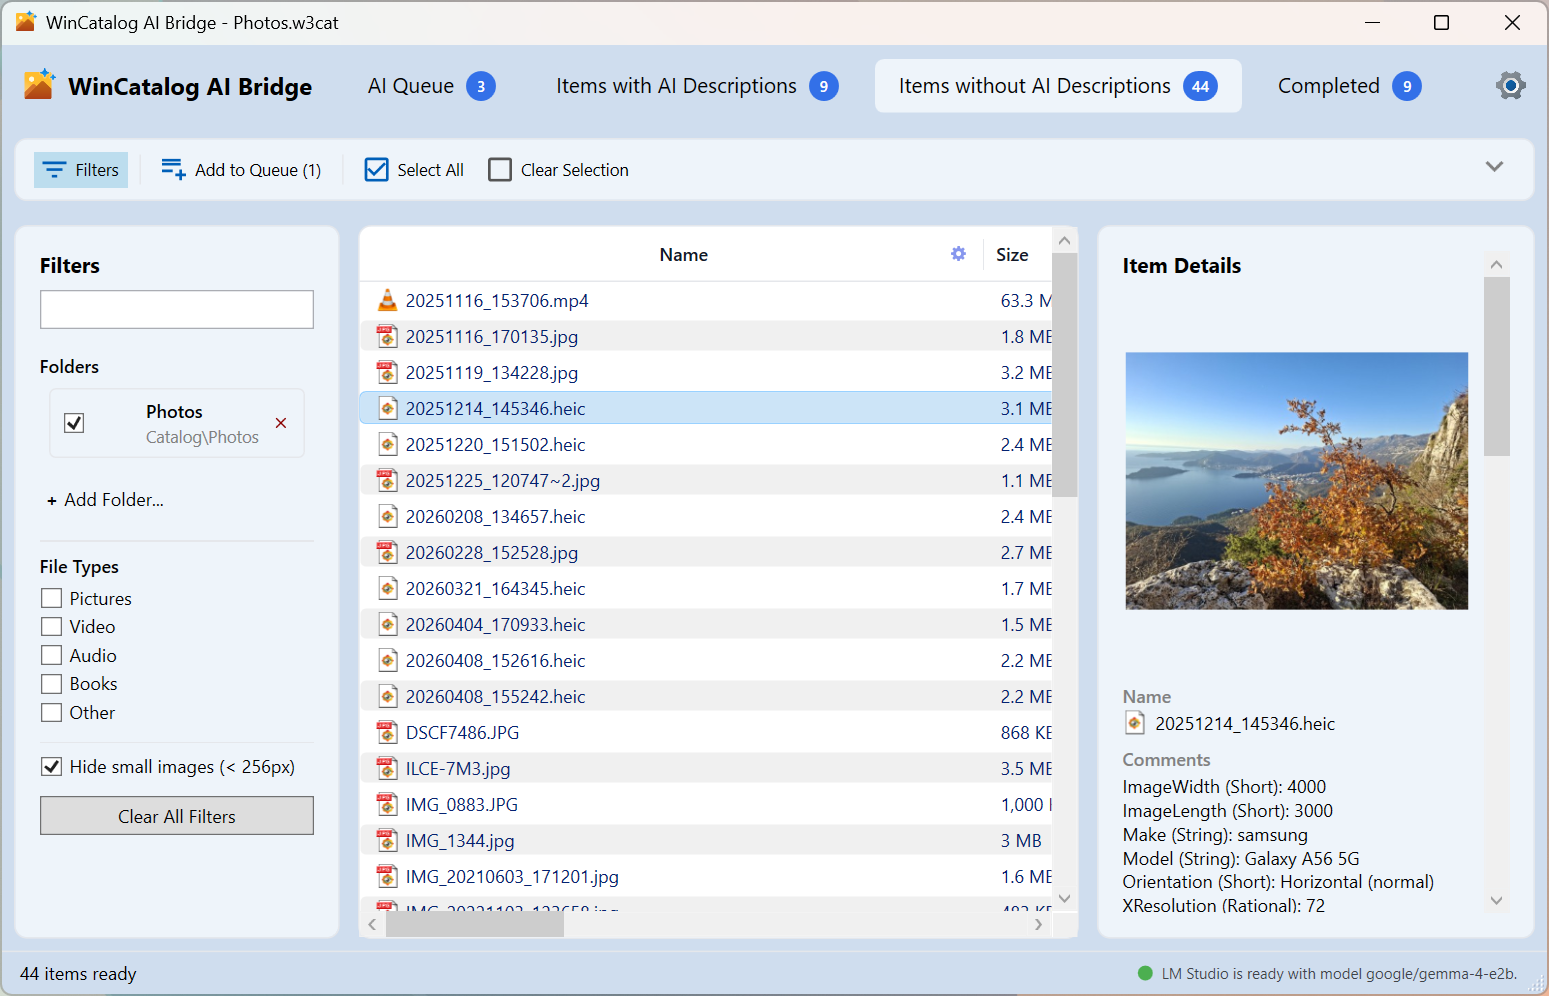
Available Actions
-
Add to Queue — Move selected files to the AI Queue for processing
-
Select All / Clear Selection — Bulk selection helpers
Use Select All followed by Add to Queue to enqueue your entire unprocessed collection at once.
Filtering
Use the Filters button to narrow the list by file type (Pictures, Video, Audio, Books), folder, date, or other criteria.
Completed Tab
The Completed tab shows a history of files that were successfully processed in the current and previous sessions.
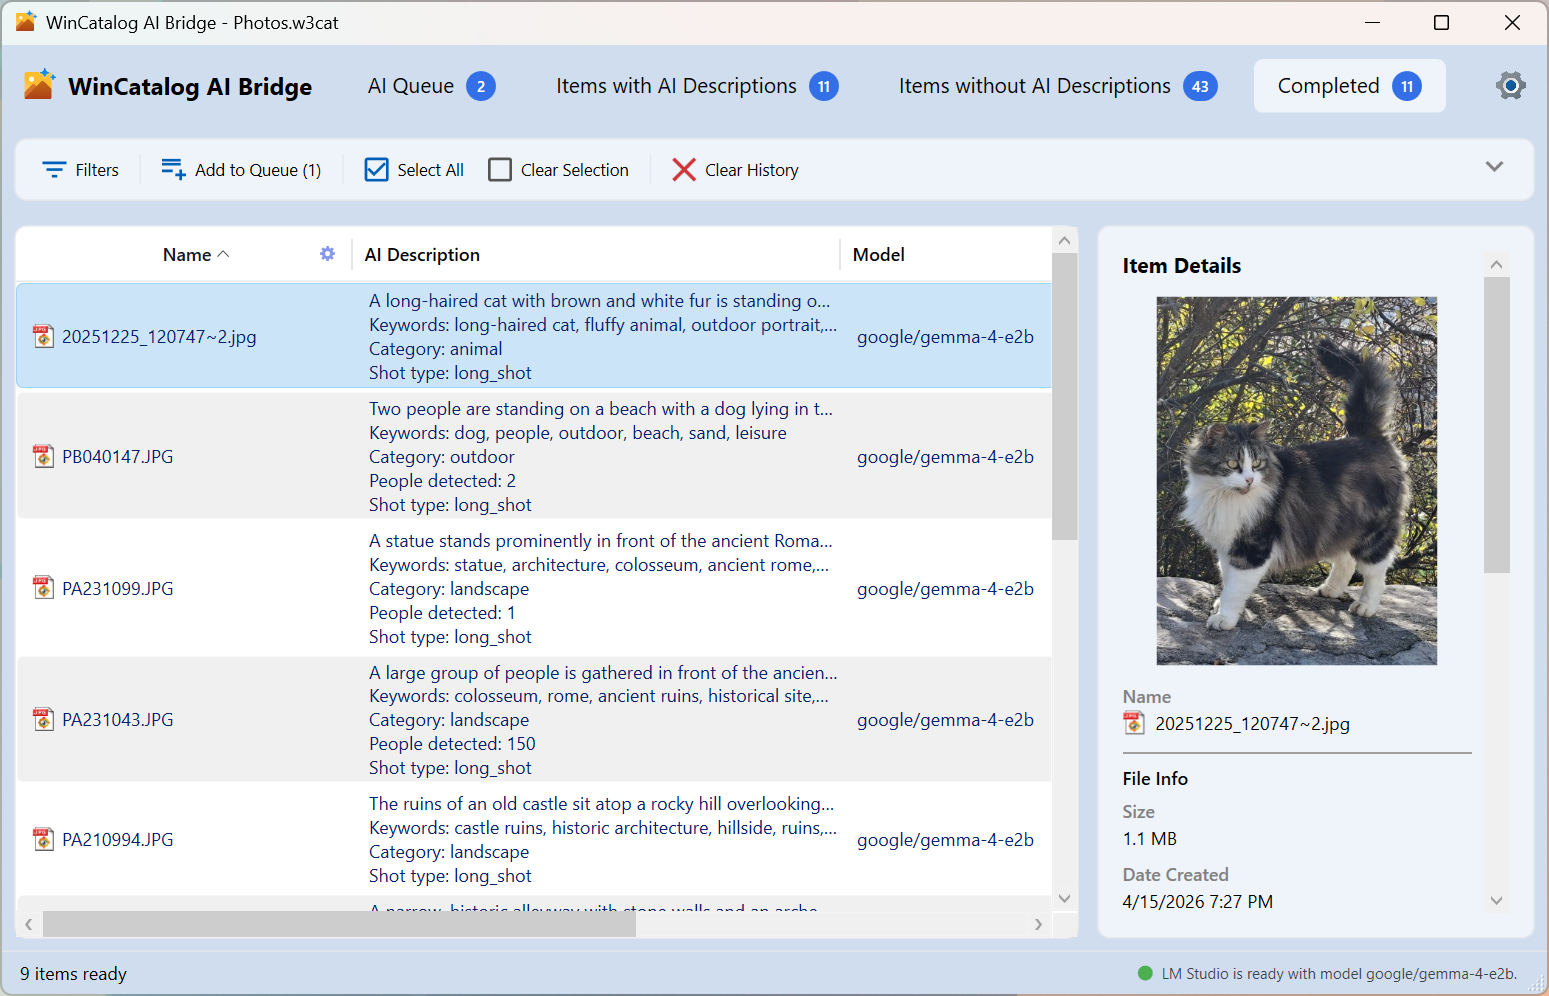
Available Actions
-
Clear History — Remove all entries from the history list. This does not delete the AI descriptions themselves — it only clears the history display.
-
Add to Queue — Re-add selected files to the AI Queue to regenerate their descriptions
-
Select All / Clear Selection — Bulk selection helpers
Typical End-to-End Workflow
Here is the standard process for generating AI descriptions for images in your catalog:
-
Open WinCatalog and make sure a catalog is open
-
Launch AI Bridge (from the WinCatalog Ribbon Toolbar)
-
Verify that the status indicator is green — if not, see Getting Started or Troubleshooting
-
Go to the Items without AI Descriptions tab
-
Click Select All to select all unprocessed files (or select specific files manually)
-
Click Add to Queue — the selected files move to the AI Queue tab
-
Switch to the AI Queue tab
-
Click Process All to start generating descriptions
-
Monitor progress in the progress panel at the bottom
-
When processing completes, processed files appear in the Completed tab and Items with AI Descriptions tab
In WinCatalog, you can now search your images using text descriptions
For large collections, processing can take a significant amount of time depending on your hardware and the AI model used. On an average laptop with GPU processing takes 2-5 seconds per image. You can cancel at any time and resume later — items that were not yet processed remain in the queue.
WinCatalog Integration
You can interact with AI Bridge directly from the main WinCatalog window without switching to the AI Bridge application. WinCatalog provides menu commands that let you add items to the AI Queue and trigger AI processing from within your catalog.
Adding Items to the AI Queue
To add one or more catalog items to the AI processing queue:
-
Select the items in WinCatalog (files, a folder, or a mixed selection). Important: all the selected items should have thumbnails in the catalog.
-
Use one of these methods:
-
Right-click the selection and choose Add to AI Queue from the context menu
-
In the ribbon toolbar, go to the AI Tools section and click Add to Queue
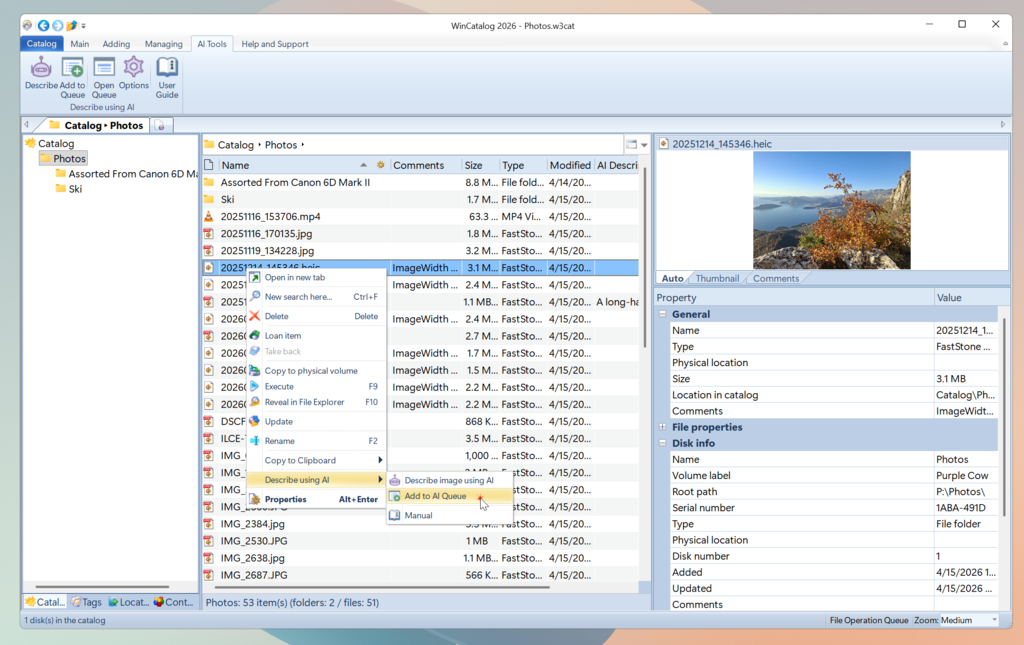
WinCatalog will launch AI Bridge (if it is not already running) and add the selected items to the AI Queue tab. A status message confirms how many items were added:
-
Added ‘filename.jpg’ to AI Queue — for a single item
-
Added 5 item(s) to AI Queue — for a multiple selection
-
All 5 items are already in the AI Queue — if the items were already queued
After adding items, WinCatalog may show a confirmation dialog asking:
“N file(s) were added to the AI Queue. Do you want to open the AI Queue window now?”
Click Yes to switch to AI Bridge, or No to continue working in WinCatalog.
Generating AI Descriptions Immediately
To add items to the queue and start processing immediately :
-
Select the items in WinCatalog
-
Open the context menu or main menu
-
Click Describe images using AI
This command adds the selected items to the queue and signals AI Bridge to begin processing automatically. AI Bridge will launch if needed.
AI Tools in the Ribbon Menu
The WinCatalog ribbon includes a dedicated AI Tools section with the following commands:
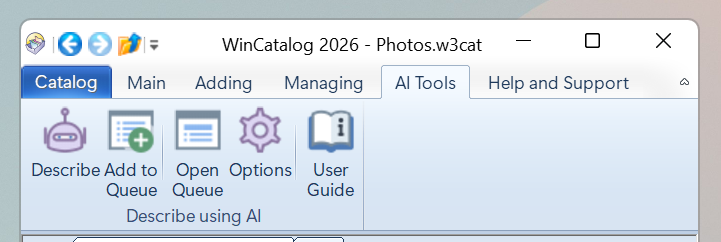
Describe : Add selected items to queue and start processing immediately
Add to Queue : Add selected items to the AI Queue
Open Queue : Open the AI Bridge window
Options : Open AI Bridge settings
User Guide : Open this documentation
Viewing Results in WinCatalog
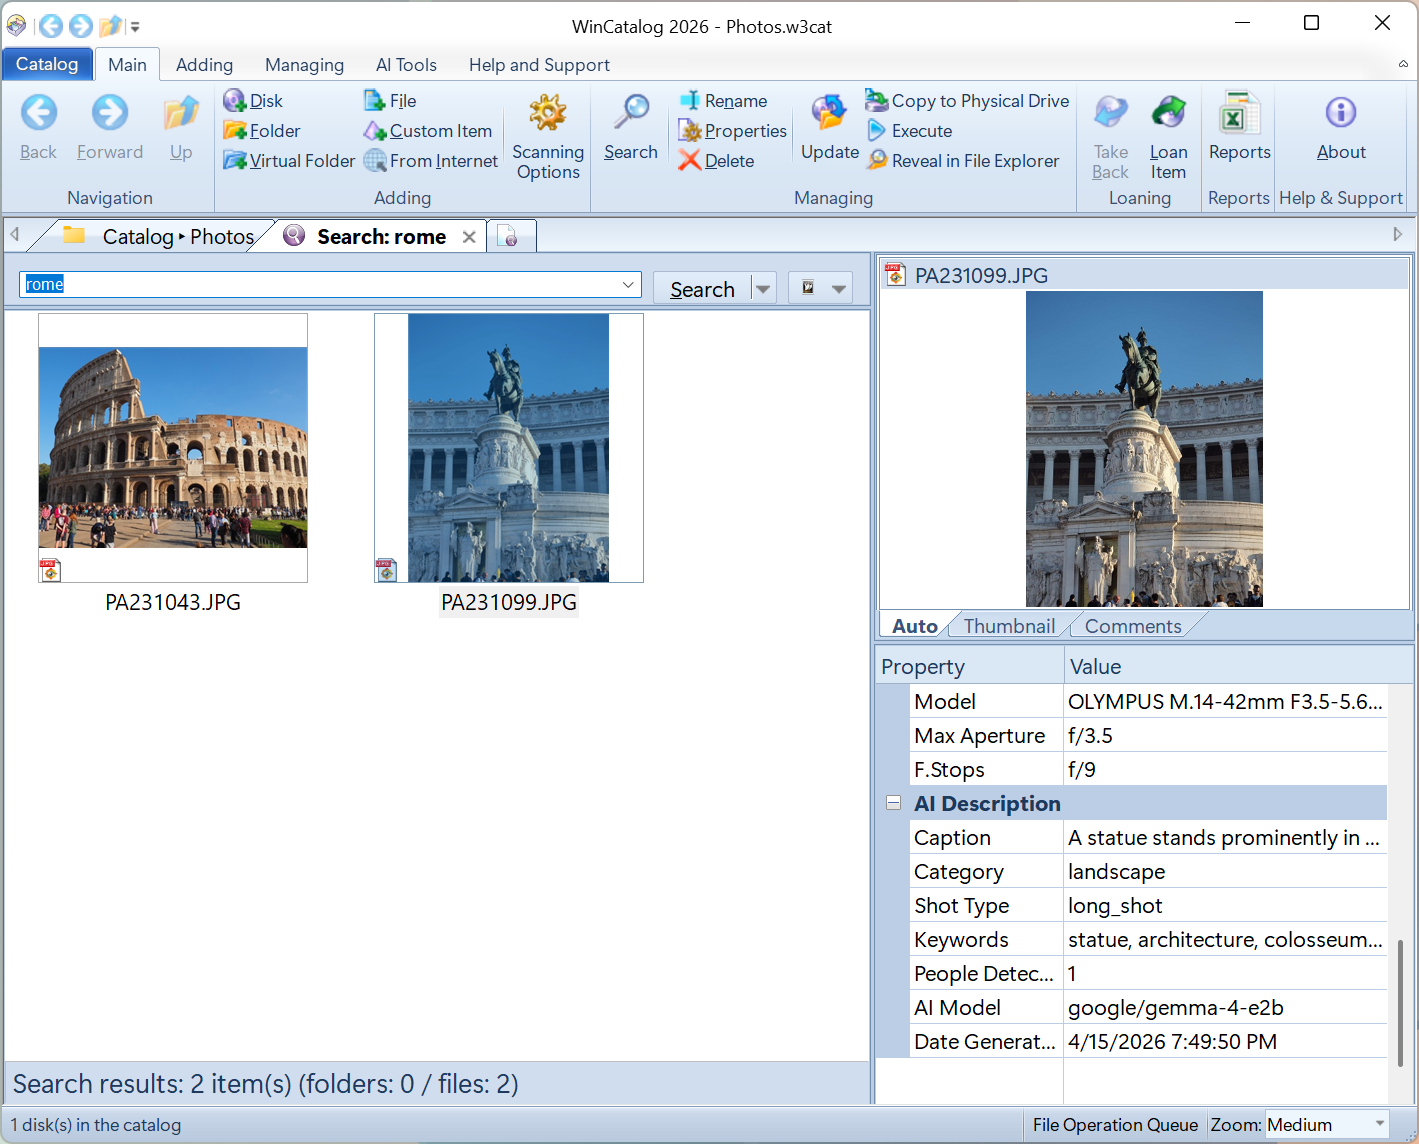
After AI Bridge has processed an image, the generated data becomes available in WinCatalog:
-
The AI Description section on the Properties pane and in Details tab of the item’s properties dialog shows the generated caption
-
Generated keywords and caption are searchable through WinCatalog’s standard search
-
Use the full-text search in WinCatalog to find images by their AI-generated content
-
Two dedicated columns: AI Desctiption and Keywords (AI) in the main grid view and in search results view
Notes
AI Bridge must be configured with a working AI provider before processing can start. See Getting Started.
Items that don’t have a thumbnail in the catalog cannot be processed by AI Bridge. When you select items that cannot be processed (no thumbnails), WinCatalog shows them in a separate “Cannot be added to AI Queue” group so you can see which items were skipped and why.
If AI Bridge is already running and processing other items, newly added items are placed at the end of the queue and processed when the current batch finishes.
Troubleshooting
This page covers the most common issues you may encounter when using WinCatalog AI Bridge.
Status Indicator Colors
The colored dot in the top-right corner of the AI Bridge window indicates the current connection status. Click it at any time to open Settings.
Green : Provider is installed and running, model is ready, you’re good to go.
Yellow : Provider is installed but has an issue (e.g., server not running, model not loaded). Click the dot to open Settings; use Start Server ** or load the model.
Red : Provider is not reachable or not installed. Check the provider application, verify the IP/port, or install the provider.
The same status information appears as a banner message at the top of the window with more detail.
Common Issues
“Health check failed. Click to open settings.”
The AI Bridge cannot reach the provider server.
Possible causes and fixes:
1. Provider not running — Open LM Studio or Ollama and start the server. In AI Bridge Settings, the System Status section shows "{provider} is installed but not running". Click Start Server to start it automatically.
2. Wrong port — Check that the Port in Provider Configuration matches the port the provider is actually using (default: 1234 for LM Studio, 11434 for Ollama).
3. Wrong IP address — If you’re running the provider on the same machine, IP Address should be localhost. If it’s on another machine, verify the IP address.
4. Firewall blocking the connection — Check Windows Firewall or any security software that might be blocking local connections on the provider’s port.
“{provider} is running but model ‘{model}’ is not loaded.”
The AI server is running, but the selected model is not available.
Fix: In AI Bridge Settings → Model Configuration , click Refresh List to refresh the list, then select an available model. If no models appear, you need to download one:
-
In LM Studio: download the model through the LM Studio interface as described in Getting started
-
In Ollama: run
ollama pull <model-name>in a terminal, or use Download Selected Model in AI Bridge Settings
“No vision-capable models are available.”
None of the models available in your provider can analyze images.
Fix: Download a vision-capable model. Recommended options:
-
LM Studio: google/gemma-4-e2b
-
Ollama: qwen3.5:4b (run
ollama pull qwen3.5:4b)
Items remain in the queue with “Failed” status
An item failed to process. This can happen when:
-
The model returned an empty response
-
The image thumbnail could not be read
-
The connection to the provider was lost during processing
Fix: Select the failed items and click Process Selection to retry. If failures persist, check the log files for details (see below).
Processing is very slow
Processing speed depends on your hardware (CPU/GPU) and the size of the AI model.
Tips:
-
Use a smaller model (e.g., 4B parameter models are much faster than 13B+ models)
-
Reduce the context size to 4096 in LM Studio model settings
-
Enable GPU acceleration in LM Studio or Ollama if your GPU supports it
-
Close other resource-intensive applications during processing
-
Stop the process, restart LM Studio or Ollama, and continue
AI descriptions are in the wrong language
The AI model is generating descriptions in a language you didn’t expect.
Fix: Open AI Bridge Settings → Advanced Settings → Output Language (scroll the window to bottom if you don’t see this option) and select the correct language. If your language is not in the list, select Other and type the language name. Then re-process the affected items.
AI descriptions are low quality or inaccurate
The model may produce vague or incorrect descriptions for some images.
Tips:
-
Try a larger model (e.g., 8B instead of 4B) — larger models are generally more accurate
-
Ensure the image thumbnails in WinCatalog are of reasonable quality and size — very small thumbnails give the model less information to work with
-
Some image types (screenshots, documents, abstract art) are harder for AI to describe accurately
Keep in mind that AI descriptions are meant to help with search and catalog organization — they are not guaranteed to be accurate. Do not rely on them in situations where precision matters, such as medical, legal, or financial content, or images with culturally sensitive symbols. See the disclaimer in the overview for details.
Processing stops with a timeout error
The connection to the AI provider was lost or the model is taking too long to respond.
Possible causes and fixes:
-
Model is too large for your hardware — Processing a single image should not take more than 30–60 seconds. If it does, switch to a smaller model.
-
Provider crashed — Check if LM Studio or Ollama is still running. Restart it if needed, then retry the failed items.
-
System went to sleep — If your computer entered sleep mode during processing, the connection may have been lost. Wake the computer and retry.
Items added from WinCatalog don’t appear in AI Bridge
WinCatalog launches AI Bridge automatically when you use Descrobe images using AI (context menu) or Open Queue on the Ribbon Toolbar on the AI Tools tab. If AI Bridge is already open but items don’t appear in the queue:
-
Switch to the AI Queue tab in AI Bridge — items may already be there
-
Restart AI Bridge from WinCatalog to ensure it connects to the right catalog
-
Restart WinCatalog and try again
Finding Log Files
AI Bridge writes detailed log files that can help diagnose problems. By default, logs are stored in the Windows AppData folder.
To locate the log files:
-
Open File Explorer
-
Navigate to: %AppData%\WinCatalog (hint: %AppData% is a special shortcut for a system folder in Windows)
Each day’s log is a separate file named by date (e.g., AiBridge-20260415.log). Logs rotate automatically and are kept for 7 days.
If you need to report an issue, include the relevant log file along with a description of the problem.
Settings Location
AI Bridge stores its settings in the Windows Registry under:
HKEY_CURRENT_USER\SOFTWARE\OrangeCat Software\WinCatalog
To reset all AI Bridge settings to defaults, delete the AI Bridge-related keys from this registry path using the Windows Registry Editor (regedit). This does not affect your catalog data or AI descriptions.
Still Having Issues?
If none of the above steps resolve your problem:
-
Verify that the provider (LM Studio or Ollama) works correctly outside of AI Bridge
-
Try Test Connection in AI Bridge Settings to get a specific error message
-
Check the log files for error details
-
Reinstall the AI provider if the installation appears corrupted
In addition to above, check the Frequently Asked Questions section
Frequently Asked Questions
Can I edit AI descriptions after they are generated?
AI descriptions are stored in the catalog database. Currently, they can be regenerated by adding items back to the queue, but manual editing is not available through AI Bridge.
Can I process video files?
Yes — AI Bridge can process any file that has a thumbnail stored in WinCatalog, including video files. The AI model analyzes the thumbnail image (a single frame), not the entire video.
Does AI Bridge send my images to the internet?
No. All processing happens locally on your computer using the AI model running in LM Studio or Ollama. No images or data leave your machine.
How much disk space do AI descriptions use?
Very little. AI descriptions are plain text stored in the catalog database. Even for a catalog with tens of thousands of images, descriptions add only a few megabytes to the database size.
Can I use a remote AI server?
Yes. In AI Bridge Settings → Advanced Settings , change the IP Address from localhost to the IP address of the machine running the AI provider. Make sure the port is accessible over the network.
User Interface
This section describes the main windows and dialogs of WinCatalog 2026.
Startup Welcome Dialog
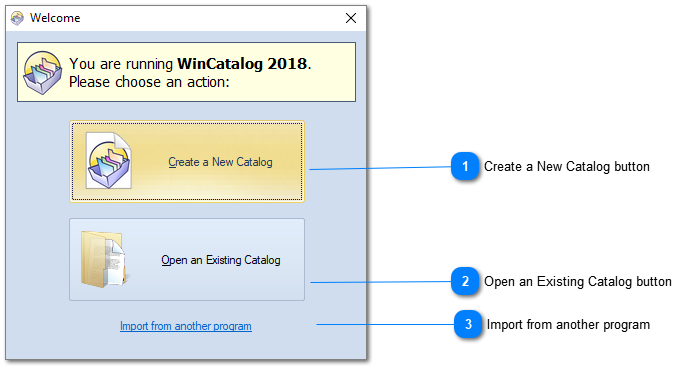
When you are running WinCatalog 2026 for the first time on a new computer, it show the Startup Welcome Dialog. Here you can select 2 options.

Create a New Catalog button
Click this button to create a new empty catalog file.
Top

Open an Existing Catalog button
Click this button to open the previously created catalog file.
Top

Import from another program

A link to our web site where the information about importing from another disk catalog software is located: http://www.wincatalog.com/migrate.html
Top
Scanning Options
Using WinCatalog you can use several sets of scanning options (called Scanning Presets or Scanning Options) and easily switch between them. WinCatalog remembers which set of the scanning options
was used for scanning each disk and automatically selects the same options for updating the disk.
The scanning options are catalog depended and stored in the catalog file.
Read more
Sets of the Scanning Options
Using WinCatalog you can use several sets of scanning options (called Scanning Profiles or Scanning Options) and easily switch between them. WinCatalog remembers which scanning profile was used for adding each disk and automatically selects the same profile for updating the disk.
The scanning profiles are catalog depended and stored in the catalog file.
“From the box”, when you create a new catalog file or continue using a catalog file created with any WinCatalog version prior to 2018, WinCatalog creates 4 sets of the scanning profiles:
-
Disk info only
-
Disk and folders
-
Basic file info(all scanning plugins are disabled)
-
Full file info(default)
If you used WinCatalog before upgrading to 2018 version and modified the scanning option, the additional scanning profile will be created:
- My settings (copied from a previous version).
Each scanning profile can be modified or renamed on your own. Below you will find the descriptions of the profiles as they were created.
Disk info only
If this profile is used, WinCatalog does not add any contents (files and folders), it just grabs the disk info: total and free sizes, volume label, serial number and root path.
Disk and folders
If this profile is used, WinCatalog scans the disk, but adds only disk info (as in Disk info only) and folders. No files will be added to the catalog.
Basic file info
If this profile is used, WinCatalog scans the disk (or a folder) and adds all the files and folders on the disk but grabs only basic information about the files: size, created and modified dates, file attributes. WinCatalog does not run scanning plugins, for example, it does not create thumbnails for pictures, does not extract EXIF and ID3 tags and does not scan inside archives.
Full file info
If this profile is used, WinCatalog scans the disk (or a folder) and applies all the scanning plugins it has: EXIF and thumbnails for pictures, ID3 tags and embedded album covers for audio files, metadata for e-books, the contents of the archives, etc.
My Settings
This profile is optional and appears only if you migrated from a previous version of WinCatalog where you modified the settings. Please note: if you migrated from a previous version of WinCatalog, this profile will be set for all existing disks in the catalog.
Scanning Options Manager
To modify scanning profile please use the Scanning Options manager. On the Main tab of the Ribbon toolbar please click the Scanning Options button:
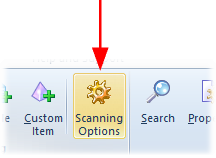
The Scanning Options window will appear. Here you can add, remove, export, import or modify the each scanning profile.
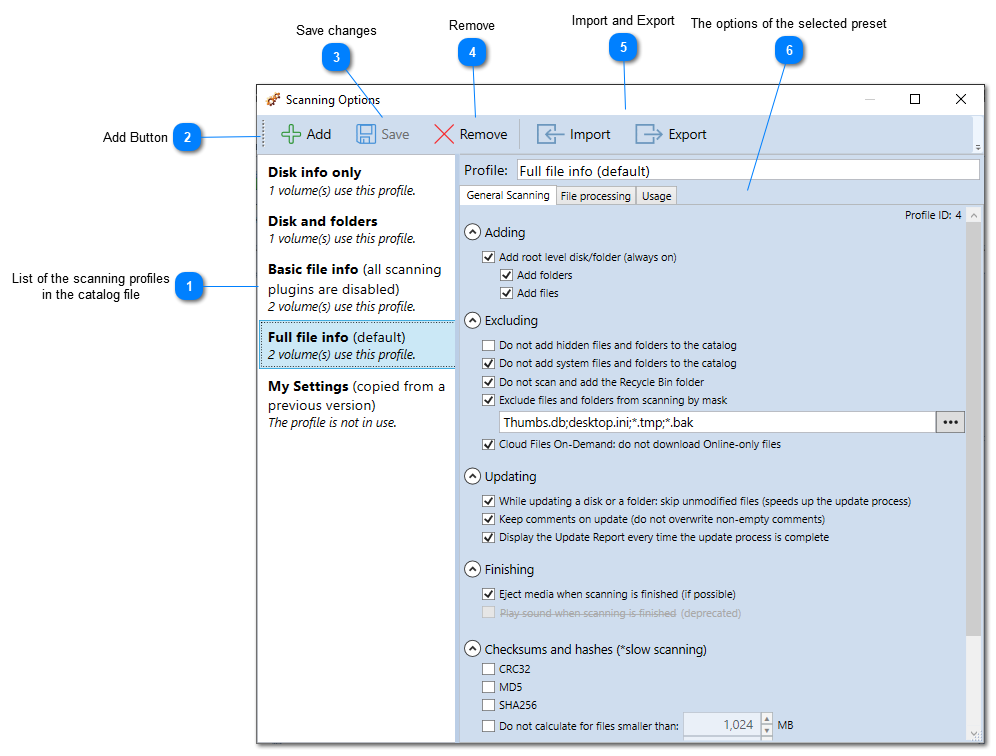
List of the scanning profiles
in the catalog file

All the sets of the scanning options are listed here. WinCatalog also displays the number of disks that use each preset.
Top
Add Button

Click the Add button to create a new scanning profile, WinCatalog will suggest to copy values from one of the existing profile.
Top
Save changes

Click the Save button to save all changes you made for scanning profiles. If you wish to discard changes, close the window. If there were any changes, WinCatalog will ask if you wish to save or cancel changes. The Save button in active only if you made any changes, otherwise the button is inactive.
Top
Remove

Click the Remove button to delete the selected scanning profile. If the scanning profile is in use by any drive, WinCatalog will ask for a scanning profile to switch to.
Top

Import and Export

Click the Export button to export the selected profile to a text file (JSON formatted values), or the Import button to import another profile from a text file containing JSON formatted values.
Top

The options of the selected preset
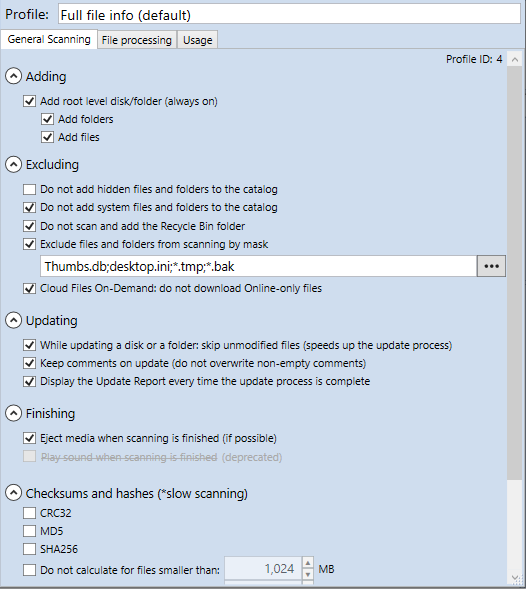
Modify the options of the selected profile and click Save to save changes or Discard to cancel the changes.
Top
Modifying the Scanning Profile
To modify the scanning profile please select the scanning profile you wish to modify, change the options you and click Save button to apply the changes. The changes will be saved into the current catalog file. The changes you make are available for all the disks that uses the modified scanning profile. Please note that changes you make affect the future scans and updates and does not change the previously catalogued files (until you click the Update button).
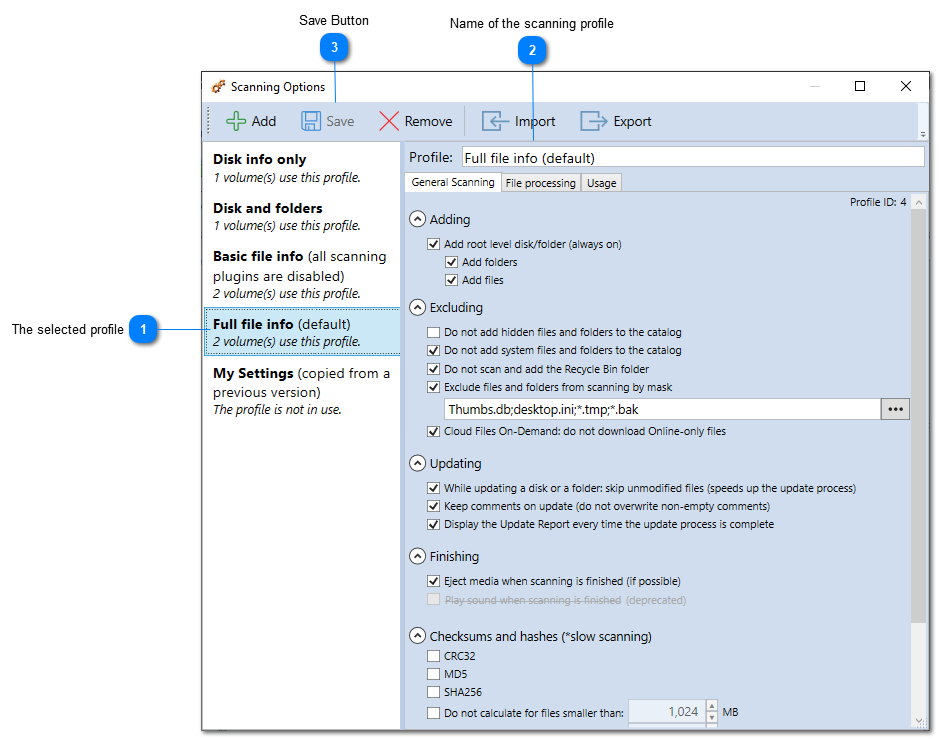
The selected profile
The selected profile (set of the scanning options). All the options for this profile are loaded into the right panels. For each scanning profile, WinCatalog displays the number of disks that use the preset.
Top
Name of the scanning profile

The name of the scanning profile. WinCatalog displays the name in bold font and text in the round brackets using a normal font.
Top
Save Button

Click Save to apply the changes you made, or Discard to cancel the changes
Top
Read more:
General Scanning Page
Change here the general scanning settings.
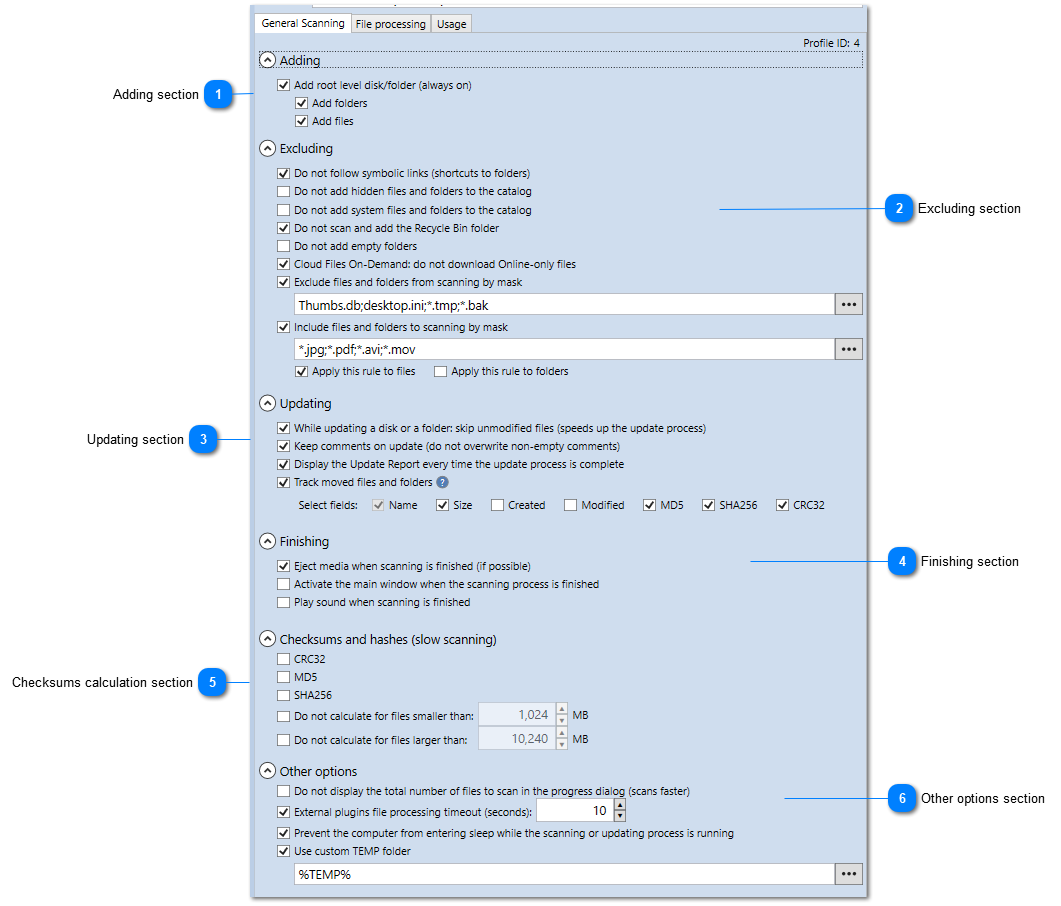
Adding section
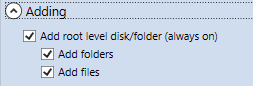
-
“Add root level disk/folder” option is always on.
-
If the “Add folders” option is on, WinCatalog will add folders to the catalog. If this option is off, WinCatalog will not add folders and files to the catalog.
-
If the “Add files” option is on, WinCatalog will add files to the catalog.
Top
Excluding section
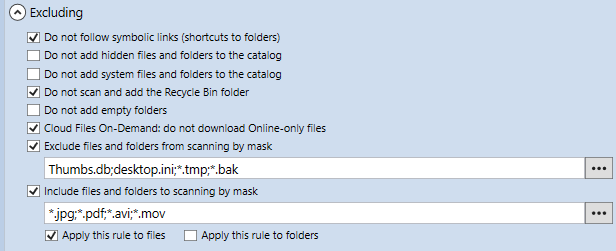
Configure here what content will be excluded from the scanning.
Do not add hidden files and folder to the catalog - if this option is on, hidden files and folder will not be added to the catalog.
Do not add system files and folders to the catalog - if this option is on, system files and folders will not be added to the catalog.
Do not scan and add the Recycle Bin folder - if this option is on, WinCatalog will not scan inside the Recycle Bin folder and will not add it to the catalog. It is recommended to keep this option on, especially if you catalog a system drive.
Do not add empty folders - if this option is on, empty folders (that contain no files or sub-folders) will not be added to the catalog.
Exclude files and folders from scanning by mask - if this option is on, WinCatalog will test each file and folder it finds on the disk and if it matches the provided pattern, it will be skipped (i.e. it will not be added to the catalog). Please note that WinCatalog uses the filename (or a folder name) for testing, not the full path to the file. To modify the list of masks, please click the ellipsis button […] next to the field.
Include files and folders to scanning by mask. Enable the “Include files and folders to scanning by mask” option to selectively add files and folders to the catalog based on a specified pattern. This option is the opposite of the “Exclude files and folders from scanning by mask” option. When enabled, only files and folders that match the provided pattern will be included in the catalog.
- Apply this rule to files: Only files will be tested against the pattern, and all folders will be added to the catalog.
- Apply this rule to folders: Only folders that match the pattern will be added to the catalog.
You can combine this option with the “Do not add empty folders” option to skip folders that do not contain any files due to the filtering rules.
Note that WinCatalog tests only the filename or folder name against the pattern, not the full path. To modify the list of masks, click the ellipsis button […] next to the field.
Top
Updating section
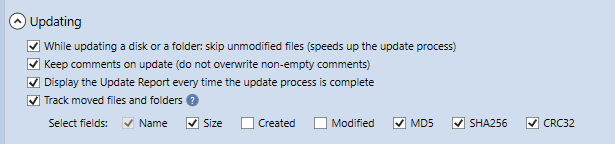
Configure here how WinCatalog will update a disk or a folder.
While updating a disk or a folder: skip unmodified files (speeds up the update process). If this option is on, during the update process, WinCatalog will skip all the files that were not modified since a previous scan or update. WinCatalog checks the file size and last modified date to decide if the file was modified or not. Please note that if you changed some processing options (on the File processing tab), for example, if you changed the size for the picture thumbnails, WinCatalog will not update the thumbnails for not modified pictures if this option is turned on. Please turn it off for the updating session. Please don’t forget to turn it back on for the future updates.
Keep comments on update (do not overwrite non-empty comments). If this option is on, WinCatalog will never overwrite the non-empty comments. For example, WinCatalog may store parts of text files in the comments, but if this option is enabled WinCatalog will not update comments even if the file contents is changed.
Display the Update Report every time the update process is complete. If this option is on, WinCatalog will display the update report after each updating process where it will show all the added, deleted and updated items.
Track moved files and folders. When this option is enabled, WinCatalog will attempt to detect files that have been moved across the drive during each update session by matching the selected fields. All chosen fields must match for a file or folder to be identified as moved. Learn more about tracking moved files here.
Top
Finishing section
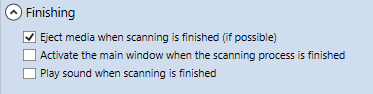
Configure here what should WinCatalog do when the scanning or updating process ends. It can Eject the removable media (if possible). The option to play sound when the process ends was removed from WinCatalog since the 2021.1 version.
Top
Checksums calculation section
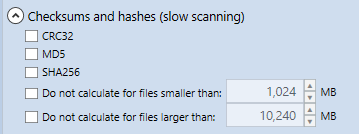
For every file WinCatalog can calculate a checksum or a hash. Currently 3 different options are available: calculate CRC32 checksum, MD5 (the fastest one), and SHA256 (the slowest). You can also exclude small or large files from the calculation by turning the “Do not calc MD5/SHA/CRC32 for files smaller than” and “Do not calc MD5/SHA/CRC32 for files larger than” options on.
Top
Other options section
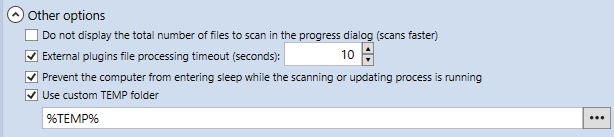
Do not display the total number of files to scan in the progress dialog (scans faster). If this option is on, WinCatalog will not calculate the number of files it has to scan. WinCatalog never calculates this number for optical drives, but you can also turn it off for hard drives (turning this option on has sense for slow drives).
External plugins file processing timeout. The number of seconds WinCatalog should wait until a processing module grabs an additional info about a file. The default value is 10 seconds per a file, but for optical drives WinCatalog multiplies this value by 3 (so, for the optical drives, the default value is 30 seconds per a file).
Prevent the computer from entering sleep mode during scanning or updating. Enable this option to keep your computer awake while scanning or updating processes are running.
Use custom TEMP folder. Enable this option to specify a custom location for storing temporary files during the scanning or updating processes.
Top
File Processing Page (Part 1)
Change here the way how WinCatalog processes different types of files.
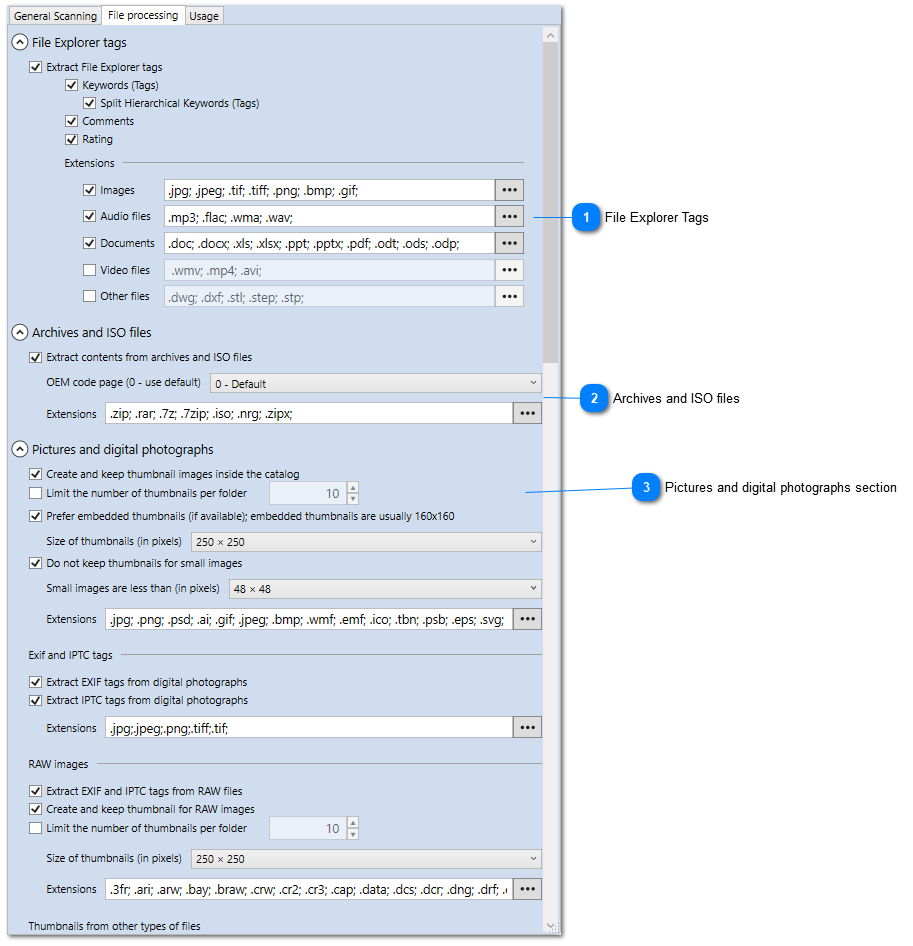
File Explorer Tags
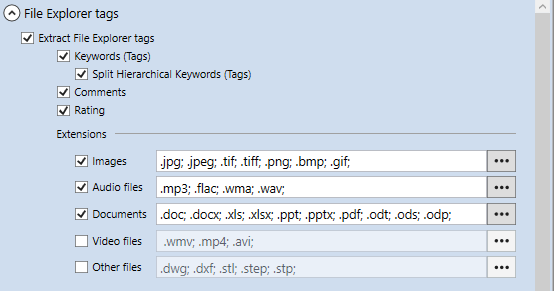
Configure these options to extract File Explorer Tags from files (you can see File Explorer Tags on the Details tab in File Explorer)
Top
Archives and ISO files
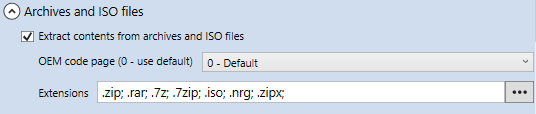
Extract contents from archives and ISO files. If this option is on, WinCatalog will grab the list of files and folders located in archives. Please note that WinCatalog does not parse the files inside archives, it just gets the list of the files and basic file properties. For example, WinCatalog will not grab thumbnails for pictures located inside archives, or will not grab the contents of the archives, located inside archives.
Extensions. Files with the extensions from the list will be parsed as archives.
OEM code page. For non-unicode archives containing non-English filenames, WinCatalog will use the OEM codepage. If 0 (default) is selected, the Windows default codepage will be used.
Top
Pictures and digital photographs section
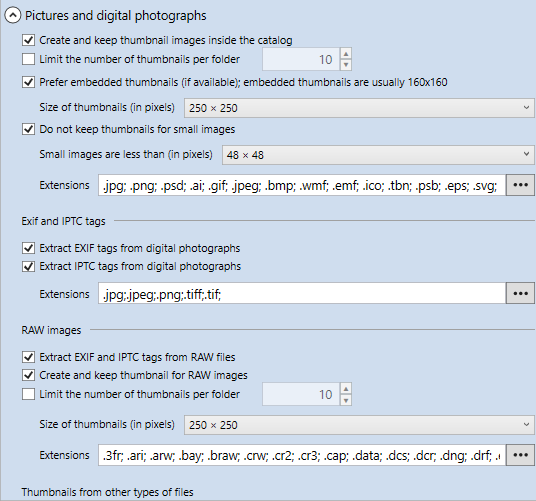
Thumbnail Extraction
Create and keep thumbnail images inside the catalog. If this option is on, WinCatalog will create thumbnails for pictures and will store them in the catalog.
Limit the number of thumbnails per folder. Enable this option to limit the number of thumbnails generated per folder. When activated, only a specified number of thumbnails will be created for each folder.
Prefer embedded thumbnails (if available). If this option is on, WinCatalog will grab embedded thumbnails (they are embedded in the EXIF tags) instead of creating the thumbnails by resizing the original image. Turning this option on increases the speed of processing digital photos, but please note that embedded thumbnails are usually 160x160.
Create and keep thumbnails for RAW files. If this option is on, WinCatalog will grab thumbnails for RAW files (photos created by digital cameras).
Thumbnail size (in pixels). This option sets the size of the thumbnails to grab. Please note that if the “embedded thumbnails” option is on, this option will not have effect for the embedded thumbnails. Since the 2021.1 version, this option can be set individually for each type of thumbnails: pictures, RAW images, shell thumbnails, video files, album covers for music files, book covers, Audio CD/track covers. The default value is 250×250 pixels.
Do not keep thumbnails for small images. If this option is on, WinCatalog will skip small images and will not create thumbnails for them.
Small images are less than (in pixels). The size of the small images in pixels. If the image fit the defined square, it is considered as small.
Extensions for photos and pictures. File with these extensions will be processed as pictures.
Extensions for RAW images. File with these extensions will be processed as RAW images.
Exif data processing
Extract EXIF tags from digital photographs. If this option is on, WinCatalog will grab and save EXIF tags in the catalog. This option is applicable for RAW, JPG and other types of images that may have embedded EXIF tags.
Other files
Extract thumbnails from other types of files. If this option is on, WinCatalog will try to extract thumbnails from files with extensions listed in the “Other types extensions” option. WinCatalog uses File Explorer to grab the thumbnails for these types of files. The thumbnails for the listed types of files are not guaranteed.
Top
File Processing Page (Part 2)
Change here the way how WinCatalog processes different types of files.
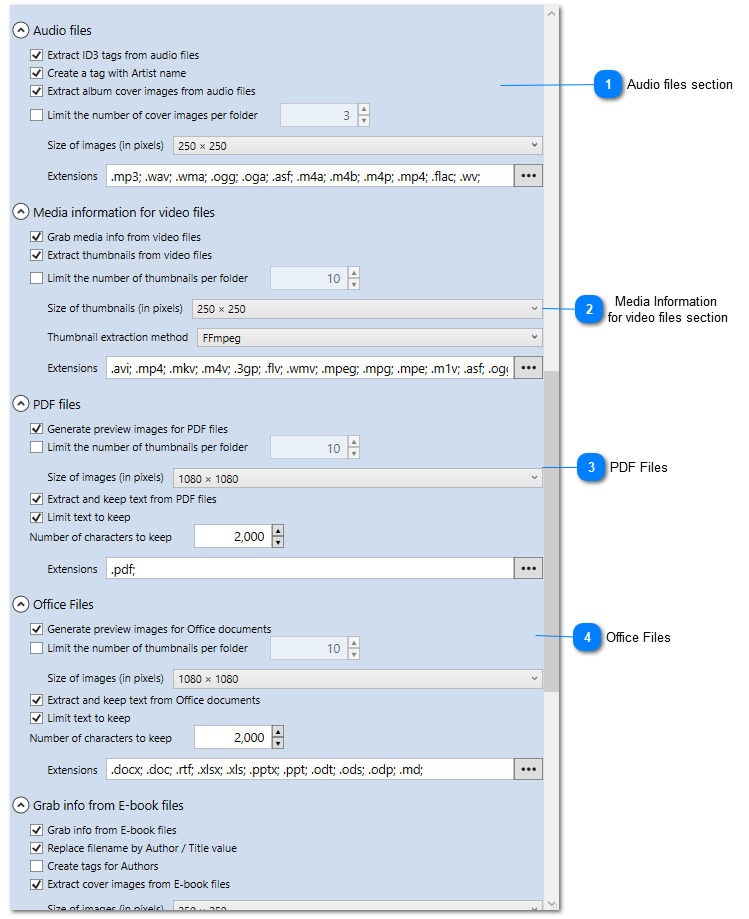
Audio files section
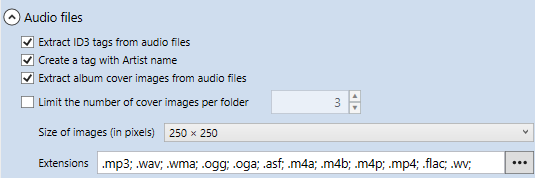
Extract ID3 tags from audio files. If this option is on, WinCatalog will try to extract ID3 tags from Audio files.
Replace filename by Artist - Title value. WinCatalog stores two values - the original filename, and name (or display name). If this option is on, WinCatalog will replace the display name by the “Artist - Title” pattern it grabs from the ID3 tags. Changing the display name does not affect the filename and the file will not “lose the connection” with the original file.
Append track number to the new title. If this option is on, WinCatalog will also append the track number grabbed from ID3 tags to the display name.
Extract thumbnails from audio files. Some ID3 tags have album covers or other pictures. If this option is on, WinCatalog will extract and store these pictures in the catalog.
Create a tag with Artist name. If this option is on, WinCatalog will create a tag using the Artist name from the ID3 tags and link the file the tag. If the tag already exists, the existing tag will be linked with the file.
Extensions. Files with these extensions will be processed as audio files.
Top
Media Information
for video files section

Grab media info from vide files. If this option is on, WinCatalog will grab media information from video files like duration, resolution, video and audio channels information, codec, etc.
Extract thumbnails from video files. If this option is on, WinCatalog will grab thumbnails for video files and store them in the catalog.
Thumbnail extraction method. There are two options: “System; FFmpeg” (default), and “FFmpeg”.
If the first option (“System; FFmpeg”) is selected, WinCatalog tries to grab thumbnails using File Explorer. In other words, if you see thumbnails for video files, WinCatalog will grab exactly the same thumbnails. This method work quickly, but since the thumbnails depend on File Explorer, they are not guaranteed. If the File Explorer is failed to provide a thumbnail for a video file, WinCatalog users FFmpeg - a tool that extracts a frame from approximately a middle of the video file. This method is slower than System, but supports more video formats and codecs.
If the second option (“FFmpeg”) is selected, WinCatalog uses FFmpeg only to grab the thumbnails.
Extensions. Files with these extensions will be processed as video files.
NOTICE: This processing module currently is also used for grabbing ID3 tags from the .flac audio files. That is why you see the .flac extension in the list.
Top
PDF Files
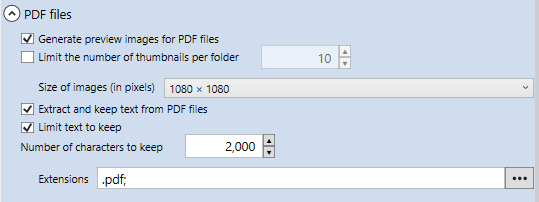
WinCatalog can generate preview images of the first pages (covers) of PDF files, extract text from the PDF files, and make this text searchable.
Top
Office Files
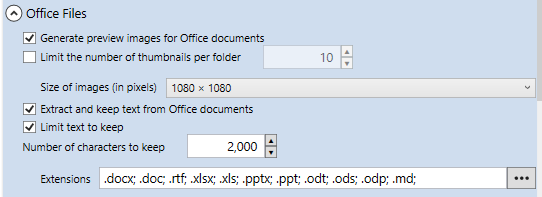
WinCatalog can generate preview images of office documents, extract text, and make this text searchable. The supported document types include:
- Microsoft Word: Both old (.doc) and modern (.docx) file formats.
- Microsoft Excel: Both .xls and .xlsx file formats.
- Microsoft PowerPoint: Both .ppt and .pptx file formats.
- OpenDocument Text: .odt files.
- OpenDocument Spreadsheets: .ods files.
- OpenDocument Presentations: .odp files.
- Markdown: .md files.
The list of extensions may be configured on your own.
Top
File Processing Page (Part 3)
Change here the way how WinCatalog processes different types of files.
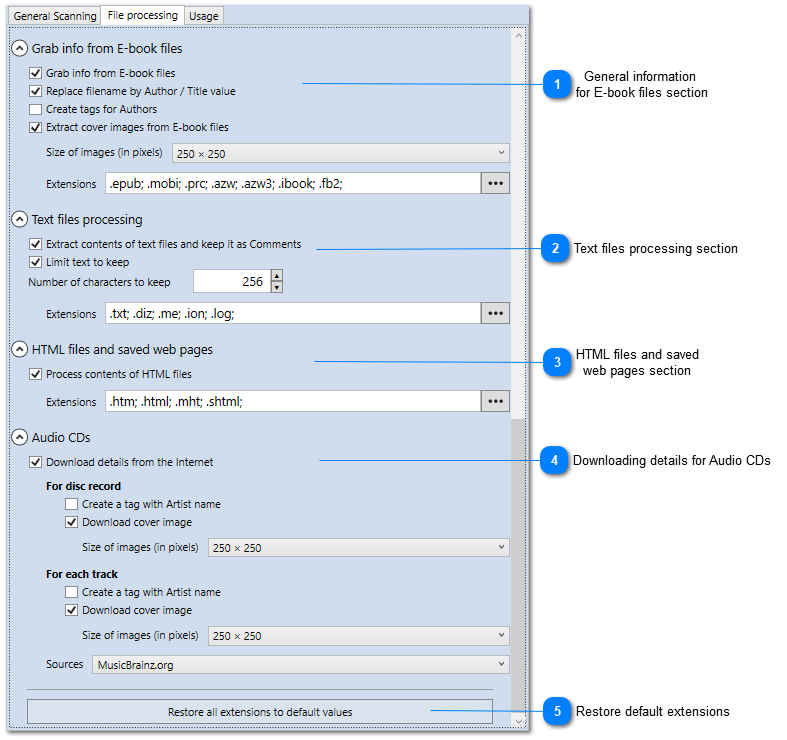
General information
for E-book files section

This processing module grabs info from electronic books. Currently it supports three major formats: Electronic Publication (ePub), Amazon Kindle (mobi), and FictionBook (FB2).
Grab info from E-book files. If this option is on, WinCatalog will grab the info from e-books.
Replace filename by Author / Title value. For every file, WinCatalog stores two values - the original filename, and name (or display name). If this option is on, WinCatalog will replace the display name by the “Author - Title” pattern grabed from the e-book metadata. Changing the display name does not affect the filename and the file will not “lose the connection” with the original file.
Create tags for Authors. If this option is on, WinCatalog will create tags using the Author names grabbed from e-book metadata and link the book with the tags. If the tag(s) already exist(s), the existing tags will be linked with the file.
Extract cover images from E-book files. If this option is on, WinCatalog will grab embedded covers from e-book files (some books may have no cover images).
Extensions. Files with these extensions will be processed as video files.
Top
Text files processing section
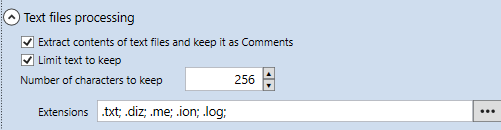
Extract contents of text files and keep it as Comments. If this option is on, WinCatalog will copy some text from text files and store them in the comments field for the file record in the catalog.
Limit text to keep. If this option is on, WinCatalog will limit the store text according to the “Number of characters to keep” (next option). Otherwise, it will store all the text from the text files.
Number of characters to keep. The maximum number of characters to grab from the text files and keep in comments. Please note that WinCatalog limits the text only if the option “Limit text to keep” is on. The number is the number of characters, so it works identically for Unicode and ANSI text files.
Extensions. Files with these extensions will be processed as text files.
Top
HTML files and saved
web pages section

WinCatalog can extract titles from HTML files and saved web pages (MHT files).
Process contents of HTML files. If this option is on, WinCatalog will extract titles from the HTML and MHT files.
Extensions. Files with these extensions will be processed as web pages.
Top
Downloading details for Audio CDs
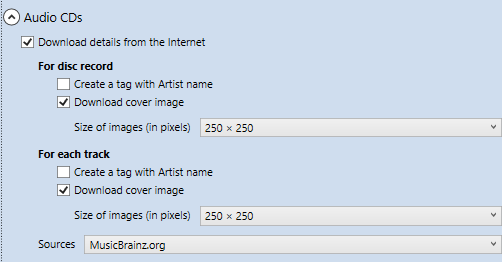
WinCatalog can download details of Audio CDs, including disc covers from the Internet. Currently, only one online source is supported (MusicBrainz.org), other online sources will be added later. To add an Audio CD to your catalog, insert it into the drive. WinCatalog computes a unique disk ID, passes it to the server (no other information is passing), and receives back the disc title, artist name, list of tracks with durations, and disc cover image. Adding discs by scanning barcodes is not supported in the current version, but is planned for future updates.
Top
Restore default extensions

Click here to restore all extensions lists in all sections to their default values.
Top
Usage Page
On this page you can see the list of disks and folders that use the selected set of the scanning options.
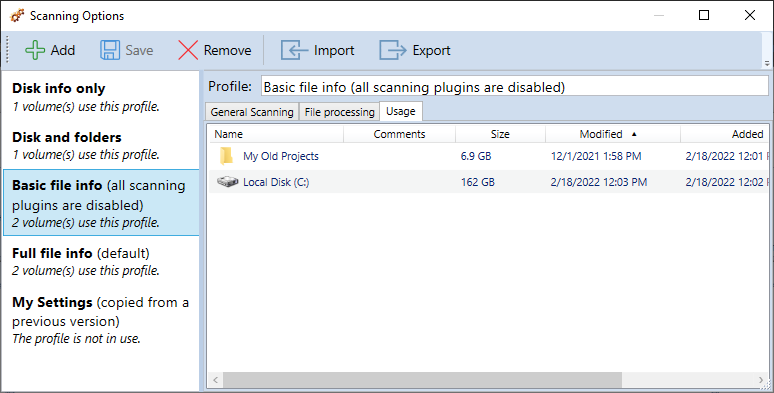
Switching between Scanning Profiles
When you add a disk of a folder to the catalog, WinCatalog remembers the scanning profile that was selected in the Add Disk or Add Folder dialog. WinCatalog applies the selected scanning profile automatically every time you Update the disk.
You can change the scanning profile for the disk on the Volume Info tab of the item properties. Please select the disk, folder, or any file or a folder from the disk, make a right mouse click and select Properties, this will open the Properties for the item. Follow to the Volume Info tab and you will see the disk properties.
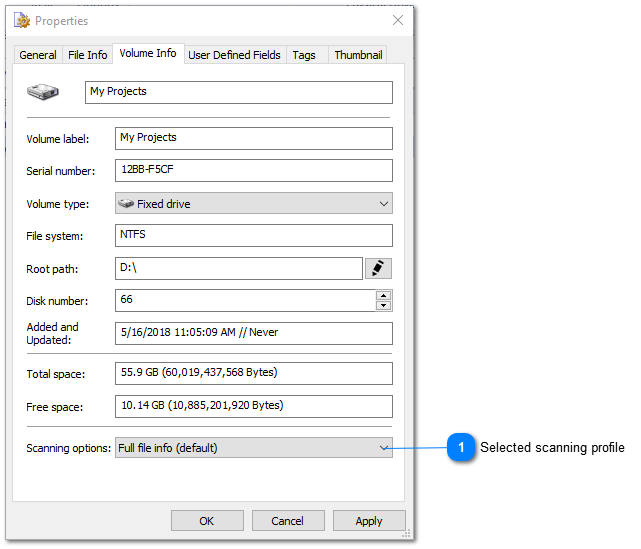
Selected scanning profile

You can easily switch the disk to another set of the scanning option. Please note that changing the scanning profile affects the future updates only. For example, if you switch “Disk only”, WinCatalog will not remove all the files and folder from the catalog until you click the Update button.
Top
Tracking Moved Files and Folders
The “Track Moved Files and Folders” feature in WinCatalog helps maintain catalog integrity by detecting files that have been moved to a different location within the same drive. This prevents data loss by preserving manually entered information such as comments, thumbnails, tags, and custom fields.
How It Works
During each update session, WinCatalog follows these steps to identify moved files:
1. Detecting Deletions and Additions
If a file that was previously cataloged is not found in its original location, it is initially marked as “deleted.” Any new files detected in the update session are marked as “added.”
2. Matching Moved Files
For each file marked as “deleted,” WinCatalog searches for a corresponding file in the “added” list. The software compares the selected fields (e.g., file size, date modified, and checksum) between the deleted and added files. If all selected fields match, the software recognizes the file as moved and updates its status accordingly.
3. Data Preservation
If a file is marked as “moved,” WinCatalog transfers associated metadata from the old file entry to the new one, including Comments, Thumbnails, Tags, and Custom fields. This ensures that manually entered information is retained even after files are relocated.
Important Considerations
1. To be recognized as a moved file, the filename must remain the same. Renamed files cannot be tracked as moved.
2. This feature works exclusively for files moved within the same drive and does not track renamed files.
Enabling “Track Moved Files and Folders” in WinCatalog ensures that manually added information remains intact when files are relocated. This feature enhances catalog accuracy and efficiency during updates by identifying moved files and preserving associated metadata.
Read more
Sets of the Scanning Options
Scanning Options Manager
Adding a Disk Dialog
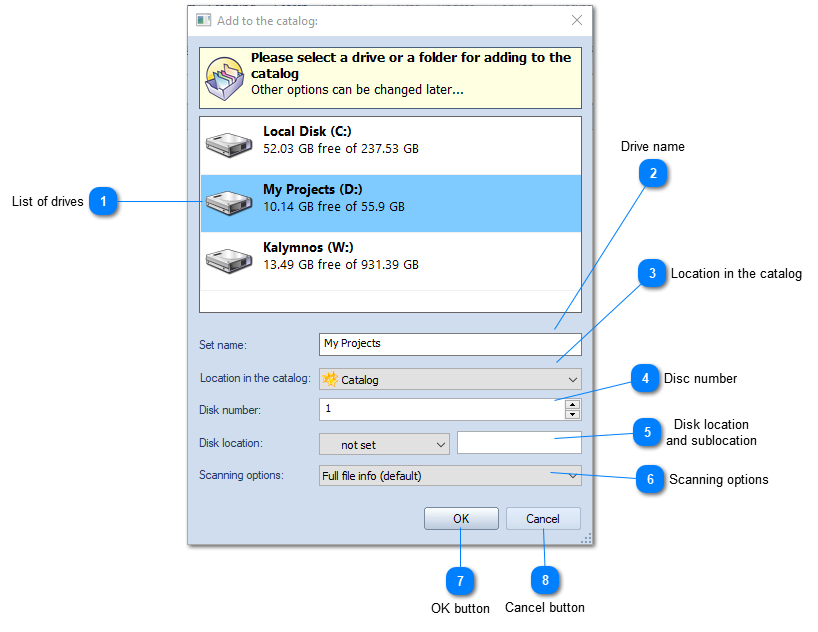
This dialog allows you to select a drive for adding to the catalog
List of drives
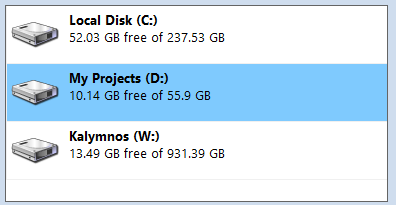
The list of drives displays all available local discs and mapped network drives. If you want to index an unmapped network location, use Add folder command instead (see Adding a Folder Dialog).
Top
Drive name

Using the Drive Name edit box you can set the name to the disc as it will be shown in the catalog.
Top
Location in the catalog

Using the Location in the catalog combo box you can select where to add the new disc.
Top

Disc number

Using this field you can assign an unique number to each disc. The Disk Number is automatically incremented field. On the example above, the next value will be 272, then 273, etc.
Top

Disk location
and sublocation

Here you can set where the disk is physically located. It could be a physical shelf, cardboard box, CD binder, disc wallet or anything you want.
The Location field consists of two part: General Location and Sub Location.
General Location (or Location) means something that can be the same for several items, for example a cardboard box, or a disc wallet. The General locations can be managed by the location manager.
The Sub Location makes the location more exact. In example above it shows the page number inside the disc wallet.
Top

Scanning options

Select the scanning options profile that will be used to process the current disk. WinCatalog remembers your choice for each disk and reuse this profile each time you update the disk.
Top

OK button

Click OK button to start scanning process
Top

Cancel button

Click Cancel button to close the dialog and cancel adding a disk
Top
Adding a Folder Dialog
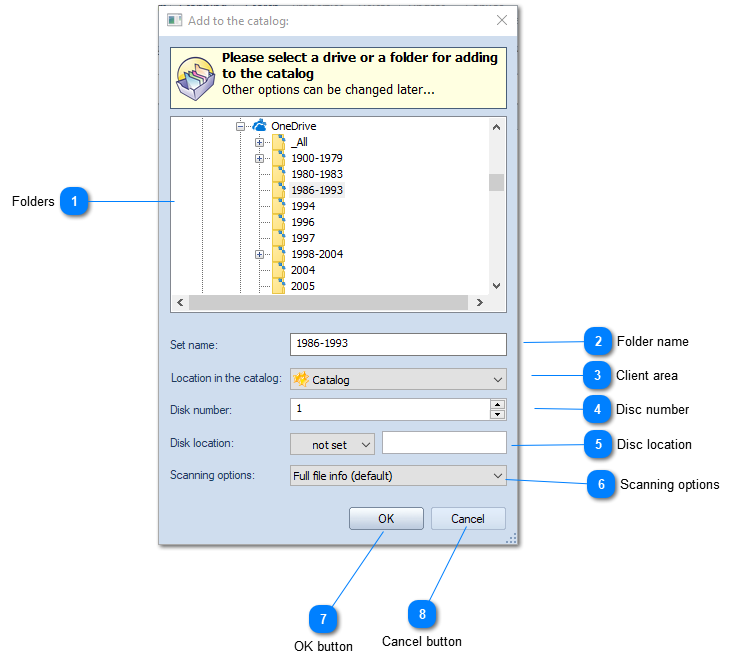
Folders
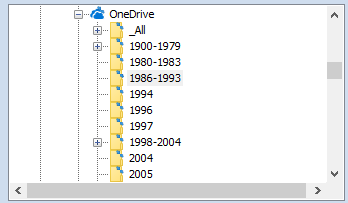
The list of folders available for indexing.
Top
Folder name

Using the edit box you can set the name to the folder as it will be shown in the catalog.
Top
Client area

Using the Location in the catalog combo box you can select where to add the new folder.
Top
Disc number

Using this field you can assign an unique number to each drive. The Disk Number is automatically incremented field. On the example above, the next value will be 273, then 274, etc.
Top
Disc location

Here you can set where the disc with the folder is physically located. It could be a physical shelf, cardboard box, CD binder, disc wallet or anything you want.
The Location field consists of two part: General Location and Sub Location.
General Location (or Location) means something that can be the same for several items, for example a cardboard box, or a disc wallet. The General locations can be managed by the location manager.
The Sub Location makes the location more exact. For example it may be the page number inside the disc wallet.
Top
Scanning options

Select the scanning options profile that will be used to process the current folder. WinCatalog remembers your choice for each folder you add and reuse this profile each time you update the folder.
Top
OK button

Click OK button to start scanning process
Top
Cancel button

Click Cancel button to close the dialog and cancel adding a disc
Top
Indexing Progress Dialog
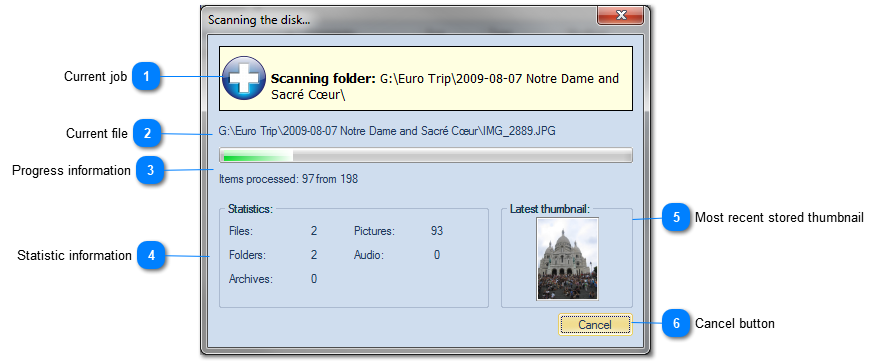
WinCatalog displays the progress dialog while it scans a disc or a folder.
Current job

The yellow banner displays the information about the current indexing job.
Top
Current file

WinCatalog is processing this file.
Top
Progress information

Progress information displays how many items have been processed to the moment.
Top
Statistic information
The statistic information displays how many files of different types been processed by WinCatalog.
Top
Most recent stored thumbnail

This panel displays the most recent stored thumbnail image.
Top
Cancel button

Click the Cancel button if you want to abort scanning job. No information will be added to the catalog.
Top
Catalog Title and Comments Dialog
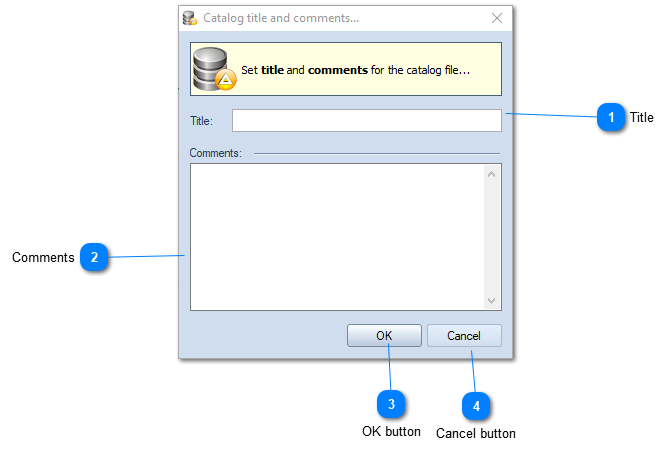
Title

Set the catalog file title. It will be displayed in the caption of the Main window.
Top
Comments
Set the comments for the catalog file.
Top
OK button

Click OK to apply changes.
Top
Cancel button

Click Cancel to close the dialog without changes.
Top
Actualizing (Updating) a Drive or a Folder
The contents of drives and folders change. You can add new files, delete files that you no longer need, move files from one folder to another, or simply rename files.
To reflect all the changes you made, please select the previously cataloged disk or the folder you want to actualize and click the Update button on the toolbar or in the context menu.

How WinCatalog Identifies Drives in the System
To identify drives in the system, WinCatalog uses volume serial numbers (a pseudo-unique hexadecimal number assigned to a drive during the creation of the file system during the format process) and volume labels.
Remark: volume serial numbers of hard drives usually don’t change, but they may change for optical drives after burning new sessions.
Please also note that the volume serial numbers are usually based on a combination of the date and time that the drive was formatted. For some manufacturers, hard drives from the same consignment may have the same serial numbers. That is why as an additional parameter, WinCatalog uses Volume Labels (these values are usually assigned by customers based on their needs).
If the drive with the given Volume Serial Number and Volume Label isn’t connected to your computer, WinCatalog will ask you to connect the drive:
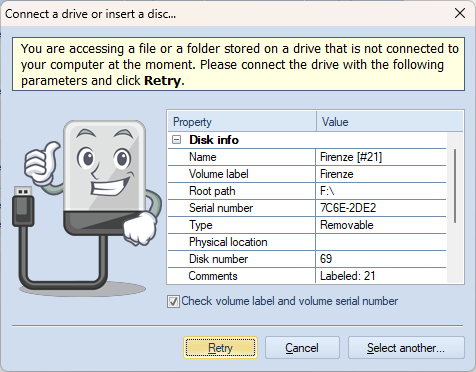
If the Volume Serial Number or Volume Label were changed since the last scan or update sessions, in the “Connect Drive” prompt (on the screenshot above) click the Select Another button to select the drive, then unmark the “Check volume label and volume serial number” checkbox, and click the Retry button. Please be careful, when unmarking the “Ckeck volume label and volume serial number” checkbox, double check that you have selected the correct drive letter to update.
The Scanning Profile for Updating the Drive or the Folder
The update process reuses the scanning profile selected on adding the drive or the folder to the catalog. To change the scanning profile, open Properties of the drive or the folder, follow to the Volume Info tab, and switch the Scanning Profile. Click OK to apply changes.
Update Report
The Update process will search for changes on the disk and update the catalog: WinCatalog will add files that have been added, it will remove deleted files from the catalog, and it will update files that have been modified since the last scan/update session.
After the process ends, you get the Update Report - the list of files and folders that were added, updated, or deleted during the session.
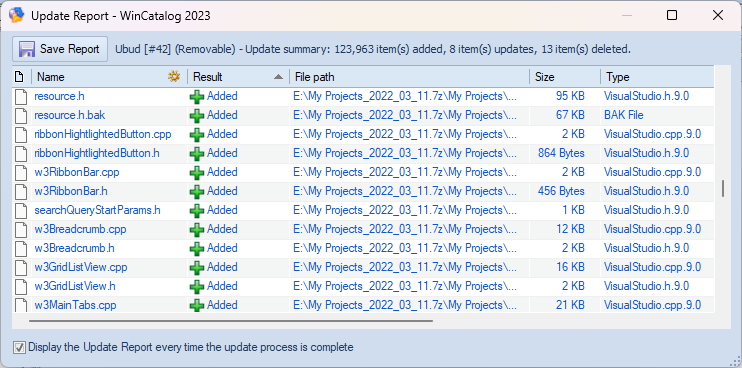
Skip Unmodified Files
The update process is much faster than the initial scanning process because by default WinCatalog skips files that weren’t modified since the last session. This helps to speed up the updating process. This option is turned on by default for each scanning profile.
If you switch a scanning profile and update the disk, or if you change any processing options, for example, the size of picture thumbnails, or an amount of text to grab from text or PDF files, only files that were modified since the previous scan will be updated.
To update all the files you should switch this option temporarily off. Please click the Scanning Options button on the toolbar, select the scanning profile to modify (most probably, “Full file info (default)” or “My Settings), and on the General Scanning tab unmark the following option: “While updating a disk or a folder: skip unmodified files (speeds up the update process)”. Make the same changes to other scanning profiles if needed. Click Save and update your disk(s).
Please do not forget to turn this option back on to speed up future updates.
Read more
Change Password Dialog
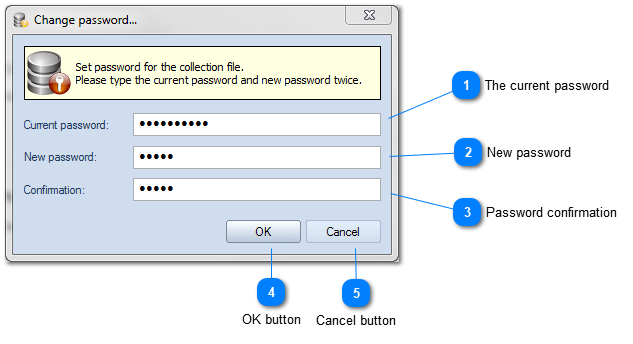
The current password

Type here the current password for the catalog file. If the password has not been set yet, leave this field blank.
Top
New password

Type a new password for the catalog file. To reset the current password leave this field blank.
Top
Password confirmation

Confirm the new password by typing it once again. To reset the current password leave this field blank as well.
Top
OK button

Click OK to set the new password.
Top
Cancel button

Click Cancel to exit without changes.
Top
Search Index Options
The article describing the external (fast) search index is located here.
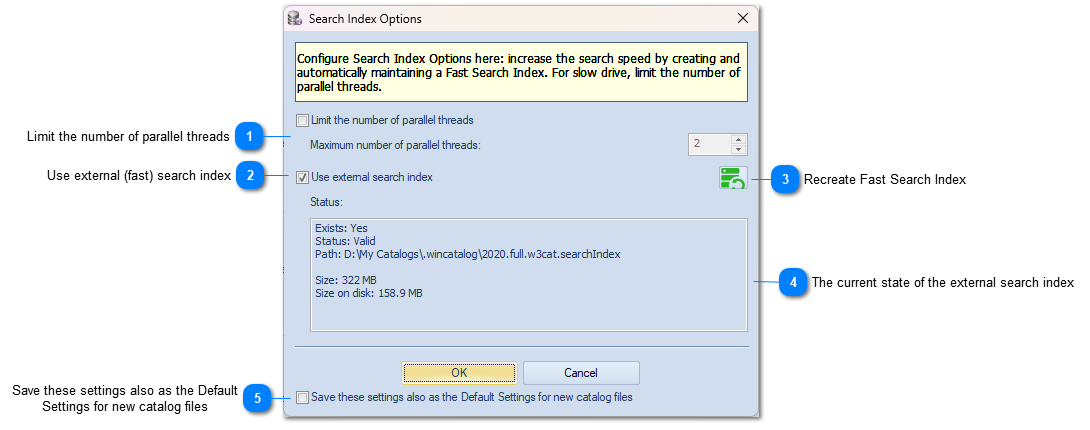
Limit the number of parallel threads

Each modern computer has several processors, the high search speed is reached by iterating data in parallel threads on different processors. Best performance may be achieved when the catalog file and the search index are located on SSD drives.
When the catalog file is stored on slower drives, especially on optical drives (DVDs, CDs), or shared in a local network and accessed via a slow network connection, the high number of parallel threads may cause the search index to work slow because of low disk speed. In that case, you may want to limit the number of parallel threads to 2 for slow network drives and slow external hard drives or to 1 for optical drives.
Use external (fast) search index

Mark or unmark the “Use external search index” checkbox to enable or disable the external (fast) search index.
If the external search index was not previously created, and you turn it on, the index will be created when you click the OK button.
If the external search index exists, but you turned it off, all files will be deleted from the disk and WinCatalog will perform searches using the catalog file only (works slower than using the external search index).
Recreate Fast Search Index

Click this button to recreate Fast Search Index
The current state of the external search index
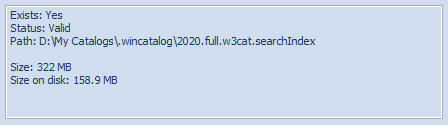
The current state, location, and size of the external (fast) search index.
Save these settings also as the Default
Settings for new catalog files

If you have several catalog files, you may want to use the same settings for all files. Save these settings as default values for new catalog files. By default, when you create a new catalog file, WinCatalog will turn the external (fast) search index on and will not limit the number of parallel threads. Changing the settings and applying them as default values for new catalog files changes this behavior. Saving this configuration will not affect any other existing catalog file.
Switching between Grid View and Thumbnails View
WinCatalog supports two types of views to represent data: a grid or detailed view and a thumbnails view.
You can switch between views by clicking the down arrow button next to the Catalog Path control:
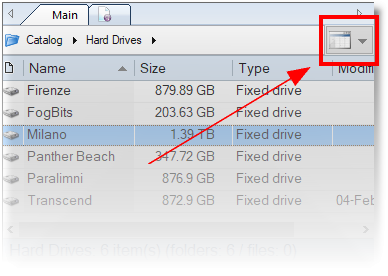
By clicking the button you can find the switcher to the Grid view or various Thumbnails view
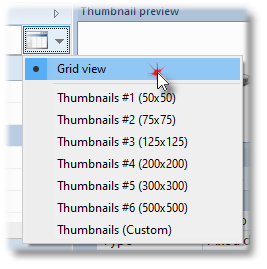
Grid view: the detailed view containing all available columns.
Thumbnails #N (Width x Height): displays thumbnails of maximum Width x Height pixels. The default option is 125x125.
Thumbnails (Custom): displays thumbnails with the maximum Width and Height defined by user. Clicking the Thumbnails (Custom) menu item displays the selector of the desired thumbnails size to display:
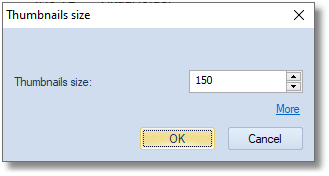
The Thumbnails size value may lay in the range from 50 to 2500 pixels.
You can also use CTRL+Mouse Wheel or a Touchpad to change the size of the thumbnails in the Thumbnails view:
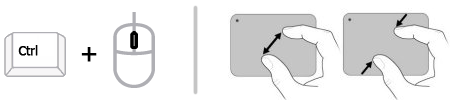
The information of this topic may also be applied to the Search Results View.
Changing the Thumbnail Background Color
By default, WinCatalog shows thumbnails on a white background. That works for most images, but it’s a poor match for transparent PNGs, logos, and icons, where a white shape can vanish into the page. You can pick a different background color for the thumbnail preview panel, and have the same color used in the Thumbnails List View.
Changing the preview-panel background
The thumbnail preview panel is the pane on the right that shows a large preview of the selected item.
- Move the mouse over the thumbnail preview panel. A small band of color swatches appears near the caption.
- Click a swatch to apply that background color right away:
- Default (white)
- Dark Grey
- Light Grey
- Red
- Blue
The swatches fade when the mouse leaves the panel and come back when you hover over it again, so they don’t get in the way. WinCatalog remembers your choice.
You can also right-click the preview panel for its menu, which has Change background and a Stretch thumbnails toggle. Stretch makes the image fill the panel instead of showing it at native size.
Applying the color to the Thumbnails List View
By default, the color you pick also applies to the tiles in the Thumbnails List View, so the main view matches the preview panel. The control background (the gaps between tiles and the label area) stays neutral so labels remain easy to read. Only the tile behind each thumbnail takes the color.
If you’d rather keep the Thumbnails List View on the standard system background no matter which swatch you pick, there’s an option for that (on by default). Turn it off to keep the list view separate from the preview-panel color.
Tip: A neutral grey is a safe choice for a mixed collection, since it keeps both light and dark transparent images readable.
Configure Columns in the Grid View
By default, WinCatalog displays just a few columns in the Grid view, but you can easily add or remove column on your own.
The information of this topic may also be applied to the Search Results View.
Please switch to the Grid view.
Make a right mouse click in the header area of any column or click the Gear icon ( ) in the Name column:
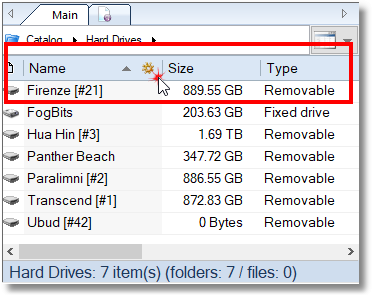
This will show the Select Columns dialog:
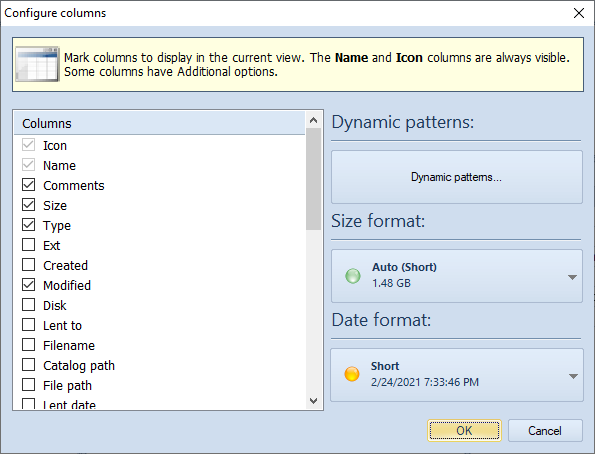
Mark the columns you want to display in the Grid (detailed) view and click OK to apply changes. Newly selected columns will be added to the rightmost position. Please use mouse Drag&Drop to change the columns order.
Explanation of columns
Icon - displays the icon for the catalog entry. This column is always visible.
Name - means the display name. For most entries, the value displayed in the Name columns equals to Filename, but you can change the value to any string you want without loosing a connection with the original file. By default, for music files, WinCatalog changes the Name column value to “Artist - Title” pattern grabbed from ID3 tags. For HTML and MHT files it displays the Title tag grabbed from the files.
Comments - displays the comments. For some types of files, WinCatalog populates the Comments field automatically (from Exif and ID3 tags, or from HTML/MHT files).
Size - for files, the size of the file. For file system folders and for virtual folders - the sum of sizes of all objects inside.
Type - the type of the entry.
Ext - file extension.
Created , Modified - created and modified dates grabbed from the file properties.
Disk, Volume Label, Serial number - the disk where the file system object is located, Volume label, and the logical Serial number of the disk (grabbed from file system).
Disk Total Space , Disk Used Space , Disk Free Space - total, used and free space on the disk where the file object is located.
Disk Number - represents the disk number in your catalog, may be used for better data organization.
Added , Updated - dates when the disk was initially added to the catalog and the most recent date when it was updated (actualized).
Lent to , Lent date - if the disk is marked as lent, the “Lent to” column display the name of the person borrowed the disk. The “Lent date” column displays the date when the disk was marked as lent.
Physical Location - a place where the disk is physically located. Consists of two parts - Location and Sub Location. For example, optical discs may be organized into Wallets. The Location may be the Wallet name whereas Sub Location may represent a page number.
The Disk, Volume Label, Serial number, Total/Used/Free Space, Disk Number, Added/Updated dates, Physical Location, Lent to, Lent date - are the “per disk” values: the values are the same for all objects from the same disk.
Filename - the name of the file or fodler in the file system, it cannot be changed by user in WinCatalog and used by WinCatalog to keep the connection with the real file on the disk.
Catalog Path - path in the catalog.
File Path - file system path.
MD5 / SHA256 / Blake2 , CRC32 - these columns display checksums/hashes if they were calculated.
Tags - the list of associated tags with the current catalog entry.
The list of User Defined Fields - in the end of the list User Defined Fields are located.
Dynamic Patterns
The Dynamic patterns button opens the Dynamic Patterns editor for the Name column.
Size Format, Date Format
Here you can configure how WinCatalog displays sizes and dates in the grid view, and in the additional windows like Properties panel. Formats for sizes and dates for Reports should be configured separately in Reports.
Name Column vs. Filename Column
WinCatalog has Name column and Filename column in the main grid view. For most files both columns display the same value (filename), but there is a difference between these columns.
The Filename column contains the name of the file or the folder as it was originally named in the file system. The Filename field is used by WinCatalog to keep a connection with the real file on the disk and cannot be edited in WinCatalog. For non-file entries like Virtual (blue) Folders, Custom Items, Tags this value is empty.
The Name columns (or Display Name) displays the name of the entry how it is named in WinCatalog. This column is editable, so you can always change the value of this column for any item on you own. The Name column also supports the Dynamic Patterns (currently for entries having ID3 tags).
Dynamic Patterns for the Name Column
For entries, having ID3 tags, WinCatalog supports Dynamic Patterns for the Name column. Using the Dynamic Patterns you can define how the Name field will be displayed in WinCatalog. The Dynamic Patterns affect any place in WinCatalog where the Name field is used (Grid View, Thumbnails View, Search Results, Reports).
The main advantage of the Dynamic Patterns is that you can define or change how WinCatalog displays the data without a need to rescan your drives.
The difference between Name and Filename columns is explained here.
1For most file entries (files and folders) the Name column equals Filename until you rename the entry in WinCatalog (in that case, the Name column will display the new value). For entries having ID3 tags but not renamed manually by a user, WinCatalog displays names according to the Dynamic Pattern rules.
The priority of displaying the values in the Name column is the following (1 is the highest):
-
The value entered by a user or automatically generated during the scanning process;
-
Dynamic patterns (if supported);
-
Filename.
Opening the Dynamic Patterns editor
To open the Dynamic Patterns editor for the Name field please make a right mouse click in the header area of any column in the Grid View, or click the Gear icon ( ) in the header of the Name column. This will open the Configure Columns window.
Click the Additional Options button to open the Dynamic Patterns editor.
The Dynamic Patterns Editor
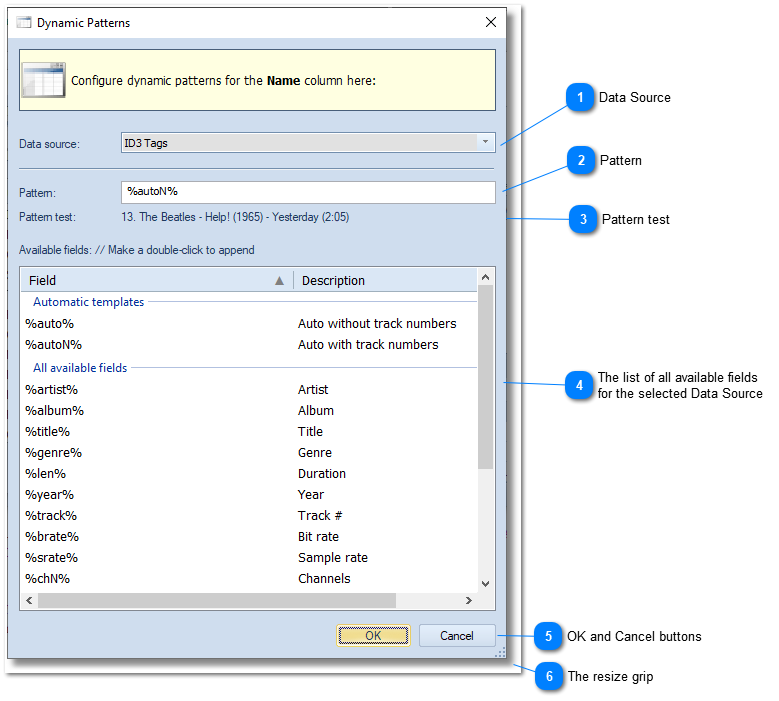
Data Source

Data source for building the value. To the moment, ID3 Tags is the only available Data Source
Top
Pattern

The Dynamic Pattern, edit this field to change how WinCatalog displays the Name field values.
Top
Pattern test

This is a test string based on some predefined data to provide an example of how the Name field may look for the selected Dynamic Pattern
Top
The list of all available fields
for the selected Data Source

The full list of the available fields for the selected Data Source. Type these values into the Pattern field, or make a double click on any row - this will append the selected field to the Pattern string.
Top
OK and Cancel buttons

Click OK to save the changes and close this window, or Cancel to discard changed and close this window.
Top
The resize grip

Use this Resize Grip to change the size of the window.
Top
Dynamic Patterns for ID3 tags
There are following fields are available for entries having ID3 tags. The default value is %autoN%.
Pattern Test
The Pattern Test field is based on the following example:
Artist: The Beatles
Album: Help!
Title: Yesterday
Genre: Chamber pop
Track number: 13
Year: 1965
Duration: 125 sec.
Bitrate: 320 kbps
Sample Rate: 44100
Channels: Stereo (2)
Comments: “Written by Paul McCartney, credited to Lennon–McCartney.”
Filename: “13 - Yesterday.mp3”
File system path: “E:\Music\The Beatles\Help! (1965)"
Catalog path: “Catalog\Music\Beatles, The\Help!"
Automatic Templates
%auto% - builds the automatic strings by trying to include Artist, Album, Title, Year, and Duration. If any of the following values is empty, it will be skipped. For the “Yesterday” example above, this pattern will be expanded as “The Beatles - Help! (1965) - Yesterday (2:05)”.
%autoN% - the same as the %auto%, but with the Track number in the beginning. For the example above, it will be expanded as “13. The Beatles - Help! (1965) - Yesterday (2:05)”. This is the default pattern.
All available fields for ID3 tags
%artist% - the Artist Name from ID3 tags. If this value is empty, the “Unknown Artist” value will be used. For various artists, WinCatalog shows all the artists separated by slashes. For the example above, it will be expanded as “The Beatles”.
%album% - the Album Title from ID3 tags. If this value is empty, the “No Album Title” value will be used. For the example above, it will be expanded as “Help!”.
%title% - the Title from ID3 tags. If this value is empty, the “No Title” value will be used. For the example above, it will be expanded as “Yesterday”.
%genre% - the Genre from ID3 tags. If this value is empty, the “Unknown” value will be used. For the example above, it will be expanded as “Chamber pop”.
%len% - the Duration, automatically formatted. For the example above, it will be expanded as “2:05”.
%year% - Year value from ID3 tags. For the example above, it will be expanded as “1965”.
%track% - Track number. For the example above, it will be expanded as “13”.
%brate% - Bitrate in kbps. For the example above, it will be expanded as “320 kbps”.
%srate% - Sample Rate. For the example above, it will be expanded as “44100”.
%chN% - number of channels, for the example above, it will be expanded as “2”.
%chA% - number of channels, string representation (Stereo/Mono). For the example above, it will be expanded as “Stereo”.
File and catalog fields
%filename% - the name of the file (the Filename field). For the example above, it will be expanded as “13 - Yesterday.mp3”.
%filebase% - filename without extension. For the example above, it will be expanded as “13 - Yesterday”.
%ext% - extension. For the example above, it will be expanded as “.mp3” (with a leading dot).
%parentF% - the name of the parent folder in the file system. For the example above, it will be expanded as “Help! (1965)”.
%parentC% - the name of the parent folder in the catalog. For the example above, it will be expanded as “Help!”.
Dynamic Columns
What are Dynamic Columns?
Dynamic Columns let you build your own columns for the file/report view and fill them with whatever content you want, assembled from metadata tokens. You are no longer limited to the built-in columns. You can make a column that shows the exact piece of information you care about, such as “Camera + Lens”, “Resolution”, “Artist – Album (Year)”, or “Series #Number”.
A few things to know:
- They are stored per collection, inside the catalog file, so each collection can have its own columns and they stay with the file when you move or share it.
- They are token-based. A column’s content is defined by a pattern: plain text mixed
with
%tokens%that get replaced, for each item, with the matching metadata value (%filename%,%size%,%exif_camera%,%tags%, and so on). - You can rename a column at any time without rebuilding it.
- Token names in the picker are translated to your interface language.
The Name column is itself a Dynamic Column. It always exists and cannot be removed. Its
default pattern is %autoN%, which builds a readable name for audio tracks and falls back
to the file name for everything else. You can redefine the Name column like any other.
Opening the editor
- Click the ⚙ (“gear”) button in the header area of the Name column, or right-click any column header in the file/report view, this will open the column chooser - Configure columns dialog.
- Click Dynamic Columns….
The Dynamic columns dialog opens. This is where you create, edit, rename and delete your custom columns.
Creating and editing a column
The dialog has these parts:
- A column selector (drop-down) at the top switches between the columns you have defined. The + (Add column) and Remove buttons next to it add a new column or delete the selected one. (The Name column cannot be deleted.)
- The Column header field sets the title shown in the column header. Edit it to rename the column on the spot.
- The Pattern field holds the template that defines the column’s content. Type plain text and insert tokens (see below). A live preview under the field shows how the pattern resolves for sample items as you type.
- The Available fields list contains every token, grouped by category. Double-click a field to drop its token into the pattern at the cursor.
- The Filter box narrows the field list as you type (try
exif,audio, orsize). The ✖ button clears it.
Click OK to save your columns to the collection, or Cancel to discard your changes.
Mixing tokens and text
A pattern can combine literal text and tokens however you like. If a token has no value for a given item, it simply resolves to nothing, so half-filled patterns still look fine. Examples:
| Pattern | Result (example) |
|---|---|
%exif_camera% |
Canon EOS R6 |
%exif_width% × %exif_height% |
6000 × 4000 |
%artist% – %title% (%year%) |
Pink Floyd – Time (1973) |
%comic_series% #%comic_number% |
Saga #12 |
%size% • %file_date_change% |
4.2 MB • 2026-03-14 |
Token reference
Tokens are grouped in the picker the same way they are listed below. Which categories show up depends on what kind of files are in your collection (audio, photos, video, comics, and so on).
Frequently used
| Token | Description |
|---|---|
%filename% |
Full file name (with extension) |
%filebase% |
File name without extension |
%ext% |
File extension |
%size% |
File size, formatted automatically (KB/MB/GB) |
%comments% |
Item comments |
%tags% |
All keywords/tags assigned to the item |
%rating% |
Item rating (number of stars) |
%db_id% |
The item’s internal database ID (w3_items.id), handy for power users and external tooling |
Automatic names
| Token | Description |
|---|---|
%auto% |
Automatic name built from audio metadata (artist / album / title / year / length) |
%autoN% |
Same as %auto%, with the track number in front |
Audio (ID3)
%artist%, %album%, %title%, %genre%, %year%, %track%, %len% (duration),
%brate% (bitrate), %srate% (sample rate), %chN% / %chA% (channels), %id3_comments%.
Photos (EXIF)
Dimensions (%exif_width%, %exif_height%), camera and lens
(%exif_camera%, %exif_make%, %exif_model%, %exif_lens%), shooting settings
(%exif_iso%, %exif_exposure%, %exif_aperture%, %exif_focal%, %exif_flash%),
date taken (%exif_date%), GPS (%exif_gps_lat%, %exif_gps_lon%, %exif_gps_alt%),
and many more advanced EXIF fields.
Video / media (MediaInfo)
Duration (%mi_duration%), video and audio codecs (%mi_video_codec%, %mi_audio_codec%),
resolution (%mi_width%, %mi_height%), frame rate (%mi_framerate%),
bitrates (%mi_video_bitrate%, %mi_audio_bitrate%), channels (%mi_channels%),
plus detailed per-stream fields.
File properties
Dates (%file_date_change%, %file_date_create%), full path (%file_path%),
checksums (%file_md5%, %file_sha256%, %file_crc32%), attributes
(%file_hidden%, %file_system%, %file_readonly%, %file_archive%),
parent folder (%parentF%, %parentC%), and size in specific units
(%size_b%, %size_kb%, %size_mb%, %size_gb%, %size_tb%).
Disk / volume
%vol_label%, %vol_serial%, %vol_filesystem%, %vol_root%, %vol_disk_number%,
%vol_total_size%, %vol_free_size%, %vol_used_size%,
%vol_date_added%, %vol_date_updated%.
Comics
A full set of ComicInfo fields, including %comic_series%, %comic_number%,
%comic_writer%, %comic_publisher%, %comic_year%, %comic_summary%,
%comic_page_count%, and more.
AI
Fields produced by WinCatalog AI Bridge: %ai_caption%, %ai_category%,
%ai_shot_type%, %ai_people%, %ai_keywords%, %ai_model%, %ai_date%.
Tip: You don’t have to memorize tokens. Open the editor, use the Filter box to find a field, and double-click it to drop the token into your pattern.
Showing your column
After you click OK, add the column to the view through the same column chooser (⚙ (“gear”) button in the header area of the Name column, or right-click any column header), then mark or unmark them. Dynamic Columns sort and reorder just like the built-in ones.
Item Properties
This topic describes Item Properties Dialog box
General Tab
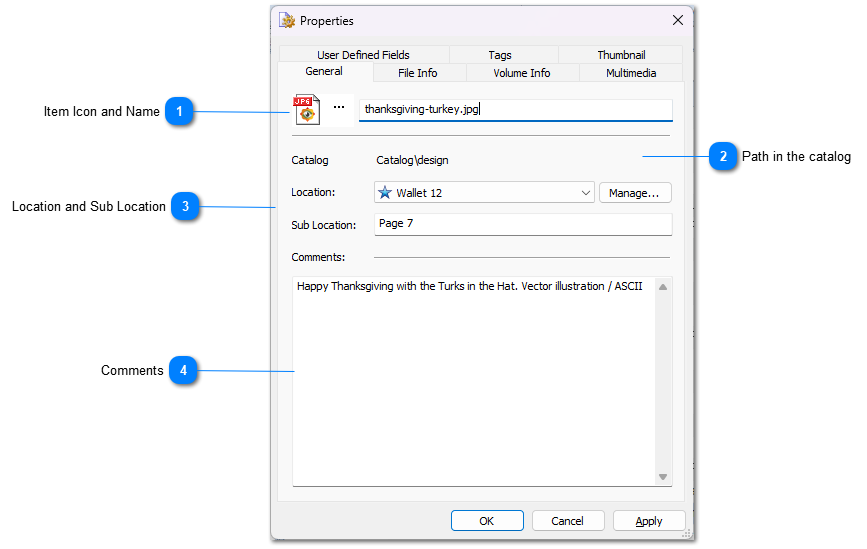
General Tab of the Item Properties Dialog
Item Icon and Name

Here you can change item display name. Click the Icon to change it. Read more.
Top
Path in the catalog

The catalog folder is displayed here. This isn’t the same as the File Path on the File Info tab.
Top
Location and Sub Location

Here you can set where the disc is physically located. It could be a physical shelf, cardboard box, CD binder, disc wallet or anything you want.
The Location field consists of two part: General Location and Sub Location.
General Location (or Location) means something that can be the same for several items, for example a cardboard box, or a disc wallet. The General locations can be managed by the location manager.
The Sub Location makes the location more exact. In example above it shows the page number inside the disc wallet.
Top
Comments
Here you can edit the comments for the currently selected item(s).
Top
Assign a Custom Icon to any Entry
Step 1. Click the Icon on the General tab to open the Change Icon window:
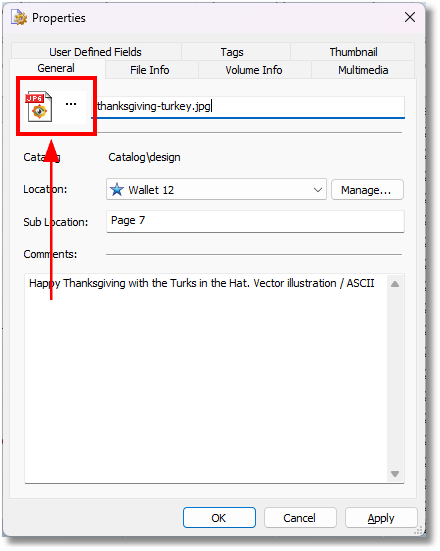
2. Select the icon to assign and click OK:
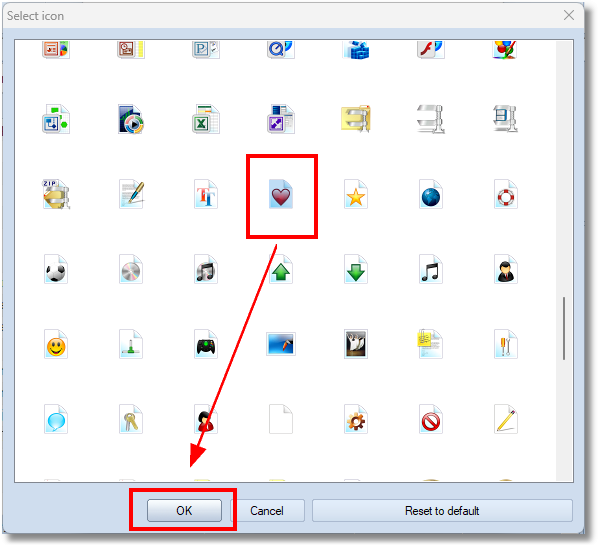
3. Now the entry uses the new icon:
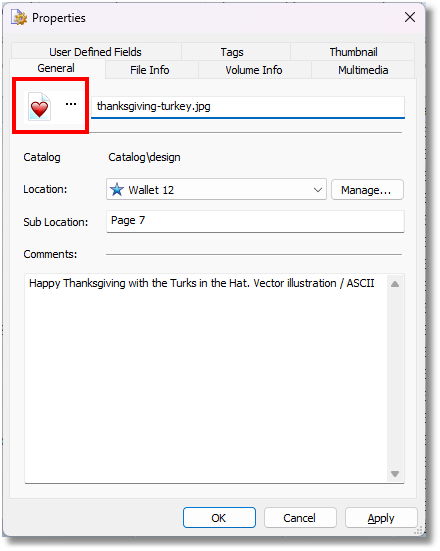
4. To reset the icon to the default one, click the Icon again, then click Reset to default.
File Info Tab
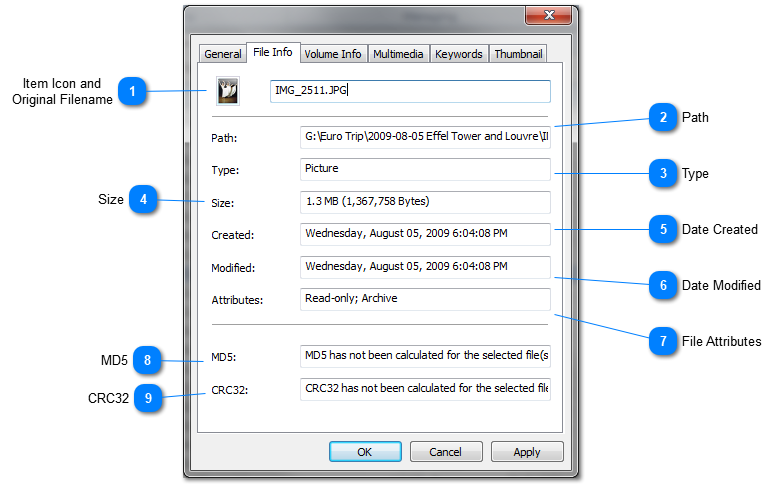
The File Info tab of the Item Properties dialog is available for file items only. It displays the attributes of the real file including path, size and other.
Item Icon and
Original Filename

The icon of the file and the original filename. The original filename cannot be changed by catalog owner.
Top
Path

Path of the file in the file system.
Top
Type

Type of the file.
Top
Size

Size of the file or folder..
Top
Date Created

Date when the file or folder has been created.
Top
Date Modified

Last date when the file or folder has been modified.
Top
File Attributes

File attirbutes.
Top
MD5

MD5 checksum for the file. In the example above the MD5 checksum has not been calculated for the file.
Top

CRC32

CRC32 checksum for the file. In the example above the CRC32 checksum has not been calculated for the file.
Top
Volume Info
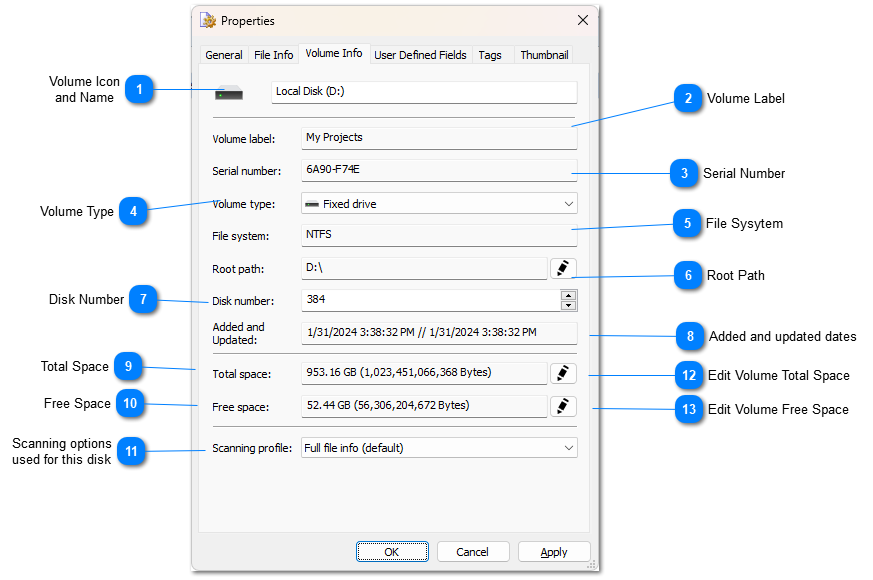
The Volume Info tab of the Item Properties Dialog displays information about drive where the file or folder is stored. This tab is not available for non-file items.
Volume Icon
and Name

The icon and the Name of the volume where the file is stored.
Top
Volume Label

Label of the selected volume.
Top
Serial Number

Serial number of the selected volume.
Top
Volume Type

Type of the selected volume.
Top
File Sysytem

File System of the selected volume.
Top
Root Path

Root path of the selected volume. You do not need to change this value because WinCatalog will find a new root path of the volume by using the Serial Number field.
Top
Disk Number

Disk number is the value you can set here or in the Add Disk / Add Folder dialog, usually WinCatalog automatically increments this value for each disk you add.
Top
Added and updated dates

WinCatalog remembers when the disk was initially added to the catalog and last time when it was updated.
Top
Total Space

Total Space of the selected volume.
Top

Free Space

Free Space of the selected volume.
Top

Scanning options
used for this disk

The set of the scanning options that was used to scan or update this disk, you can switch it and WinCatalog will use another set of the option next time you update the disk.
Top

Edit Volume Total Space

Click this button to set Volume Total Space manually
Top

Edit Volume Free Space

Click this button to set Volume Free Space manually
Top
Multimedia Tab
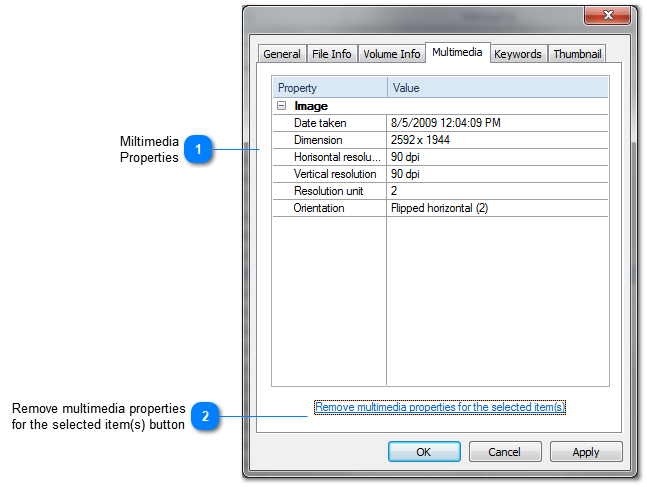
Miltimedia
Properties

Multimedia properties include Exif data and ID3 info.
Top
Remove multimedia properties
for the selected item(s) button

Click here to remove Multimedia properties from the item.
Top
Tags Tab
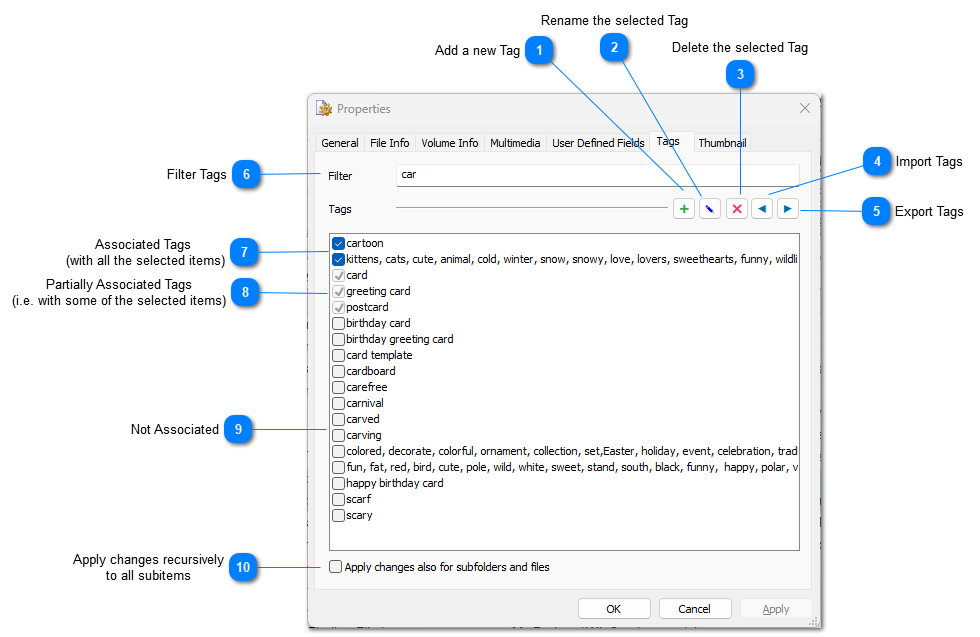
Mark tags which you want to associate with the selected item(s). Using this tab you can also add new tags or delete them.
Add a new Tag

Click the Add button to add a new tag to the catalog. [INS] is the shortcut for this command.
Top
Rename the selected Tag

Click the Rename button to change the title of the selected Tag. [F2] is the shortcut for this command.
Top
Delete the selected Tag

Click Delete button to delete the selected tag from the catalog. [DEL] is the shortcut for this command.
Top
Import Tags

Import tags from text
Top
Export Tags

Export the list of tags to a text file.
Top
Filter Tags

Filter the list of tags and display only tags matching the entered text. Spaces are word separators. If no tags are matching the filter, WinCatalog suggests to add a new tag. Press [Enter] to add the tag.
Top
Associated Tags
(with all the selected items)

The tags associated with each of the selected items are marked. Mark or unmark tags to change the association.
Top
Partially Associated Tags
(i.e. with some of the selected items)
 The tags assigned with just some of the selected items are marked as gray. Marking the grayed tag will associate it with all the selected items. Unmarking the grayed tag will clear the association for all the selected items. Leaving the tag gray will leave the association unchanged.
Top
Not Associated
Unmarked keywords are not associated with the selected item(s)
Top
Apply changes recursively
to all subitems

If this option is not set, tags will be applied to the selected items only. If this option is set, tags will be applied to the selected items, and to all sub-folders and files recursively.
Top
Thumbnails Tab
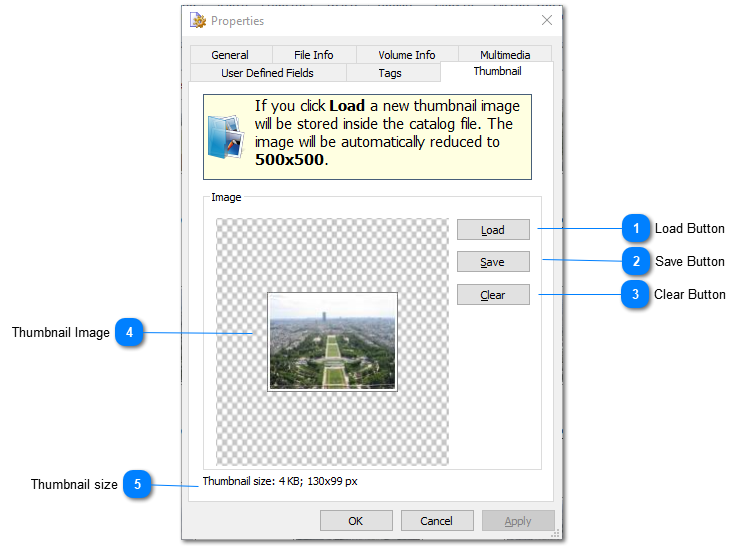
Load Button

You can force WinCatalog to create new thumbnail image from any picture on you computer. Press Load button to change or set new thumbnail image for the selected item(s).
The thumbnail image can be set for any item in the catalog. The thumbnail image will be stored inside the catalog file and it do not need the original source image for displaying the preview.
Top
Save Button

Click Save if you want to export and save the stored thumbnail to disk.
Top
Clear Button

Click Clear button to remove thumbnail image(s) for the selected item(s).
Top
Thumbnail Image

The thumbnail preview image is displayed here (if available).
Top
Thumbnail size

This value displays the actual size of the thumbnail image stored in the catalog in pixels and in kilobytes
Top
Rating Items (1–5 Stars)
WinCatalog lets you rate any item from 1 to 5 stars, so you can sort and filter your collection by how much you like something or how good it is. A rating of 0 stars means the item is unrated.
Setting a rating
There are several ways to rate the selected item. If you select several items first, the rating applies to all of them at once.
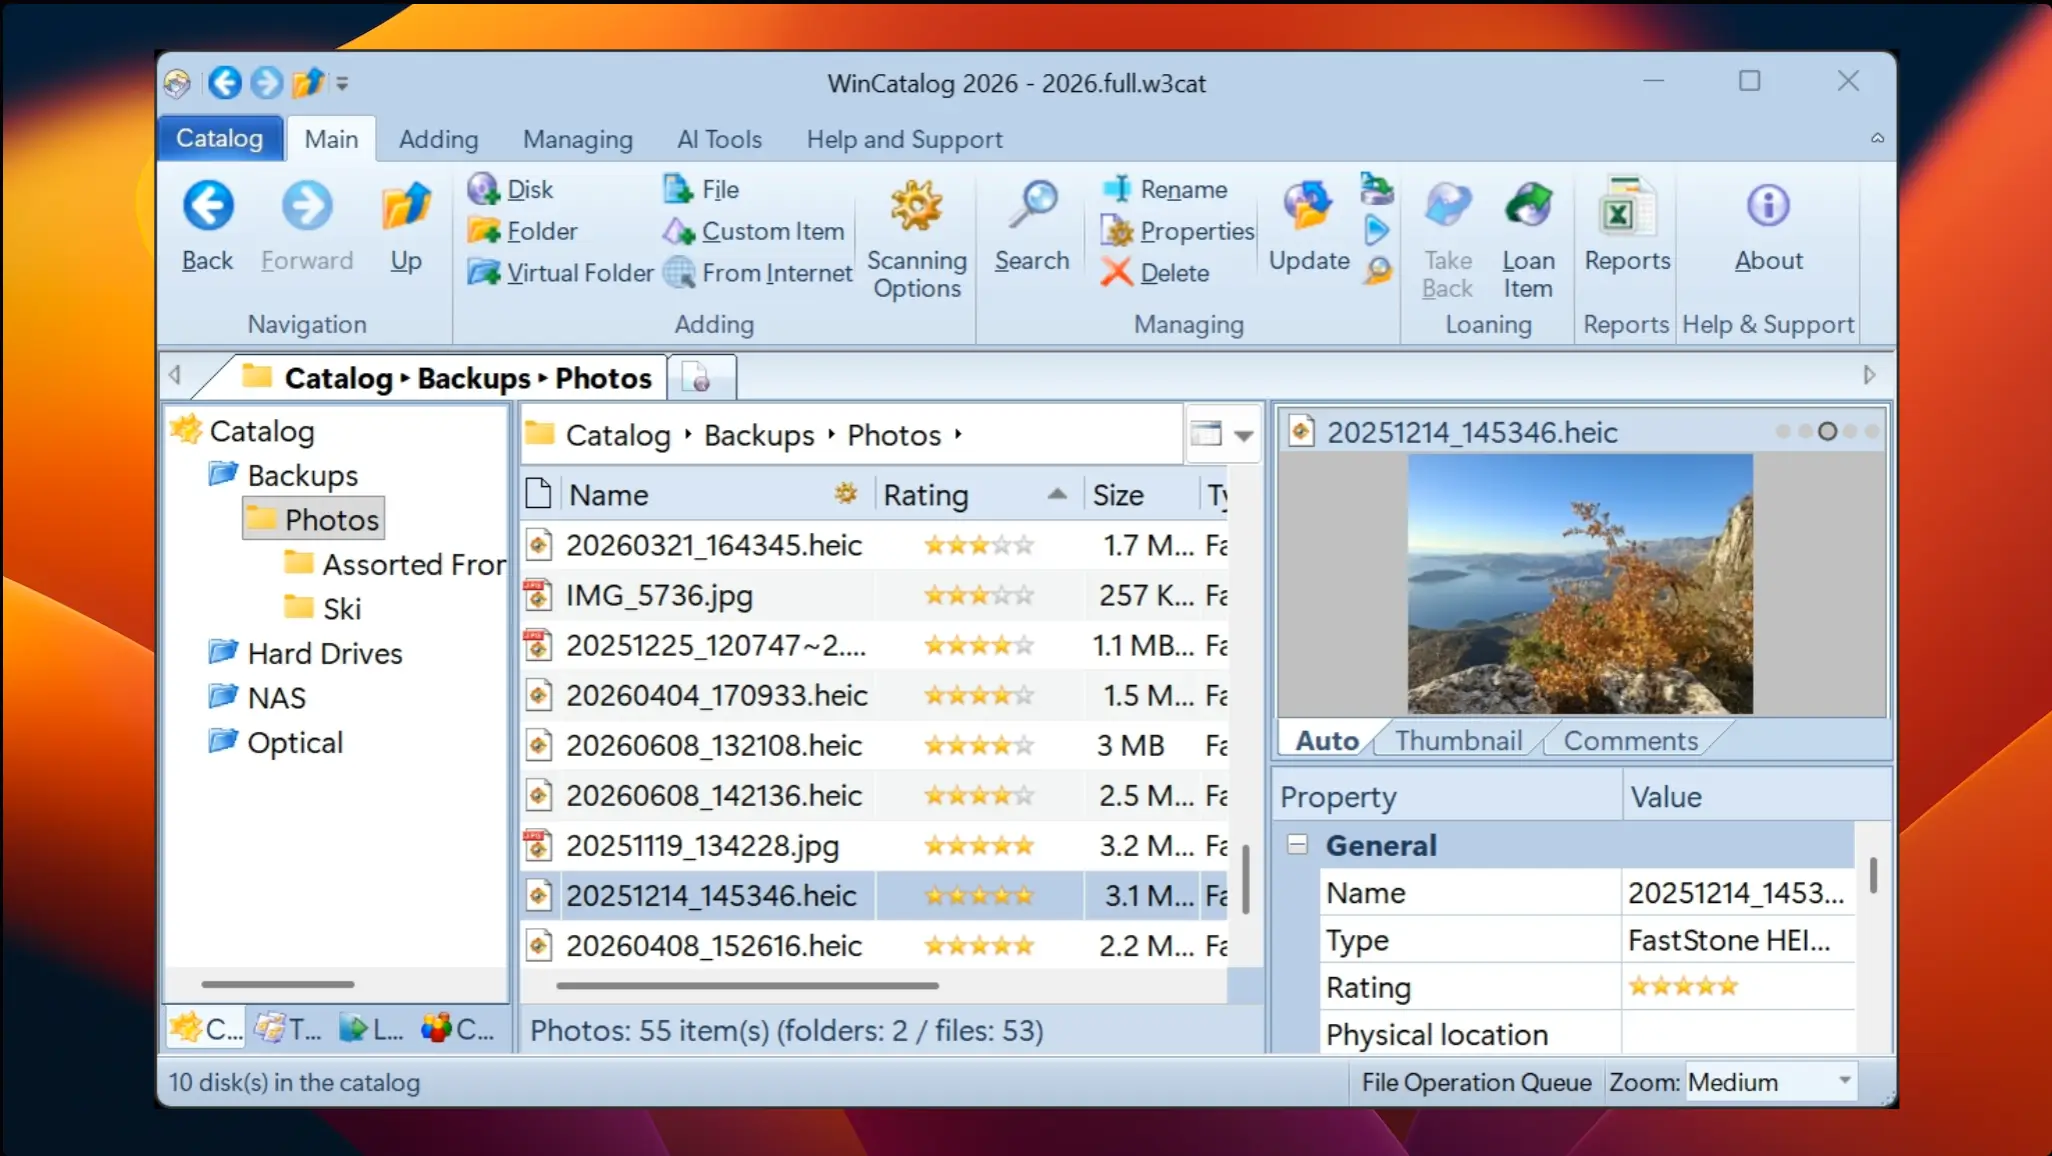
Keyboard shortcuts (fastest)
| Shortcut | Action |
|---|---|
| Ctrl+1 | Set 1 star |
| Ctrl+2 | Set 2 stars |
| Ctrl+3 | Set 3 stars |
| Ctrl+4 | Set 4 stars |
| Ctrl+5 | Set 5 stars |
| Ctrl+0 | Clear the rating (back to unrated) |
These are the defaults. Like all WinCatalog shortcuts, you can reassign them in Program Options → Keyboard Shortcuts if they clash with something else you use.
Right-click menu
Right-click the selected item(s) and use the Rating submenu to pick a star value or clear the rating.
Properties panel
The General section of the Properties panel has a graphical star control. Click a star to set the rating directly. The row stays hidden while an item is unrated and shows up once you give it a rating.
Viewing ratings
- Properties panel — the star control in the General section shows the current rating.
- Rating column — the list/report view has a dedicated Rating column that draws the stars as icons. It is hidden by default; add it through the column chooser (right-click a column header → More…). Once it’s visible, you can sort by it to bring your best-rated items to the top.
- Dynamic Columns — use the
%rating%token inside a custom column (see Dynamic Columns article).
Finding items by rating
Use the search filter by rating to list items at a given star level (for example, everything rated 4 stars or higher). Add a Rating condition when you build a search to filter the collection by rating.
Program Options
This section describes program options of WinCatalog 2026.
To open Program Options please click the Catalog button (left from the Main tab of the Ribbon toolbar), and then click Options.
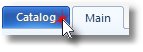
Look & Feel
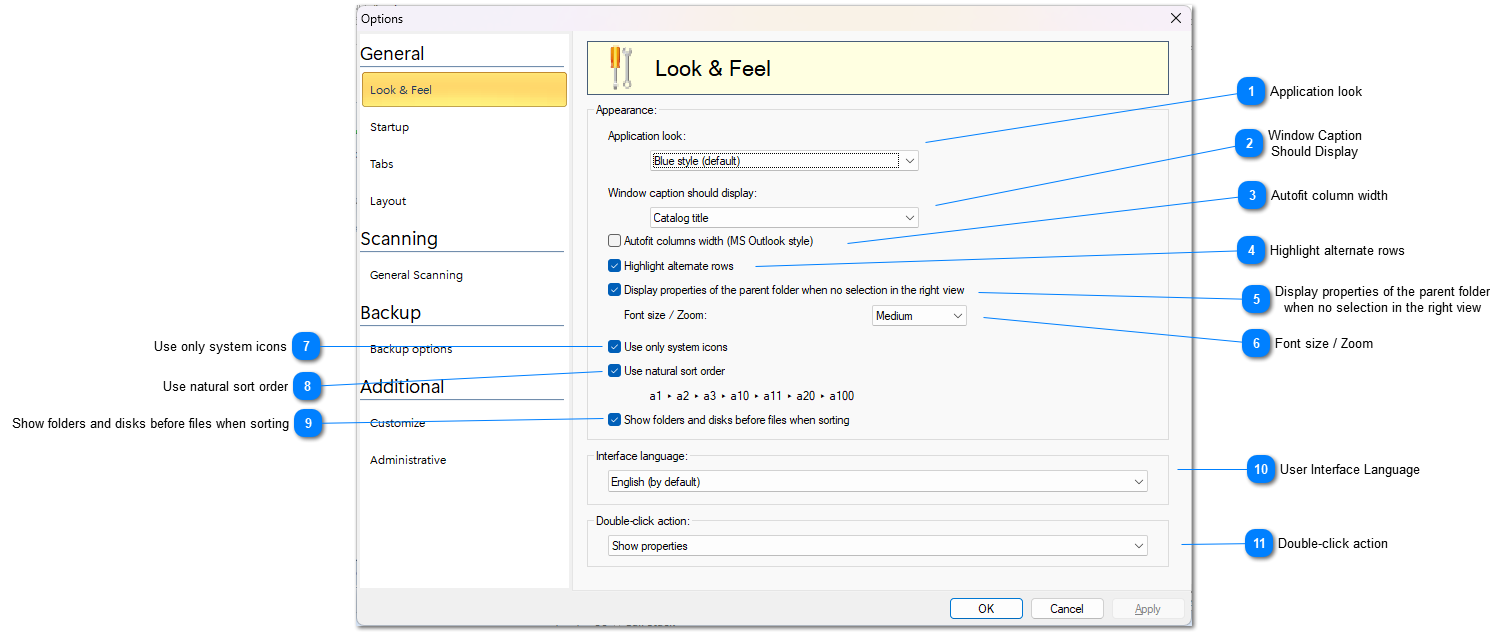
Application look

Change the application look using this option. The default value is “Blue style”.
Top
Window Caption
Should Display

Use this option to configure main window caption. There are 4 options are available:
-
Catalog title - WinCatalog will display the catalog title next to the program name.
-
Catalog filename - WinCatalog will display the catalog filename next to the program name.
-
Full path to a catalog - WinCatalog will display full file path to the catalog file next to the program name.
-
Nothing - WinCatalog will display program name only.
Top
Autofit column width
 If this option is on, WinCatalog will automatically adjust the width of the columns in the main grid view in order not to show the horizontal scroll bar. This option may be good if you have three or four columns to display, but it is better to turn this option off for more columns.
Top
Highlight alternate rows

If this option is on, alternate rows in the grid view will be displayed with grey background.
Top
Display properties of the parent folder
when no selection in the right view

If this option is on, WinCatalog will show the properties of the currently selected folder if nothing is selected in the main grid view.
Top
Font size / Zoom

The size of the text in the panels, tree view and in the main grid.
Top
Use only system icons

If this option is turned on, WinCatalog will use the same icons for files as you see in File Explorer. If this feature is turend off, WinCatalog may use own icons for archives (purple box), video files (film frame), and photos (a photo of dancing girls for JPG files, a photo of a parrot for RAW files). WinCatalog displays custom icons only if it was able to parse the files and grab additional information, it may be considered as a marker if the particular file has doesn’t have additional metadata in the catalog.
Top
Use natural sort order

This option provides the ability to change sort logic by switching between natural and ordinal (i.e. computer) string comparison.
The default option is the natural string comparison (a1→a2→a3→a10→a11→a20→a30→a100). Turning off the natural comparison feature means the sorting decisions are based on simple byte comparisons (a1→a10→a11→a100→a2→a20→a3→a30).
Top
Show folders and disks before files when sorting

The default sort logic for entries in WinCatalog is to display drives and folders before files, which is the default Windows File Explorer sorting style. Turning this option off will cause displaying folders and files sorted by names ignoring types (Mac OS Finder style).
Top
User Interface Language

All available traslations are listed here. Please note that you should restart WinCatalog after changing language.
Top
Double-click action

Configure here what should WinCatalog do if you perform a double click on the item. There are 3 options are available:
-
Show properties - WinCatalog will open Item Properties Dialog if you double click on an item.
-
Open in associated application - WinCatalog will try to open file in the associated application. This option is available for files only. Double click on folder will navigate inside the folder. Double click on non-file item will open it’s properties.
-
Open in Explorer - WinCatalog will try to run Windows Explorer and navigate the physical folder which contain the file. This option is available for files and folders. Double click on non-file item will open it’s properties.
Top
Startup
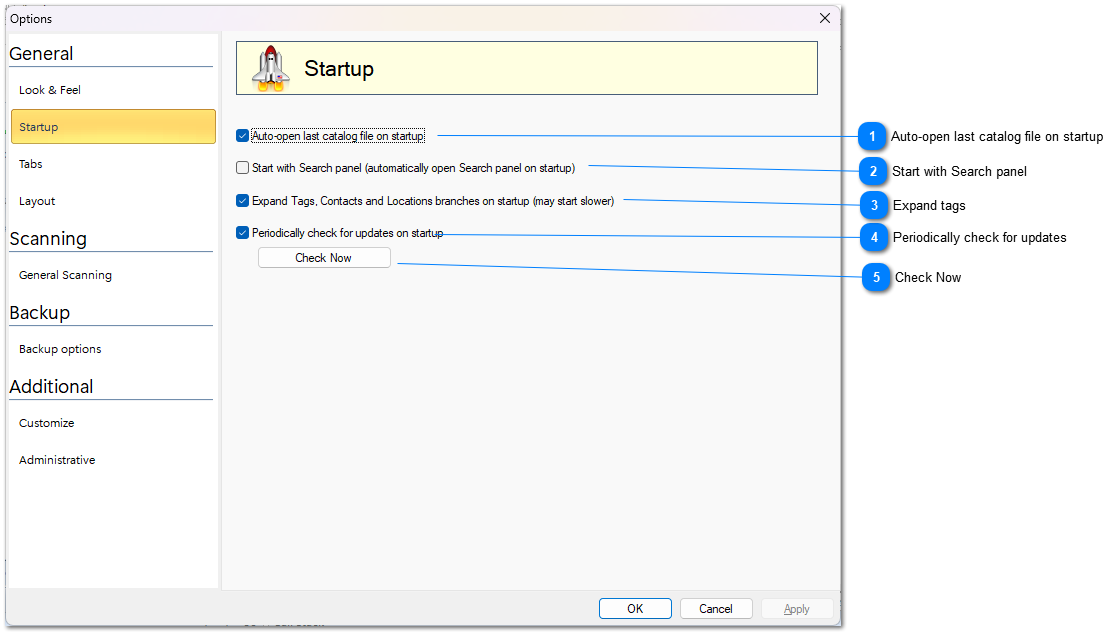
Auto-open last catalog file on startup

Mark the checkbox if you want to re-open last catalog file every time WinCatalog starts.
Top
Start with Search panel

This option automatically open Search panel every time when you start WinCatalog
Top
Expand tags

If this option is on, WinCatalog will expand (open) all the branches for Tags, Contacts and locations. If you have a lot of tags, turning this option on may increase the startup time.
Top
Periodically check for updates

Mark this option to let WinCatalog connect to our web site and check for updates once a month.
Top
Check Now

Click the button to check for updates right now.
Top
Tabs
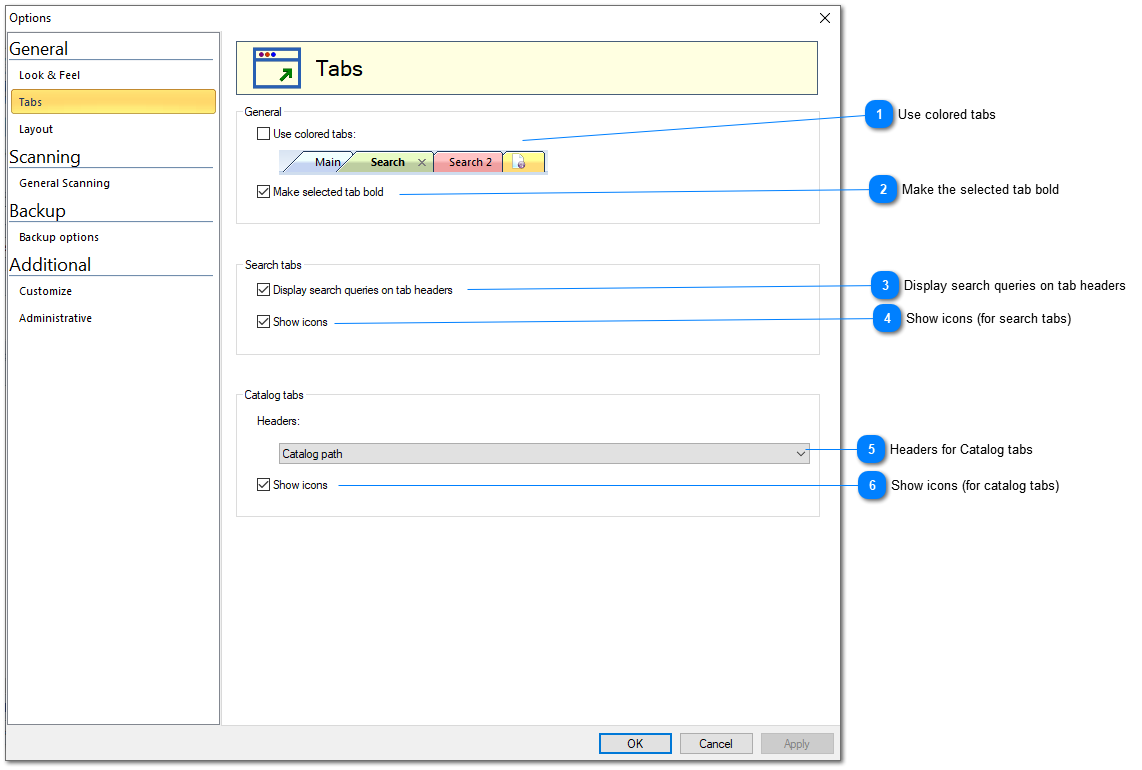
Use colored tabs
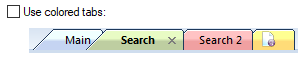
This option enables or disables colored tabs for main window. This option is switched off by default.
Top
Make the selected tab bold

If this option is enabled, the header of the selected tab will be shown using a bold font
Top
Display search queries on tab headers

If this option is enabled, headers of search tabs will display search queries. Otherwise, it will display “Search”, “Search 1”, “Search 2”, etc.
Top
Show icons (for search tabs)

If this option is enables, search icon will be shown for search tabs.
Top
Headers for Catalog tabs

Headers of catalog tabs may display: Catalog Path, (Selected) Folder Name, or just Tab number.
Top
Show icons (for catalog tabs)

If this option is enables, icon of the selected entry (drive or folder) will be shows in the header area of the catalog tab
Top
Layout
Here you can configure the layout of Catalog and Search tab, select which panels will be displayed, the location of these panels, and their order.
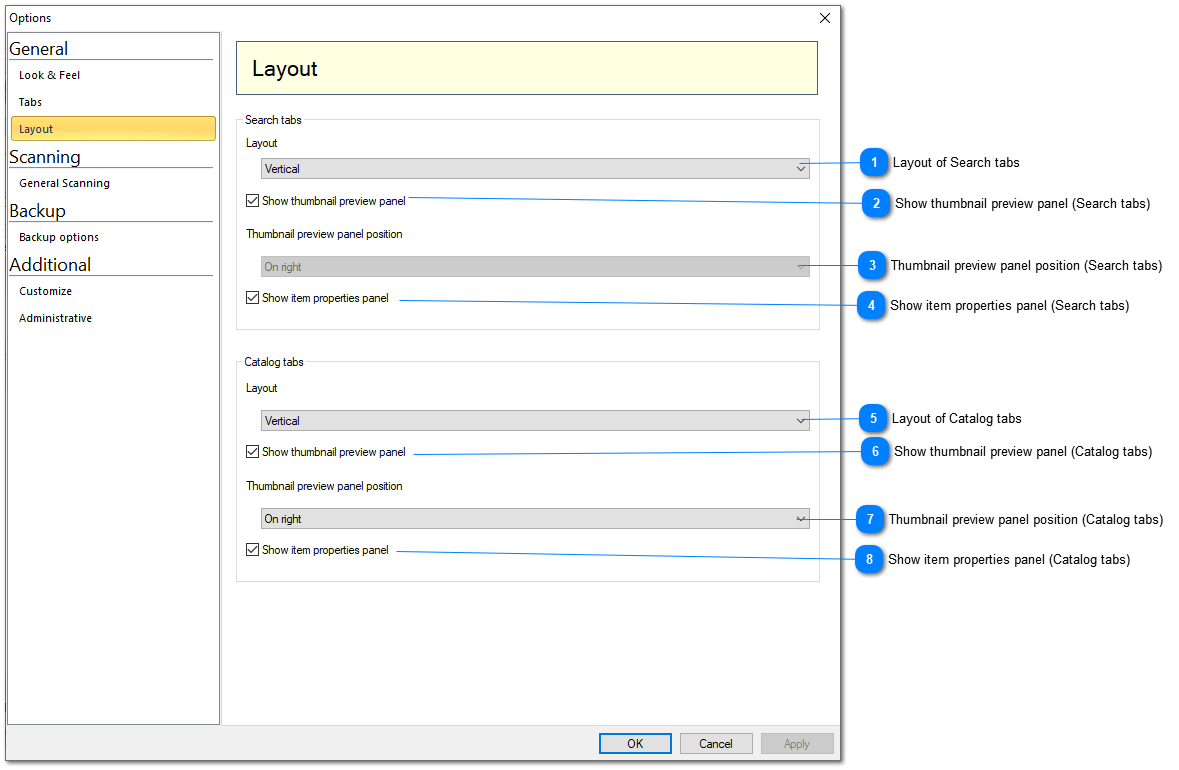
Layout of Search tabs

You can select between vertical and horizontal layouts of Thumbnail and Properties panels.
Top
Show thumbnail preview panel (Search tabs)

Show or hide thumbnails preview panel.
Top
Thumbnail preview panel position (Search tabs)

Display thumbnail preview panel on the right or on the left. Works for the horizontal layout only.
Top
Show item properties panel (Search tabs)

Show or hide item properties panel.
Top
Layout of Catalog tabs

You can select between vertical, horizontal wide, and horizontal narrow layouts of Thumbnails and Properties panels. The horizontal wide layout displays the thumbnails and the properties panels below both tree view and right (grid) view. The horizontal narrow layout displays the thumbnails and the properties panels below the right (grid) view, but the tree view remains tall.
Top
Show thumbnail preview panel (Catalog tabs)

Show or hide thumbnails preview panel.
Top

Thumbnail preview panel position (Catalog tabs)

Display thumbnail preview panel on the right or on the left. For the vertical layout, if “On the left” is selected, the thumbnail preview panel will be shown below the tree view.
Top

Show item properties panel (Catalog tabs)

Show or hide item properties panel.
Top
The quicker way to change layout of the Catalog tab
The quicker way to change the layout is via the View button on top of the right view:
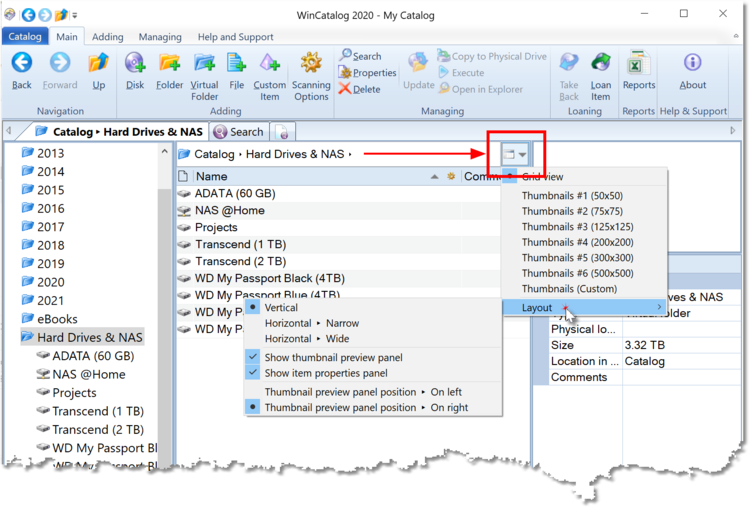
The quicker way to change layout of the Search tab
The quicker way to change the layout is via the View button on top of the right view:
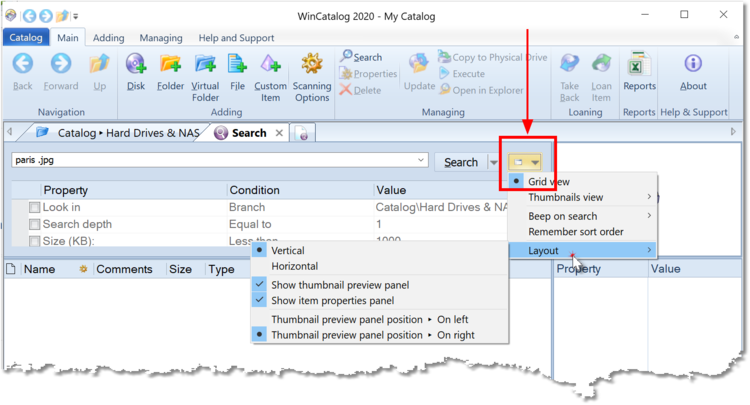
Backup Options
It is highly recommended to make backup copies of your catalog files on a regular basis to prevent any data loss.
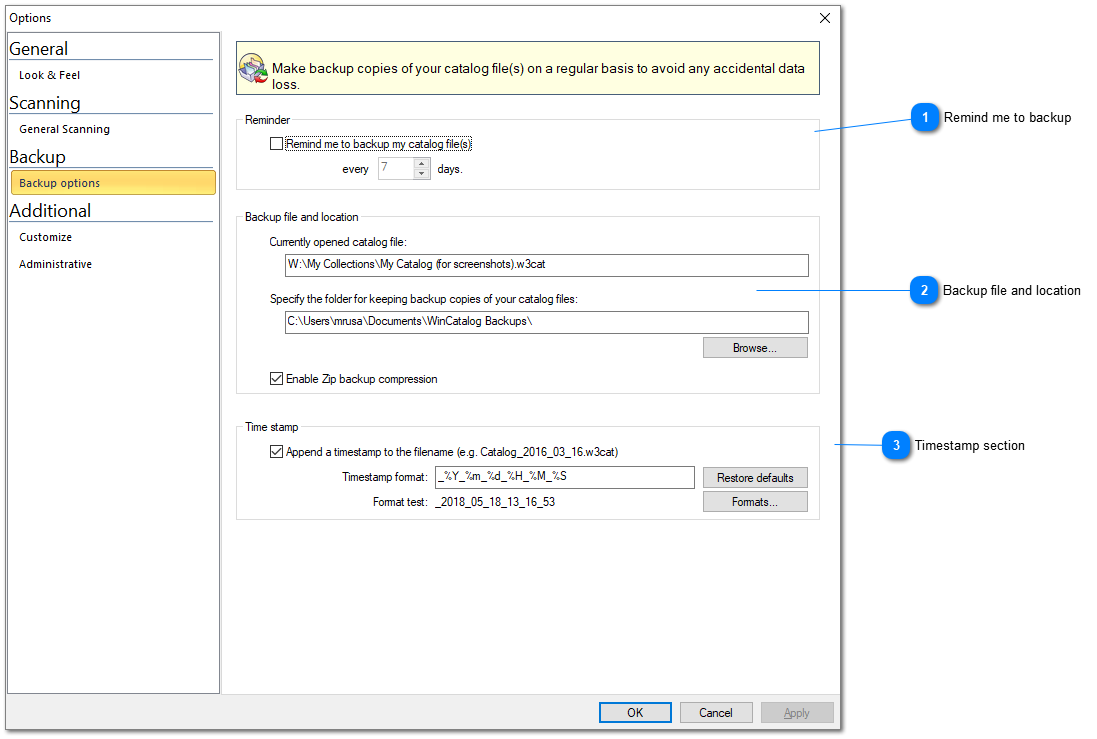
Remind me to backup

WinCatalog can remind you to make a backup copy. The default value for the reminder is 7 days. We highly recommend keep this option on and never dismiss the reminders.
Top
Backup file and location
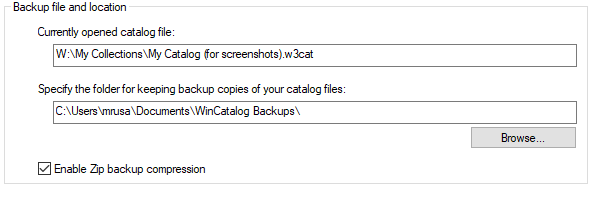
This section displays the currently opened catalog file, a folder where the backup copies will be located and an option to enable or disable zip compression for backup files. If Zip compression is enabled, WinCatalog will use ZIP to compress the backup copy of the catalog file. Otherwise, the file will be just copied to the backup location without compression.
Top
Timestamp section
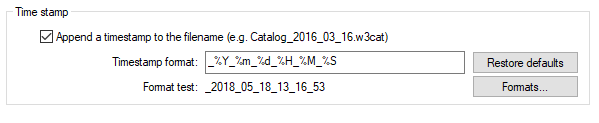
In order to help identify the date of the backup and keep several backup copies in the same locations, WinCatalog can add a timestamp to the filename of the backup copy. Click Formats button to get help on the available format options.
Top
Customize
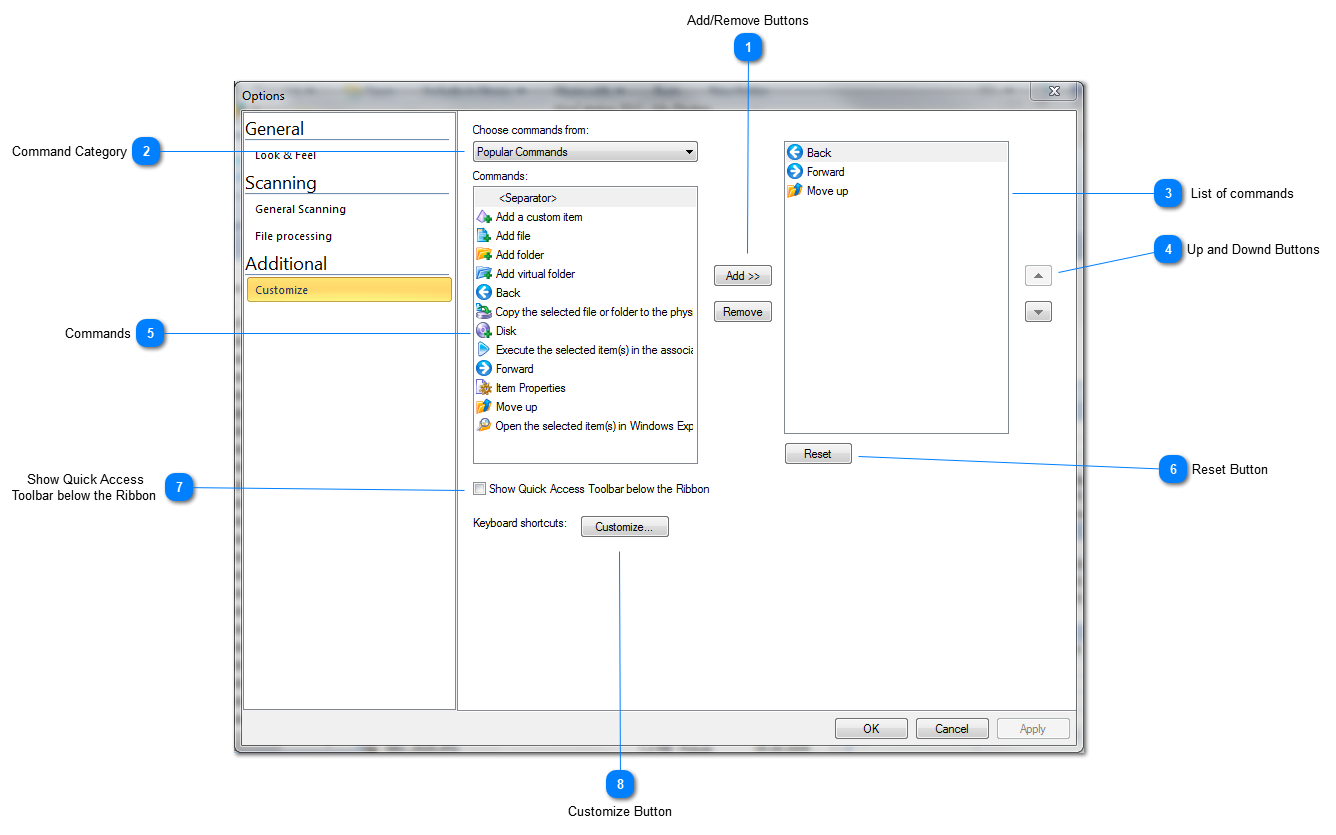
Add/Remove Buttons

Use Add/Remove buttons to configure Quick Access toolbar
Top
Command Category

Select the command category to filter commands
Top
List of commands
List of commands in the Quick Access toolbar
Top
Up and Downd Buttons

Use up and down buttons to rearrange commands
Top
Commands
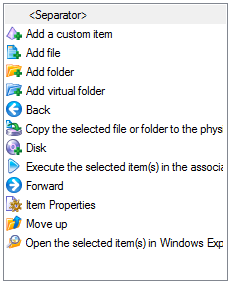
The list of all available command below the selected category
Top
Reset Button

Click Reset button to reset Quick Access toolbar to the default state
Top
Show Quick Access
Toolbar below the Ribbon

Mark this check box if you want to display Quick Access Toolbar below the Ribbon toolbar
Top
Customize Button

Click Customize Button to configure keyboard shortcuts
Top
Administrative
WinCatalog may save the scanning session to a log file or provides an ability to use ‘old’ scanning module that does not require Microsoft .NET Framework.
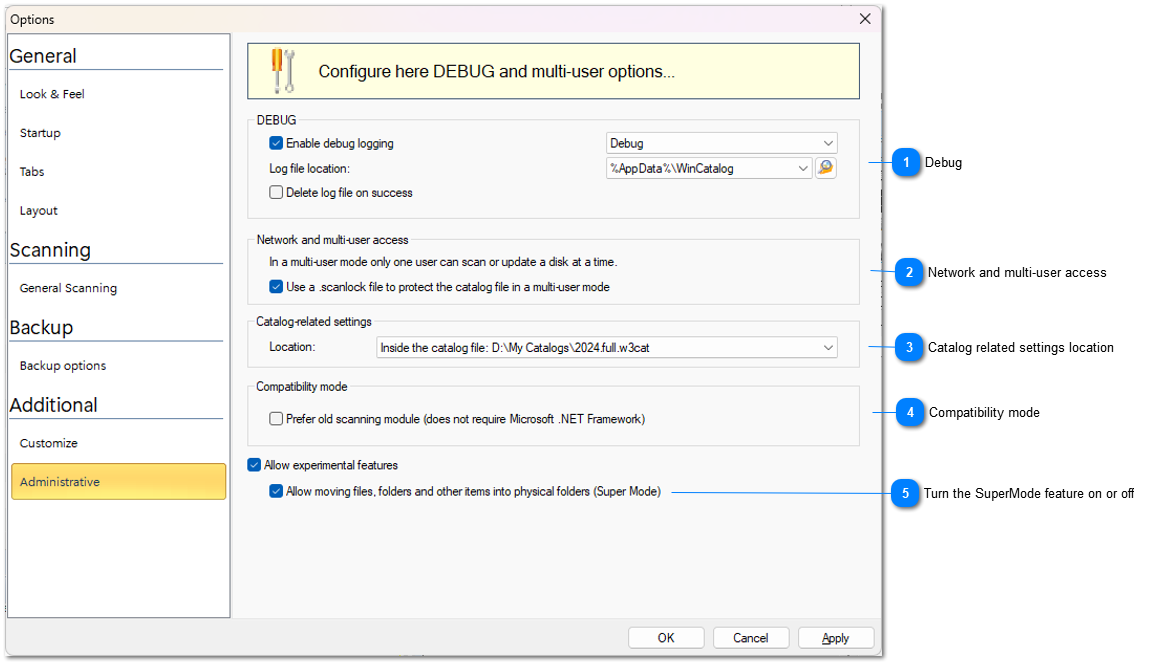
Debug

While scanning a disk or a folder, WinCatalog can save a log information about the scanning session.
If you experience any problems scanning a disk, please enable the debug logging, set logging level to “Debug” (as on the picture above) and the log file location to “Desktop” or “Documents” (if you click the Explorer button next to the value field, the selected folder will be open in Explorer). Unmark “Delete log file on success” option and start the scanning session.
Please recreate the error (and if WinCatalog freezes, please close it via the Task Manager) and then please send the log file to us for the investigations.
The log file does not contain any personal info, just the sequence of the called functions that may help us to detect a point of a crash. The log file is a simple text file, so you can open it using any text editor and check before sending.
If you’re sending a log file to us, please also include the .NET Framework information found in the field below.
Top
Network and multi-user access

The scanning module in WinCatalog is implemented as a separate process. And every time it starts scanning, it creates a simple text file next to the catalog file where it puts locking info. When the scanning is finished, the scanning module deletes the lock file.
You can see that it is named as your catalog file, but with the .scanlock extension.
This functionality was added to prevent running several scanning processes simultaneously, especially when the catalog file is shared between several users.
Sometimes, if the scanning or updating processes were unexpectedly terminated, WinCatalog may not be able to delete the .scanlock file and display “Catalog file is locked” warning next time you add or update a disk. If you are the only person who use WinCatalog, it is safe to click “Continue anyway” to start a new scanning session. Otherwise, you should remember that someone else may currently have an active scanning sesstion.
If you are the only person who works with WinCatalog, you can turn this feature off.
Top
Catalog related settings location

The catalog-related setting is metadata that can be stored inside the catalog file, or outside in a separate file. This metadata contains, for example, the date of the last backup or parameters of the last search. If you store your catalog file in a cloud folder, and if the catalog-related settings are inside the file, every search will cause new synchronization via the cloud folder (because the catalog file changes). Storing this info outside the catalog file helps to significantly reduce the size of cloud synchronization.
Top
Compatibility mode

If you don’t have .NET Framework 3.5 or higher installed on your computer you still can use WinCatalog with an old scanning module that does not require any .NET Framework, but missing some new features like e-book processing.
Top
Turn the SuperMode feature on or off
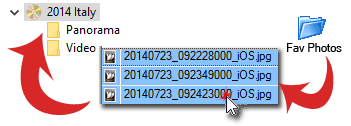
The experimental feature: SuperMode. Previously you could move any item (file, disk or folder) from real (yellow) folders to virtual (blue) folders. Now with SuperMode you can move any item (even non-file one) to any folder. This feature can be helpful, if you want to move previously moved files and folders back to their original location.
If you don’t see this checkbox, mark the “Allow experimental features” option.
Top
File Operation Queue
WinCatalog provides an ability to delete real files and folders from disks.
DISCLAIMER
PLEASE BE CAREFUL , this is the very dangerous feature, use it on your own risk and responsibility. We implemented TWO confirmation messages before you delete your files, but, once again, please be careful and review what you’re intending to delete before processing the Queue in order not to lose something important.
General information
When you remove entries from the catalog, WinCatalog provides the optional ability to delete real files from the disks.
The files you delete may be located in various disks and some of them may not be connected to your computer at the moment, that is why the deletion process consists of two steps.
On the first step, you just mark files for deletion and add them to the File Operation Queue to delete them later.
On the second step - you explicitly click the Start button in the File Operation Queue and WinCatalog performs the real file operations - moving to the Recycle Bin, or deleting permanently: depending on your preferences - asking you to connect missing disks.
How to delete real files from WinCatalog
Step 1
Select a file, a folder or several entries in WinCatalog. This works both for Search results (for example, after finding duplicates) and for the main grid view when you browsing your catalog file. Then hit Delete as usually.
You will see the delete confirmation prompt - exactly the same as previously, but containing one more option - “Delete the real files and folders from the disk(s)”.
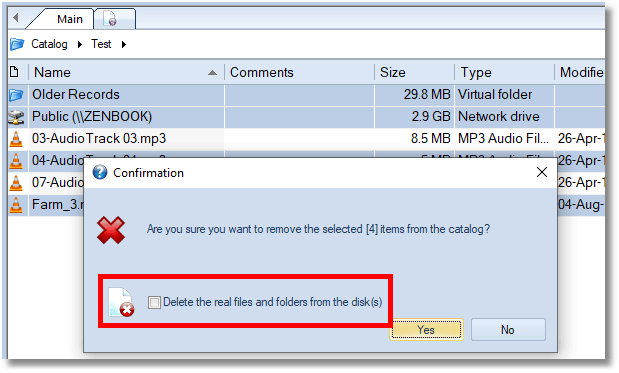
On this step, if you click Yes without marking the “Delete the real files and folders from the disk(s)” option, WinCatalog will just remove the selected entries from the catalog. The real files and folder will not be touched and the changes will be made in the catalog file only. This behavior wasn’t changed in comparison to the previous version.
If you click “Delete the real files and folders from the disk(s)” checkbox, another window will popup where you can review the entries you selected and add them to the File Operation Queue for processing the Queue later.
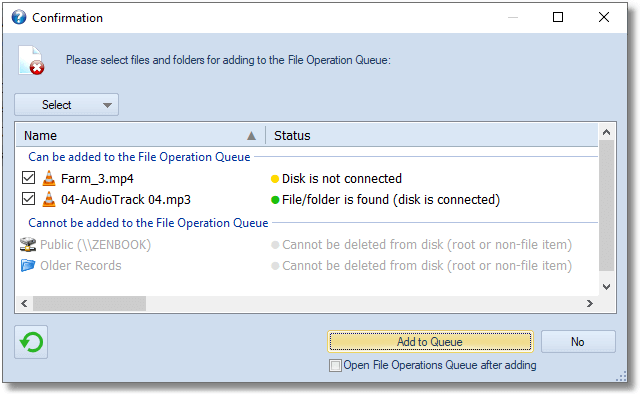
On the screenshot above you can see 4 entries having 3 different statuses and only 2 of them can be added to the File Operation Queue.
In this example, the network drive and the virtual (blue) folder cannot be added to the File Operation Queue because the network drive cannot be deleted (it is the Root entry), and the virtual (blue) folder is a non-file entry, meaning that it exists in the catalog only and does not have a representation in the real file system.
The full explanation of Groups and Status column can be found here.
Review and mark entries you want to add to the File Operation Queue and click Add to Queue. The Confirmation windows will close. If you marked “Open File Operation Queue after adding”, the File Operation Queue window will popup immediately. Otherwise, you will have to click the File Operation Queue button in the bottom right corner of the Main window to open the Queue.
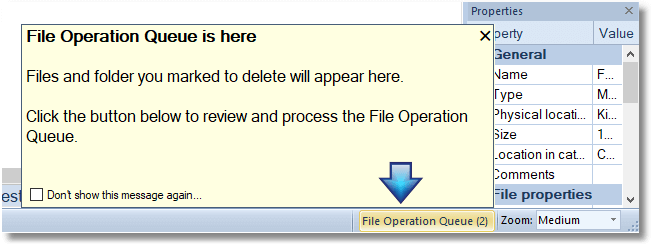
The number is the brackets means the number of entries in the File Operation Queue. If the Queue is empty, no number is shown.
Entries added to the File Operation Queue is marked by a Cross icon and displayed in grey color until deleted or removed from the Queue.
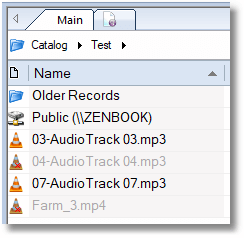
Step 2
Click the File Operation Queue button in the bottom-right corner of the Main window to open File Operation Queue.
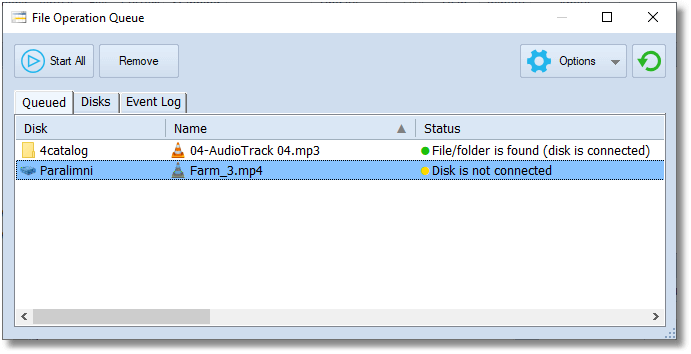
Here you can review the files and folders to be deleted, open properties of any entry or remove the selected entries from the Queue (without deletion from disk). Make a right mouse click on the selection and hit Properties to see the item properties or Remove to remove the entry from the Queue. You can also hit the Remove button to remove entries.
Follow to the Disks tab to see which disks are involved in the file operations planned for the File Operation Queue. Here you can see which disks you need, quickly inspect most important properties, including locations, or open the detailed properties by clicking the (I) button, or via the context menu:
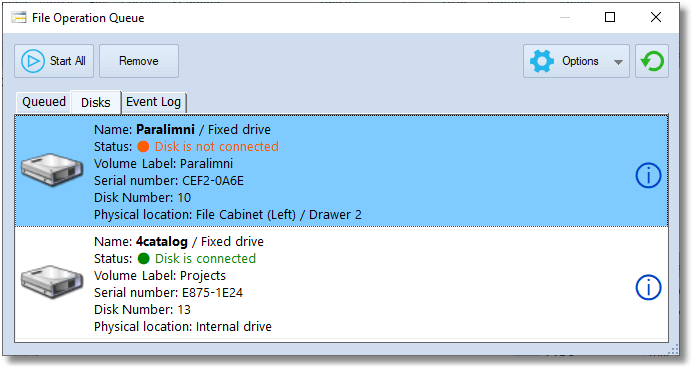
Click the Options button to select if you want to move the entries to the Recycle Bin (this is the default option) or delete them permanently.
Check everything twice and click Start All when you’re ready. The File Operation Queue will be processed: WinCatalog will try to process entries from the connected disks, then it will display a prompt to connect missing disks and will start over until the Queue contains any entries without errors or until you stop the processing by clicking the Cancel button in the progress window.
Entries successfully deleted from disks will also be automatically deleted from the catalog.
After the execution, you can inspect the Event Log to see which entries were deleted successfully or if any errors occurred. The Event Log is saved automatically in the catalog. Use the context menu to clear the log, copy lines to the Clipboard or save to a text file.
Groups and Status Column
There are 2 groups and 5 statuses for entries shown in the Delete Confirmation window.
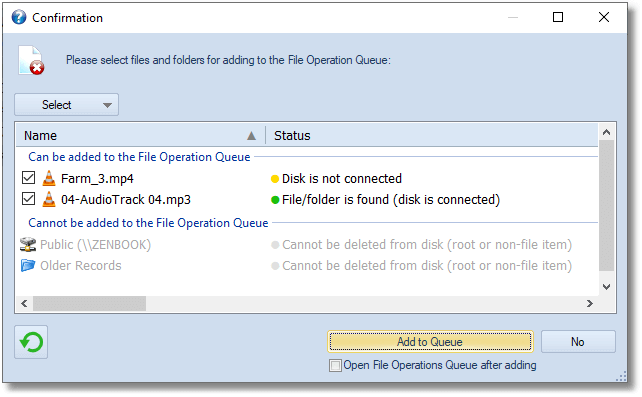
Groups
Can be added to the File Operation Queue
Entries located in this group can be added to the File Operation Queue and be deleted from disk(s) later.
Cannot be added to the File Operation Queue
Entries located in this group can not be added to the File Operation Queue because they cannot be deleted from the disks. This group contains root/disk records that cannot be deleted, files/folders located inside archives (WinCatalog can’t delete them), and non-file elements (virtual (blue) folders, tags, contacts, locations) - these elements exist in the catalog only and do not have a representation in the file system.
The Status Column
The Status column contains the explanation of the status for every entry in the File Operation Queue or in the Confirmation Window.
File/folder is found (disk is connected)
The disk containing the file or folder is currently connected to the computer and the file/folder is found on the disk. The file/folder can be deleted when processing the File Operation Queue.
File/folder is inside an archive
The file or folder is located inside an archive. WinCatalog cannot delete files and folders from archives, that is why it does not allow adding entries having this status to the File Operation Queue.
File/folder is NOT found (disk is connected)
The disk containing the file or folder is currently connected to the computer, but the file or the folder is not found. It may be already deleted, moved or renamed. WinCatalog allows adding entries having this status to the File Operation Queue, but an attempt to process the File Operation Queue will be finished with the error - file/folder not found.
Cannot be deleted from disk (root or non-file item)
If the entry is the disk root record (on the picture above you can see the Network drive has this status), it cannot be deleted. If the entry is the non-file item (virtual (blue) folder, custom item, tag, contact, or location), it exists in the catalog only and does not have a representation in the File System. WinCatalog does not allow adding these entries to the File Operation Queue
Disk is not connected
The file or folder can be deleted from the disk (it is not the root record and is not inside an archive), but WinCatalog can’t check if the file/folder exists. You can add this entry to the File Operation Queue, but you need to connect a drive to process the Queue.
User-Defined Fields
Using WinCatalog you can assign any number of text fields to any entry, this functionality is called User Defined Fields.
The functionality of the User-Defined Fields extends WinCatalog and allows adding any number of text columns to any entry (and even show these columns in the grid view).
Disclaimer: The functionality of User Defined-Fields is far from been perfect in the current version and will be reconsidered in the upcoming major update. The main conception remains the same, but it will be much easier to add, remove, and modify the fields.
Explanation of User-Defined Fields
Each field may contain any text data (it can’t add lists, checkboxes, images, or other types of data, this functionality is planned for future updates).
Only one set of fields is available on the catalog level. Each entry in the catalog has the same set of User-Defined Fields, but if you didn’t explicitly assign any value to the particular entry, the value of the field for this entry is empty and the field doesn’t show up in the list of fields for this particular entry.
After adding a new entry to your catalog, please make a right mouse click on the entry, and click Properties. Follow to the User-Defined Fields tab. If you didn’t assign any field to this entry before, the list of fields will be empty. Later, all fields having values for this entry will appear there.
Click the Add button to assign a field to the selected entry. You will see the “Add new field” window. Type a field name, or select it from the dropdown list (if you already have user-defined fields in your catalog, all fields will be available there), and then type or paste a text value into the Value field. Click OK. Do the same for other fields, and then click OK in the Properties window to save changes. Move to another entry and repeat these steps.
There are 5 user defined fields on the screenshot below assigned to a software product folder: Date Purchased, Price Paid, License Expire Date, License Key, and Rating):
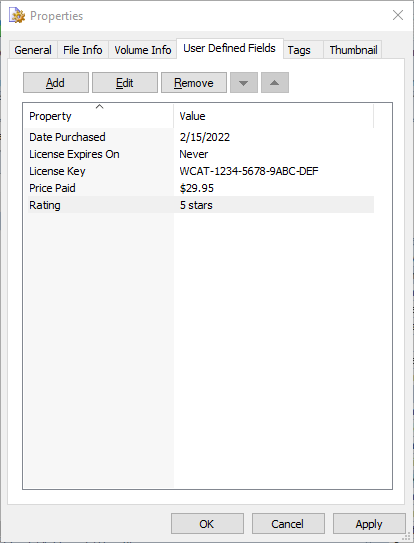
To get the full list of all fields for the catalog file, please click the Manage User Defined-Fields button on the Managing tab of the Ribbon toolbar. The Header field is what you see on the User-Defined Fields in the Properties dialog (you can use any caption you wish, for example, “Details”).
After adding one or more custom fields, you can add columns to the Grid View that will display values stored in these fields. Click the Gear button in the header area of the Name column, you will see the full list of all available columns. Scroll down (all columns for user-defined fields are located at the end of the list), and mark the newly created column.
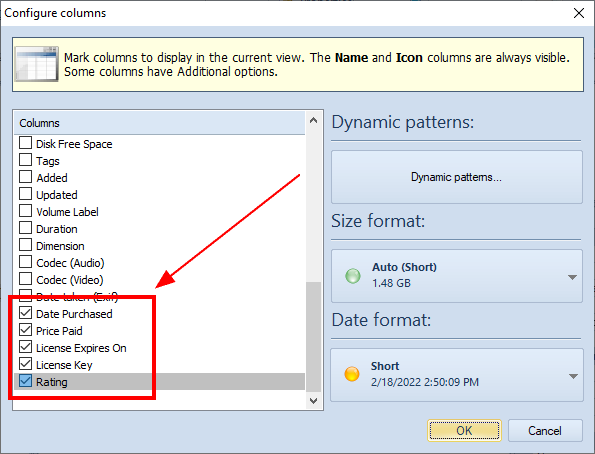
Click OK and the column will appear in the rightmost position. You can drag it to any position you want, change the width of the column. If you click on the column header, entries will be sorted by the values of this column.
Read more: Configure columns in the Grid (detailed) View
If you want to use values stored in User-Defined Fields when searching, you should mark the penultimate row of the additional search options named after the Header value of your fields (“User Defined Fields”, by default, or “Details” in the example above). Then type a part of the string to search, and click Search. The additional search options work as filters. First, WinCatalog finds all entries matching the search query entered into the Search field (on top), and then it filters results according to these additional search options.
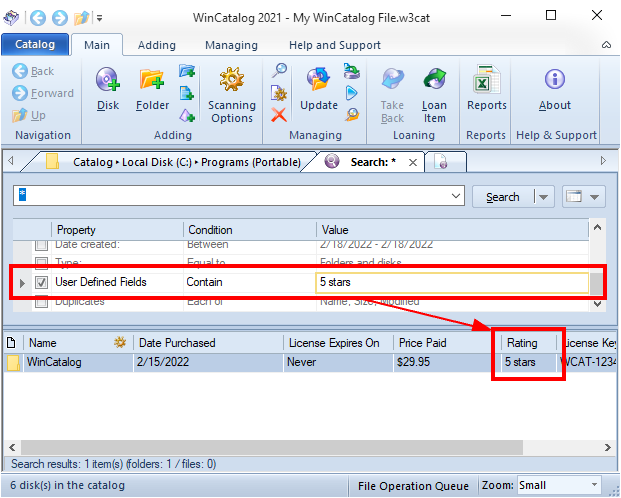
User-Defined fields may be extremely helpful when you catalog non-file items. Imagine, you have a collection of coins, pins, postge stamps, Lego sets, or anything else. Use custom items (purple pyramid icon) to represent each item of your collection, create coin-specific columns and fill them in. Consider user-defined fields as a spreadsheet, but more powerful.
Adding from the Internet
You can add information about Audio releases from the Internet without the need to insert discs into the dive. Type a part of the artist name, release title, or a barcode, and click Search, then select a release in the search results and add it to the catalog. The current version supports MusicBrainz.org, we plan to extend it to support other online sources.
This is an experimental feature, by using it you agree that it may need to be improved in future releases.
To start adding Audio Releases from the Internet, click the From Internet button on the toolbar:
You’ll the the window where you can search for Audio Releases. In the screenshot below you can see an example of searching for Audio Releases using the “take five” search query (without quotes), displaying The Dave Brubeck Quartet, where the CD1 from 3 is added to the catalog.
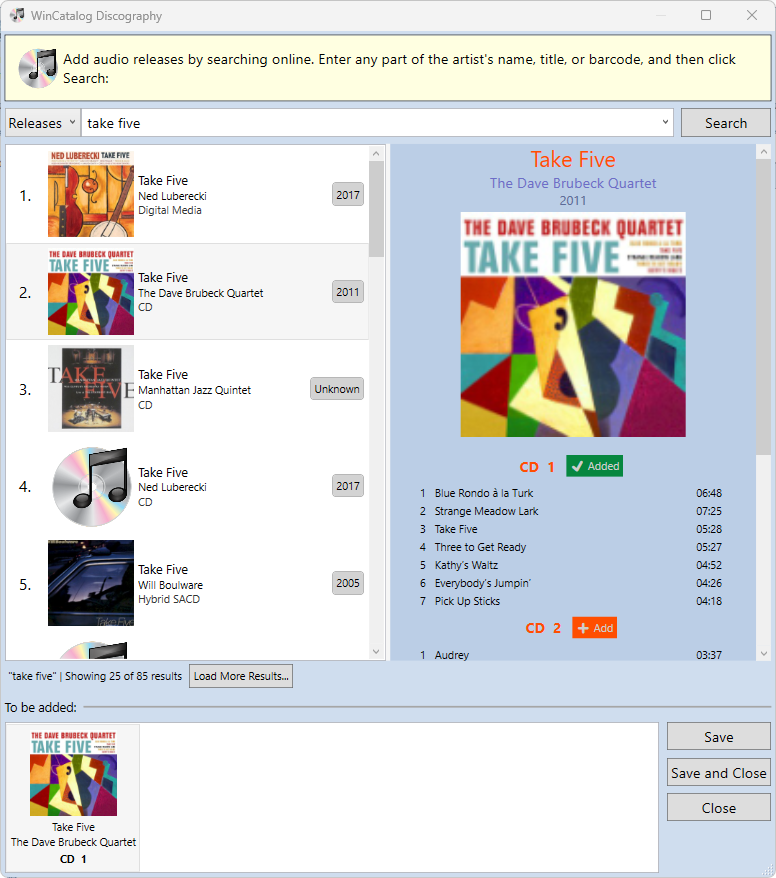
Read more: Searching for Artists, Searching for Audio Releases
Searching for Artists
Searching for Audio Releases by searching for an Artist is similar to Searching for Audio Releases but with one extra step.
To add Audio Releases by searching for an Artist, click the From Internet button on the toolbar, switch the Search Type to Artists, type a search query, and click Search.
WinCatalog will search for artists matching the entered query and the number of the associated Audio Releases. If more than one Artist has releases matching the query, You’ll see the Multiple Results window asking you to select the Artist. Otherwise, WinCatalog will start downloading Audio Releases matching the query. In the screenshot below, there are 4 artists matching the “celentano” search term, including Adriano Celentano with 231 releases, Sam Celentano, Valerio Celentano, and Halfway Home, all with one Release. Halfway Home is associated with Frank Celentano, that’s why it is on the list.
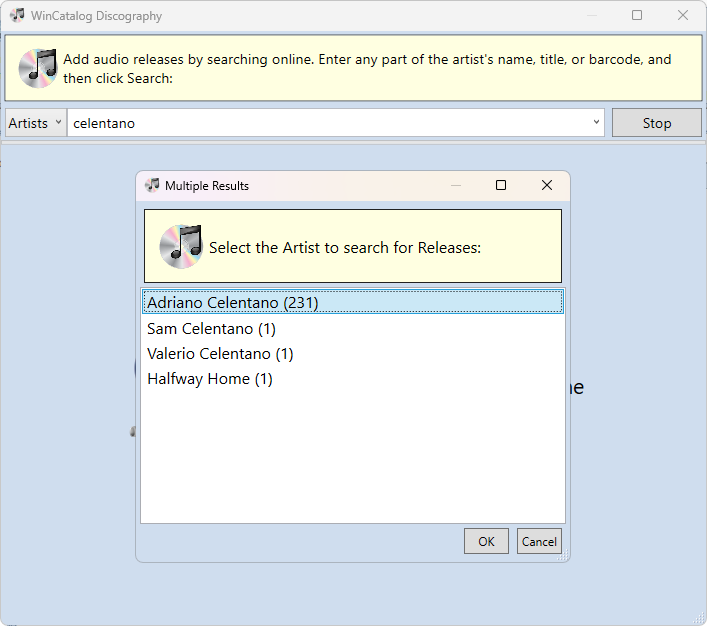
Search results:
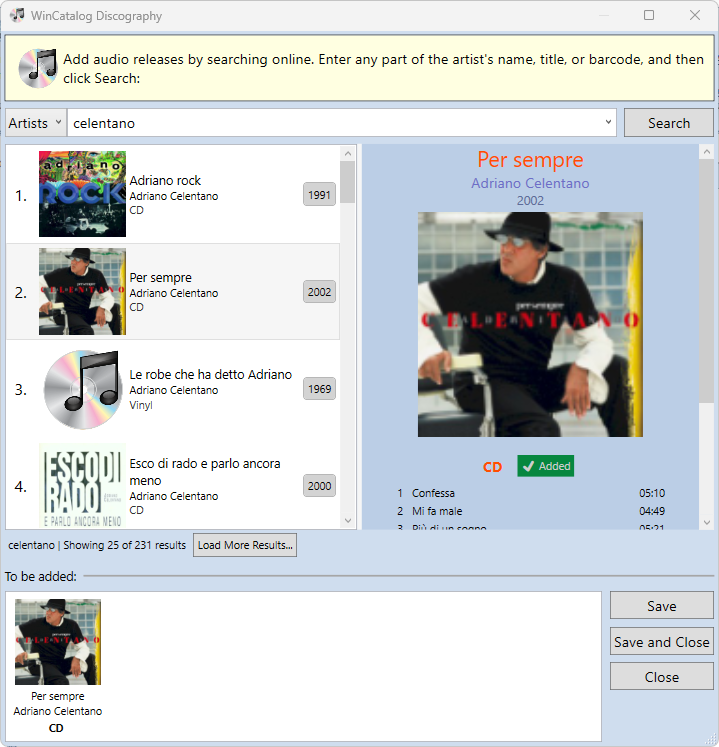
Select Audio Release on the left and inspect the details on the right. All media associated with the Release will be listed on the right pane. Click the Add button to add the correspondent media to the catalog. The added media will be shown at the bottom Basket view. Click Save to save changes, Save and Close to save changes and close the window, or Close to close the window without saving.
To remove the Audio Release from the Basket view hover the mouse over the release and click the hovering Delete button.
Useful tip: if you know the MusicBrainz ID of the artist, you may enter it as the search query in the following format: “arid:{musicbrainz-id}” or just “{musicbrainz-id}” (without quotes) and get the list of the associated releases. For example, for the following search queries “arid:arid:a530492f-8806-4bd7-9c14-80c237eb92fe” or “a530492f-8806-4bd7-9c14-80c237eb92fe” you’ll get the list of Audio Releases associated with The Cat Empire:
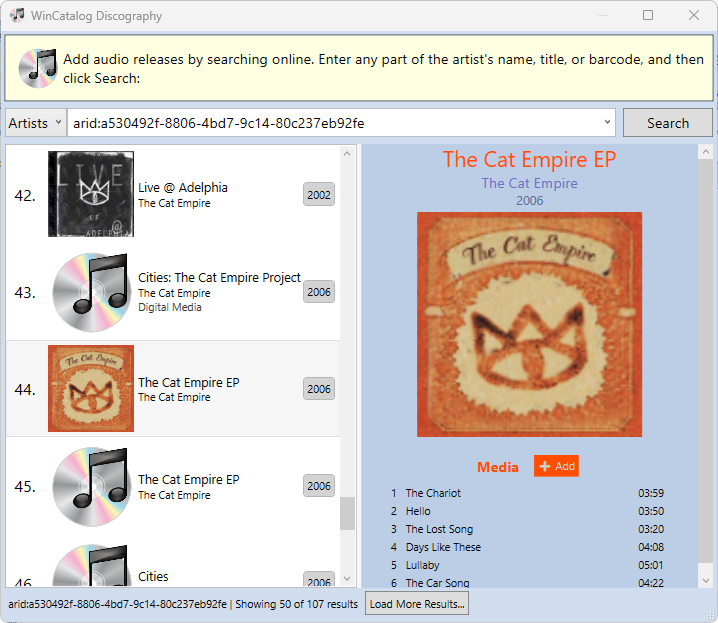
Read more: Searching for Audio Releases
Searching for Audio Releases
Searching for Audio Releases is similar to Searching for Artists.
To add Audio Releases, click the From Internet button on the toolbar, switch the Search Type to Releases, type a search query, and click Search. The search query may be a part of the release title, or a barcode, however not all releases have the barcode information in the MusicBrainz.org database.
WinCatalog will search for releases matching the entered query and display up to 25 releases at a time. Click the Load More Results button to load more results matching the query if needed.
In the screenshot below, there are releases matching the “take five” (without quotes) search term:
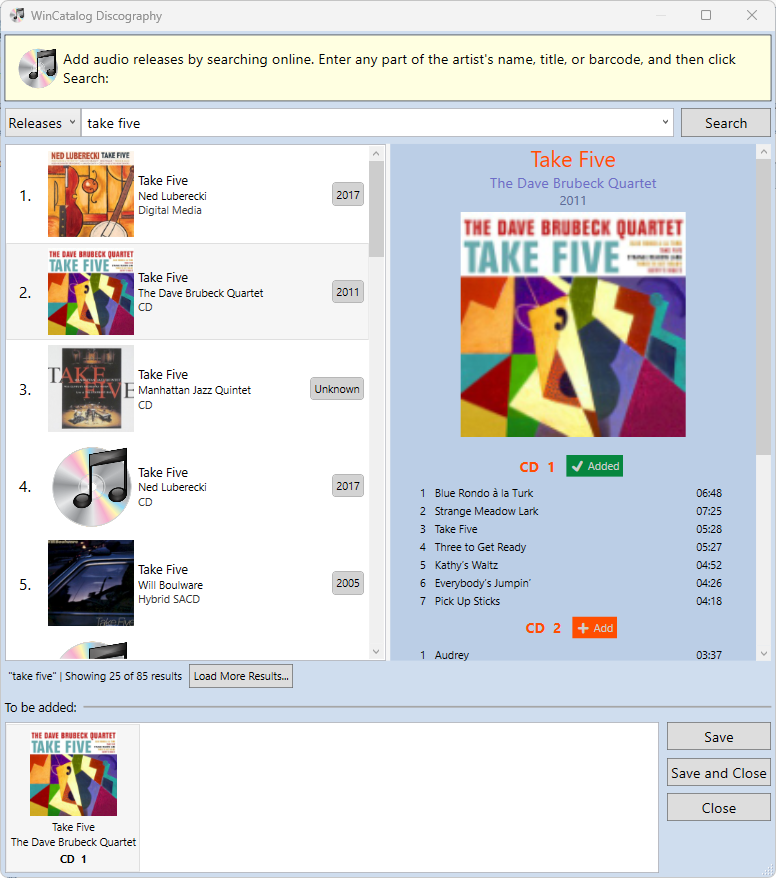
Select Audio Release on the left and inspect the details on the right. All media associated with the Release will be listed on the right pane. Click the Add button to add the correspondent media to the catalog. The added media will be shown at the bottom Basket view. Click Save to save changes, Save and Close to save changes and close the window, or Close to close the window without saving.
To remove the Audio Release from the Basket view hover the mouse over the release and click the hovering Delete button.
Useful tip: if you know the MusicBrainz ID of the release, you may enter it as the search query in the following format: “reid:{musicbrainz-id}” or just “{musicbrainz-id}” (without quotes) and get the list of the associated releases. For example, for the following search queries “reid:26ae66aa-1065-4bfd-baa7-af6c865e7ea4” or “26ae66aa-1065-4bfd-baa7-af6c865e7ea4” you’ll get the Space Oddity by David Bowie:
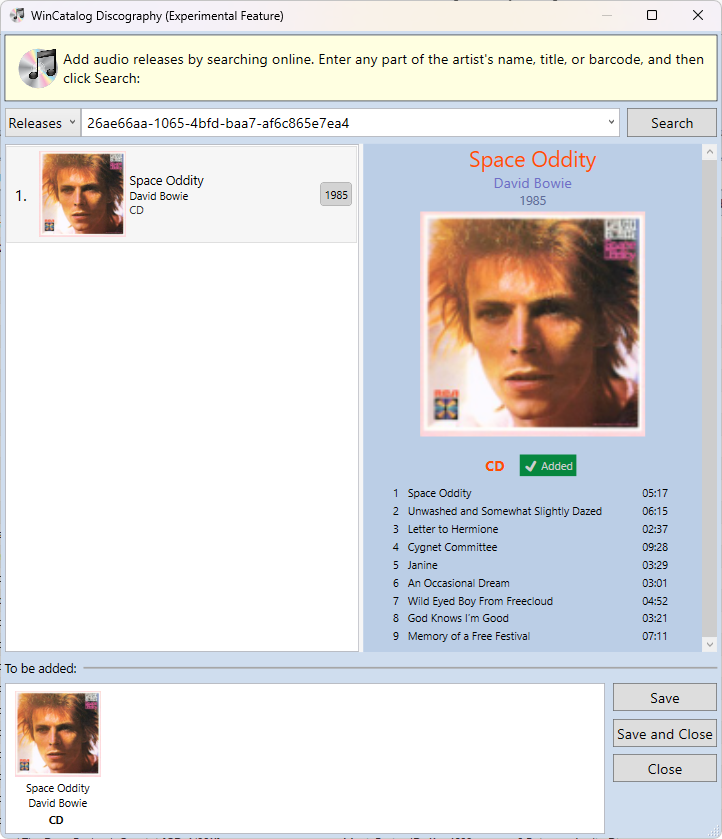
Read more: Searching for Artists
Generating Reports, Printing and Exporting Data
Some features from this article are available in WinCatalog Professional license. Details: Difference Between Personal and Professional Licenses
Using WinCatalog 2026, you can export a part of your catalog file into a CSV (for opening in Excel, PRO Feature), an HTML (for printing or publishing), a multi-page HTML (for publishing), or XML (for data exchange, PRO Feature). The export functionality is called Reports.
How to generate reports based on custom set of folders
To generate a report please click the Catalog button (left from the Main tab or the Ribbon toolbar) and then click Reports.
Configure the report type and other options, select Custom Set of Folders in the Data Source , then fill the report with items you want to export and click Save Report to save the results.
Please note that you can change the depth of included sub-items using the Included Subitems column:
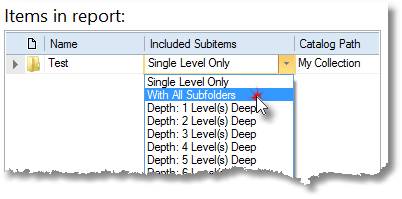
How to generate reports based on search results
To generate a report please click the Catalog button (left from the Main tab or the Ribbon toolbar) and then click Reports.
Please select HTML or CSV as a report type (CSV and XML are available in WinCatalog 2026 Professional), configure columns and other options, then switch the Data Source option from Custom Set of Folders to Search Results , this will show you an empty search form. Perform a search, and when the search is complete, click Save Report to save the report into the selected file format (CSV or HTML). WinCatalog will ask you for a filename and will save the results into that file.
The reports are also available from the Ribbon toolbar:
Moving WinCatalog to a New Computer
You do not need to deactivate WinCatalog on your old computer, but if you want to do this, you may just uninstall it.
To move WinCatalog to you new computer please perform the following steps.
-
Download and install the latest version of the trial edition of WinCatalog to your new computer and activate it using your registration key. You can download WinCatalog here: http://www.wincatalog.com/thankyou.html
-
Copy or move your existing catalog file from your old computer to the new one. If you do not know where your catalog file (or files) is located, please run WinCatalog on your old computer, this will open most recently used catalog file. Click the Catalog button (left from the Main tab of the Ribbon toolbar) and in the Catalog section you will see the full path to the currently opened catalog file. In the Recent section, you will see recently used catalog files (if any).
The Catalog button:
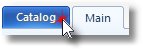
If you double click on the catalog name or file path (on top of the Catalog section), this will open the containing folder in Windows Explorer.
3. That’s it. After moving your catalog files to the new computer just run WinCatalog on the new computer and open these files (Catalog -> Open Existing).
Using WinCatalog as a Portable App
WinCatalog does not require any special installation (installer just copies necessary files to your computer). To use WinCatalog as a portable application, please just copy the entire WinCatalog folder from “Program Files (x86)” to your external hard drive or to a flash drive and run WinCatalog.exe to launch the app.
However, you should know that WinCatalog is not a real portable application and it stores the settings like a window position and the registration info in the Windows Registry. That is why you will be asked for a registration key when you run WinCatalog first time on a new machine (just once, on every next run it will use the stored registration info; and we do not limit you in a number of computers where you can use WinCatalog).
You should also know that WinCatalog uses SQLite database engine in the core and SQLite requires a lot of write operations when you populate your catalog file. Storing a catalog file on a flash drive may reduce scanning speed because usually flash drives work slowly than hard drives (even slower that the external drives).
Summarizing the above: yes, you can use WinCatalog on a flash drive, but the program’s speed may be slightly reduced. And it is recommended to keep the catalog files on an external drive connected via USB 3.0 (in order to increase the populating speed).
Command Line Support
This feature is available in WinCatalog Professional license. Details: Difference Between Personal and Professional Licenses
You can pass parameters as command line arguments to automate some basic tasks in WinCatalog 2026.
WinCatalog 2026 supports the following operations:
-
Opening existing catalog file;
-
Creating a new catalog file;
-
Adding a file, a folder or a drive to the catalog;
-
Updating previously added folder or drive;
-
Navigation into a folder in the catalog file;
-
Starting a new search.
Every command should begin with “-”, “/” or “:” (by your choice) without quotes. All commands and parameters are case insensitive, i.e. WinCatalog equally interprets the following commands:
-ExitWhenDone
-exitwhendone
Every command have full and short versions, both versions are equivalent, for example:
-ExitWhenDone
-ewd
Catalog Files Management
Opening Existing Catalog File
By default, if you start WinCatalog 2026 without command line parameters, it tries to open most recently opened catalog file. If you pass a filename as a single parameter, WinCatalog will try to open it. In other cases, use the -Open command (short version: -o or /o or :o):
-Open “catalog filename”
-o “catalog filename”
Creating a new Catalog File
For creating a new empty catalog file use -FileNew (-n). If the file exists, it will be opened without clearing the contents:
-FileNew “catalog filename”
-n “catalog filename”
The creation and opening commands are mutually exclusive; you can use only one of them at the same time. The opening and creation commands can be combined with other commands (updating, adding, navigation).
Working with Contents or the Catalog
This section describes command line keys and parameters used for Adding, Updating and Navigating the catalog file in WinCatalog 2026.
Adding a Disc, a Folder or a File
To add a drive, folder or file use the -AddNew (-add) key:
-AddNew
-add
Path to the drive, folder or file to add must be passed in the -FileSystemPath (-fsp) parameter.
-FileSystemPath “full path to drive / folder / file”
-fsp “full path to drive / folder / file”
Path to the parent folder in WinCatalog may be set in -CatalogPath (-cp) parameter:
-CatalogPath “path in the catalog”
-cp “path in the catalog”
If the -CatalogPath is not set or incorrect, new element (drive, folder or file) will be added to the root Catalog folder.
Use the key -CreatePathIfNotExist (-cne), if you want to create virtual folder from the -CatalogPath parameter:
-CreatePathIfNotExist
-cne
Use the key -ProfileId (-pid) with the numeric profile ID to select the scanning profile:
-ProfileId NN
-pid NN
Where NN is the numeric value of the scanning profile ID. The ID of the scanning profile may be found on top of the General Scanning Page for each scanning profile (see the screenshot below):
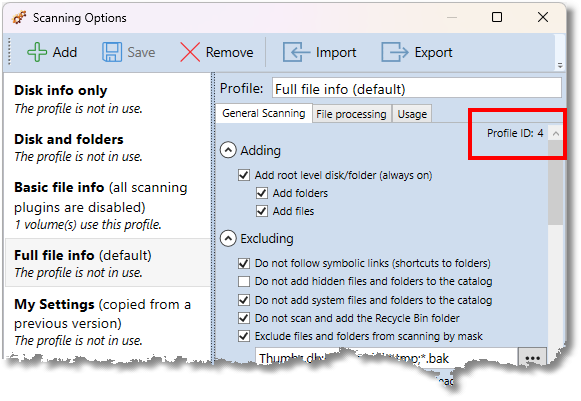
Examples:
WinCatalog.exe –Open “d:\my catalog.w3cat” –AddNew –FileSystemPath “E:\"
Start WinCatalog, open the catalog file “d:\my catalog.w3cat”, add drive E:\ to the root catalog folder. Please notice: the path ends by two slashes if you use quotes (the backslash at the end is interpreted as the start of an escape sequence, so single slash before the quote character will be interpreted as just a quote). The backslash at the end is not necessary - WinCatalog will add a backslash, so it is enough to pass just "E:".
WinCatalog.exe –o “d:\my catalog.w3cat” –AddNew –FileSystemPath “E:\Folder” -CatalogPath “Catalog\Folder\Sub Folder” –CreatePathIfNotExist
Start WinCatalog, open the catalog file “d:\my catalog.w3cat”, if not exists, create the “Catalog\Folder\Sub Folder” virtual (blue) folders, add the “Folder” from drive “E:" into “Catalog\Folder\Sub Folder”.
Updating a Disc, a Folder or a File
Use the -Update (-u) key to update a drive, folder or file in the catalog:
-Update
-u
Path in catalog to a drive, a folder or a file that you want to update should be passed in the -CatalogPath (-cp) parameter:
-CatalogPath “path in the catalog”
-cp “path in the catalog”
Important
1. The drive should be connected to the computer before running the command. Otherwise, WinCatalog will display the “Insert Disc” reminder and will wait for user action.
2. Path must start with the root folder. If the root folder is the Catalog, it is allowed to be skipped (“Catalog\Disk D” and “Disk D” are equal).
3. WinCatalog uses slashes “" as the delimiters for the catalog path components. If any of the components of the path contain a slash, a double slash, or a semicolon, it must be replaced by {@slash} for slash, {@dslash} for double slash, and {@semicolon} for semicolon.
4. You can pass more than one path in this parameter divided by semicolons.
Examples:
WinCatalog.exe –Open “d:\my catalog.w3cat” –Update -CatalogPath “Catalog\Folder\Sub Folder\My Music”
or
WinCatalog.exe –o “d:\my catalog.w3cat” –u -cp “Catalog\Folder\Sub Folder\My Music”
Start WinCatalog, open the catalog file “d:\my catalog.w3cat”, update the folder (or the disk) “Catalog\Folder\Sub Folder\My Music”
Example of the slashes replacement:
WinCatalog.exe –Open “d:\my catalog.w3cat” –Update -CatalogPath “Catalog\Folder\Public on {@dslash} Server”
or
WinCatalog.exe –o “d:\my catalog.w3cat” –u -cp “Catalog\Folder\Public on {@dslash} Server;Catalog\Folder\Public on {@dslash} Server;Catalog\Disk D”
Start WinCatalog, open the catalog file “d:\my catalog.w3cat”, update the network drive “Catalog\Folder\Public on \\Server”
Example passing several paths:
WinCatalog.exe –Open “d:\my catalog.w3cat” –Update -CatalogPath “Catalog\Folder\Public on {@dslash} Server;Catalog\Disk D”
or
WinCatalog.exe –o “d:\my catalog.w3cat” –u -cp “Catalog\Folder\Public on {@dslash} Server;Catalog\Disk D”
Start WinCatalog, open the catalog file “d:\my catalog.w3cat”, update the network drive “Catalog\Folder\Public on \\Server”, then “Catalog\Disk D”.
Update All / Update Connected
Note: You can also use the UI Tool to configure the -UpdateAll / -UpdateConnected command and run the process. Please read more here.
Update All
Use the -UpdateAll (-ua) key to update all drives, folder or files in the catalog:
-UpdateAll
-ua
Important
1. The -UpdateAll command cannot be used together with the -CatalogPath command; only one of these commands can be used at a time.
2. By default, the -UpdateAll command temporarily disables the Update Report to avoid interrupting the update process. If you want to display the Update Report after the update for each drive is complete, use the -UpdateReport Show command.
3. The -UpdateAll command prioritizes updating connected drives first. After completing updates for the connected drives, it will prompt you to connect any remaining unconnected drives for updates..
Examples:
WinCatalog.exe –Open “d:\my catalog.w3cat” –UpdateAll -ExitWhenDone -Log “D:\UpdateAll.log”
The command starts WinCatalog, open the catalog file “d:\my catalog.w3cat” and updates all drives in the catalog file and saves the log of the operations to “D:\UpdateAll.log”
Update Connected Drives
Use the -UpdateConnected (-uc) key to update all the connected drives, folder or files in the catalog:
-UpdateConnected
-uc
Important
1. The -UpdateConnected command cannot be used together with the -CatalogPath command; only one of these commands can be used at a time.
2. By default, the -UpdateConnected command temporarily disables the Update Report to avoid interrupting the update process. If you want to display the Update Report after the update for each drive is complete, use the -UpdateReport Show command.
Examples:
WinCatalog.exe –Open “d:\my catalog.w3cat” –UpdateConnected -ExitWhenDone -Log “D:\UpdateAll.log”
The command starts WinCatalog, open the catalog file “d:\my catalog.w3cat” and updates all the connected drives in the catalog file and saves the log of the operations to “D:\UpdateAll.log”
The UI Tool for Update All / Update Connected
You can use the UI tool to configure the UpdateAll / UpdateConnected command.
Click on the “WinCatalog 2026 Update All Command” shortcut in the Start Menu or run the “UpdateAllCommand.exe” from WinCatalog folder in Program Files (x86):

The UI Tool will start:
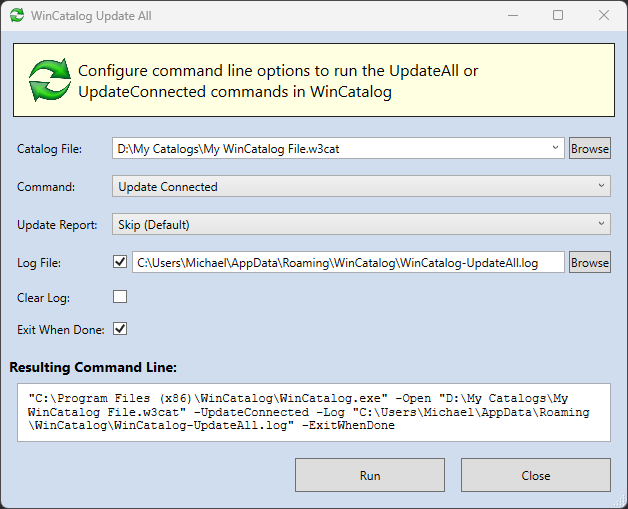
1. Catalog File: Choose the Catalog File to open from the dropdown list, or click the “Browse” button to select one manually.
2. Command: Select a command from the dropdown list. You can choose between two commands: “Update All” or “Update Connected.”
3. Update Report: Choose the Update Report option:
- Skip (default): The update report will not be displayed.
- Show: The update report will be displayed after updating each drive.
4. Log File: Check this box to enable logging. If logging is enabled, you must specify the path where the log file will be saved.
5. Clear Log: Check this box to clear the log file at startup. If unchecked, new log entries will be added to the existing log file.
6. Exit When Done: Check this box to automatically close WinCatalog when all operations are complete.
You can find the the resulting command line Resulting Command Line field. Copy it to run from a console, or click the Run button to run it right from the tool.
Simple Search
To start search use the -Search (-s) key:
-Search
-s
Search query to execute should be provided in the -SearchQuery (-sq) parameter:
-SearchQuery “search query”
-sq “search query”
Example:
WinCatalog.exe –o “d:\my catalog.w3cat” –s -sq “*.jpg”
Start WinCatalog, open the catalog file “d:\my catalog.w3cat”, open Search tab, find items (files, folders, etc) matching the “*.jpg” search query (without quotes).
Additional Search Parameters
In addition to the -Search (-s) key you can use the following keys and parameters:
Filtering by a catalog branch
Use the -CatalogPath (-cp) parameter to filter search results by a catalog branch:
-CatalogPath “path in the catalog”
-cp “path in the catalog”
Filtering results by file size
To filter search results by a file size use one of the following three parameters (important: parameters are mutually exclusive):
-SizeLessThan (-slt) - size should be less than provided (in kilobytes)
-SizeEqualTo (-seq) - size should be the same as provided (in kilobytes)
-SizeGreaterThan (-sgt) - size should be greater than provided (in kilobytes)
The size value should be passed as a number (of kilobytes):
-SizeLessThan 400 - size should be less than 400 kilobytes
-sgt 1024 - size should be greater than 1MB (1024KB is 1MB).
Filtering search results by date created, and date modified
To filter search results by a creation date use one of the following three parameters:
-DateCreatedBefore (-dcb) - created before the date, provided in the parameter
-DateCreatedOn (-dco) - created on the date, provided in the parameter
-DateCreatedAfter (-dca) - created after the date, provided in the parameter
To filter search results by a last modified date use one of the following three parameters:
-DateModifiedBefore (-dmb) - modified before the date, provided in the parameter
-DateModifiedOn (-dmo) - modified on the date, provided in the parameter
-DateModifiedAfter (-dma) - modified after the date, provided in the parameter
Date should be passed in a string format according to the Regional Settings (the value is set in the Windows Control Panel), or in the universal international format “DD-MM-YYYY” or “YYYY-MM-DD” where DD is the day (two digits number), ММ - month (two digits number), YYYY - year (four digits number).
-DateCreatedBefore 01-07-2015 - the creation date should be before July 1, 2015, date is provided in the universal international format
-dma 2/1/15 - date of last modification should be after February 1st, 2015 (English US date format).
Filtering search results by items type
To filter search results by type use one of the following keys:
-TypeFolders (-td) - find folders and disks
-TypeFiles (-tf) - find items that are not folders or discs (files, custom items, archives, etc)
Filtering search results by locations
To filter search results by locations use the -Locations (-l) parameter and pass the list of locations separated by commas or semicolons:
-Locations “Wallet 1; Red box”
-l “Wallet 1, Red box”
Filtering search results by tags
To limit search results by tags use one of the following parameters and pass the list of tags, separated by semicolons:
-TagsAny (-ta) - find items (files, folders, etc) linked with any of the provided tags;
-TagsEach (-te) - find items (files, folders, etc) linked with each of the provided tags;
-TagsNone (-tn) - find items (files, folders, etc) not linked with the provided tags.
Important: You can use the semicolon only to pass the list of tags (because automatically generated tags can contain commas, for example “Artist Last Name, Fist Name”
-TagsAny “Tag1; Tag2; Tag3”
-tn “tag5”
Finding duplicates
For finding duplicates use the -Duplicates (-dup) key and pass the list of the fields to compare as a parameter; several fields should be separated by commas or semicolons:
-Duplicates “Name, Size, Modified”
Field names can be specified in English only. Filed names should be exactly as in the list below. The full list of the supported fields:
-
Name - item name in the catalog
-
Modified - date modified (for files)
-
Created - date created (for files)
-
Size - size (for folders and files)
-
Filename - filename (for folder and files)
-
Width - width of the picture (from Exif tags)
-
Height - height of the picture (from Exif tags)
-
Date taken - date taken (from Exif tags)
-
Artist - name of the Artist (from ID3 tags)
-
Album - Album (from ID3 tags)
-
Title - Track title (from ID3 tags)
-
Length - Duration (from ID3 tags)
-
Year - Year of release (from ID3 tags)
-
Bit rate - bit rate (from ID3 tags)
-
Sample rate - sample rate (from ID3 tags)
-
Channels - number of channels (from ID3 tags)
-
MD5 - MD5 hash of the file
-
CRC32 - CRC32 checksum of the file
Examples:
WinCatalog.exe –o “d:\my catalog.w3cat” –s -sq “*.jpg”
Start WinCatalog, open catalog file “d:\my catalog.w3cat”, open a new search tab, start searching using the “*.jpg” (without quotes) as a search query.
WinCatalog.exe –o “d:\my catalog.w3cat” –s -sq “*.jpg” -cp “Catalog\Vacations” -tf -dcb “01-05-2015”
Start WinCatalog, open catalog file “d:\my catalog.w3cat”, open a new search tab, start searching using the “*.jpg” (without quotes) as a search query, filter search results by the “Catalog\Vacations” catalog branch and the creation date should be after May 1st, 2015.
Additional Commands
The additional commands that can be combined with other commands are described below.
Close WinCatalog
Adding and updating commands add be combined with the -ExitWhenDone (-ewd) key. In that case, WinCatalog will be closed after an operation is complete. The key can be combined only with -AddNew (-add) or -Update (-u) commands:
-ExitWhenDone
-ewd
Example:
WinCatalog.exe WinCatalog.exe –o “d:\my catalog.w3cat” –u -cp “Catalog\Folder\Sub Folder\My Music” -ewd
or
WinCatalog.exe WinCatalog.exe –Open “d:\my catalog.w3cat” –Update –CatalogPath “Catalog\Folder\Sub Folder\My Music” –ExitWhenDone
Start Wincatal, open the catalog file “d:\my catalog.w3cat”, update the folder (or the disk) “Catalog\Folder\Sub Folder\My Music”, exit WinCatalog when the operation is complete.
Log File
WinCatalog does not display command line error messages (error example: “catalog path not found”). However, error messages can be saved into a log file using the -LogFile (-log). The parameter of the command is the full path to the log file:
-LogFile “full path to the log file”
-log “full path to the log file”
The -LogFile (-log) command can be combined with the -LogClear (-lc) key. In that case, the contents of the log file will be cleared on every next run.
-LogClear
-lc
Example:
WinCatalog.exe –o “d:\my catalog.w3cat” –AddNew –FileSystemPath “E:\Folder” -CatalogPath “Catalog\Folder\Sub Folder” –CreatePathIfNotExist –LogFile “d:\WinCatalog.log”
Start WinCatalog, open the catalog file “d:\my catalog.w3cat”, if not exists, create the “Catalog\Folder\Sub Folder” virtual (blue) folders, add the “Folder” from drive “E:" into “Catalog\Folder\Sub Folder”, save all messages to “d:\WinCatalog.log”.
WinCatalog.exe –o “d:\my catalog.w3cat” –add –fsp “E:\Folder” –log “d:\WinCatalog.log” -lc
Start WinCatalog, open the catalog file “d:\my catalog.w3cat”, clear the log file “d:\WinCatalog.log”, add the “Folder” from drive “E:" into the root Catalog folder, save all messages to the log file.
Full List of Commands
Commands Without Parameters
-ExitWhenDone / -ewd - Close WinCatalog when operation is completed.
-CreatePathIfNotExist / -cne - If not exists, create a path of virtual (blue) folders.
-LogClear / -lc - Clear the log file before opening (otherwise messages will be appended).
Commands with Parameters
-Open / -o - open a catalog file (parameter: path to the file to open).
-FileNew / -n - create a new catalog file or open if exists (parameter: path to the file to create).
-LogFile / -log - write error/info messages to a file (parameter: path to the log file).
Commands Getting Parameters from other Parameters
-AddNew / -add - add a new folder or disk from a file system.
Parameters: -FileSystemPath, -ProfileId, -CatalogPath (optional, default is the root entry of the catalog file) .
-Update / -u - update a disk or a folder.
Parameters: -CatalogPath
-ShowInCatalog / -sic - open a catalog folder in WinCatalog.
Parameters: -CatalogPath
-Search / -s - Start a search.
Parameters:
-SearchQuery,
-CatalogPath (optional),
-SizeLessThan / -SizeEqualTo / -SizeGreaterThan (optional),
-DateCreatedBefore / -DateCreatedOn / -DateCreatedAfter (optional),
-DateModifiedBefore / -DateModifiedOn / -DateModifiedAfter (optional),
-TypeFolders / -TypeFiles (optional),
-Locations (optional),
-TagsAny / -TagsEach / -TagsNone (optional),
-Duplicates (optional).
Parameters for other commands
-CatalogPath / -cp - path in the catalog.
-
Path must start with the root folder. If the root folder is the Catalog, it is allowed to be skipped (“Catalog\Disk D” and “Disk D” are equal).
-
You can pass more than one path in this parameter divided by semicolons.
-
WinCatalog uses slashes “" as the delimiters for the catalog path components.
-
If any of the components of the path contain a slash, a double slash, or a semicolon, it must be replaced by {@slash} for slash, {@dslash} for double slash, and {@semicolon} for semicolon.
-SearchQuery / -sq - search query for -Search command.
-ProfileId / -pid - the ID of the scanning profile to use for the AddNew operation. The ID is the numeric value and may be found on top of the General Scanning page for each scannin profile.
-FileSystemPath / -fsp - path in the file system. A backslash at the end is optional.
-SizeLessThan / -SizeEqualTo / -SizeGreaterThan - size filter for -Search command.
-DateCreatedBefore / -DateCreatedOn / -DateCreatedAfter - creation date filter for -Search command.
-DateModifiedBefore / -DateModifiedOn / -DateModifiedAfter - modified date filter for -Search command.
-TypeFolders / -TypeFiles - type filter for -Search command.
-Locations - locations filter for -Search command.
-TagsAny / -TagsEach / -TagsNone - tags filter for -Search command.
-Duplicates - duplicates filter for -Search command.
-UpdateReport / -ur show or skip Update Report (the list of added, deleted, and modified files) at the end for the updating process; values [skip|show]
-ScanErrors / -se show or skip Scan Errors and Warnings at the end for the scanning process; values [skip|show]
Experimental Features
Moving items from virtual (blue) to physical (yellow) folders
By default all the drag and drop operations are limited by virtual folders: you can move files from disks and physical folders to virtual folders, but cannot move them back. The following command enables the Super Mode allowing you to move any item (file, folder, disk, non-file item) to any folder in WinCatalog.
Use the -SMode (-sm) command to turn the mode on or off:
-SMode “on”
-sm “on”
The Super Mode command uses one of the following three parameters (important: parameters are mutually exclusive):
on - switch the mode ON permanently
off - switch the mode OFF permanently
tmp - switch the mode ON temporarily (the mode will be ON during one program session and will be turned OFF after exiting WinCatalog).
Example:
WinCatalog.exe –sm on
Start WinCatalog, open the most recently used catalog file and turn the Super Mode on.
WinCatalog.exe –smode off
Start WinCatalog, open the most recently used catalog file and turn the Super Mode off.
WinCatalog.exe –SMode tmp
Start WinCatalog, open the most recently used catalog file and turn the Super Mode temporarily on (for one program session).
Examples of Command Files
Example of a command file (add-drive.cmd):
@echo Adding Disk E:\ to the Catalog
@set wcat=“C:\Program Files (x86)\WinCatalog\WinCatalog.exe”
@call %wcat% -Open “D:\My Catalog.w3cat” -Add -FileSystemPath “E:” -CatalogPath “Catalog\Backups”
Explanation
-
Print the “Adding Disk E:\ to the Catalog” message;
-
Copy path to WinCatalog executable into the wcat variable;
-
Start WinCatalog, open the catalog file “D:\My Catalog.w3cat”, add disc E: into the “Catalog\Backups” catalog folder.
Another example of a command file (update-folder.cmd):
@echo Updating folder T:\Documents to the Catalog
@set wcat=“C:\Program Files (x86)\WinCatalog\WinCatalog.exe”
@call %wcat% -Open “D:\My Catalog.w3cat” -Update -CatalogPath “Catalog\2019\Documents” -ExitWhenDone
Explanation
-
Print the “Updating folder T:\Documents to the Catalog” message;
-
Copy path to WinCatalog executable into the wcat variable;
-
Start WinCatalog, open the catalog file “D:\My Catalog.w3cat”, update the “Catalog\2019\Documents”, exit when operation is completed.
Updating 3 folders one-by-one (update-3-folders.cmd):
@echo Updating 3 folders
@set wcat=“C:\Program Files (x86)\WinCatalog\WinCatalog.exe”
@call %wcat% -Open “D:\My Catalog.w3cat” -Update -CatalogPath “2019\Documents;2019\Photos;Public on {@dslash}Server” -ExitWhenDone
Explanation
-
Print the “Updating 3 folders” message;
-
Copy path to WinCatalog executable into the wcat variable;
-
Start WinCatalog, open the catalog file “D:\My Catalog.w3cat”, update 3 folders one-by-one: “Catalog\2019\Documents”, “Catalog\2019\Photos”, “Catalog\Public on \\Server”, exit when operation is completed.
-
Please note that in this example the name of the root folder (“Catalog”) is skipped, double slash is replaced by {@dslash}.
Troubleshooting
If you forced with any problem in WinCatalog, please ensure that you’re using the latest version of WinCatalog.
You can always download the latest version here: https://www.wincatalog.com/download.html
After Modifying Processing Options
By default, to expedite updates, WinCatalog only refreshes files that have changed since the last scan when updating a disk or folder. This means if you alter processing options or switch scanning profiles, only newly modified files will be recognized and updated.
To ensure all files are updated, you’ll need to temporarily disable this default behavior. To do this, click on the “Scanning Options” button located on the toolbar. Then, choose the “Full file info (default)” scanning profile (or another you want to modify). Navigate to the “General Scanning” tab and deselect the option labeled: “While updating a disk or a folder: skip unmodified files (speeds up the update process)”. After making this change, click “Save” and proceed to update your disk(s).
Furthermore, if you’re adjusting text processing settings (applicable to PDFs, Office documents, or plain text files), it’s important to also deselect the “Keep comments on update (do not overwrite non-empty comments)” option. This step is crucial because WinCatalog stores the content of text-based files in the form of Comments, and leaving this option marked will prevent updates to these comments.
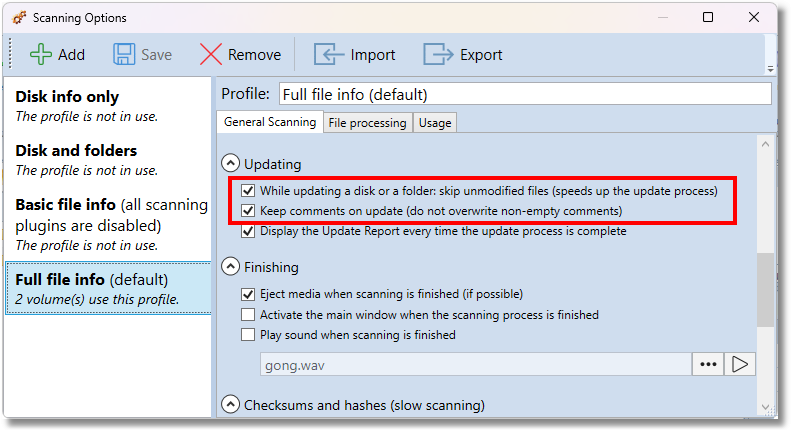
Please do not forget to turn these options back on to speed up future updates and preserve comments.
Catalog File is Locked Error Message
When starting a scanning or a updating process, WinCatalog displays the “Catalog file is locked” error message:
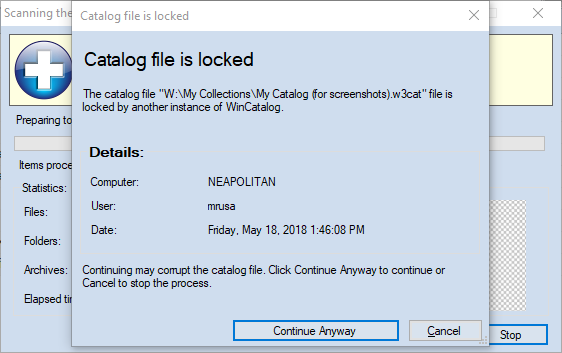
The scanning module in WinCatalog is implemented as a separate process. And every time it starts scanning, it creates a simple text file next to the catalog file where it puts locking info. When the scanning is finished, the scanning module deletes the lock file.
You can see that it is named as your catalog file, but with the .scanlock extension.
This functionality was added to prevent running several scanning processes simultaneously, especially when the catalog file is shared between several users.
The fact that WinCatalog displays the “file is locked” warning on your computer means that the .scanlock file wasn’t deleted after the previous scan, in your case because the process wasn’t finished correctly.
Please try to add a small folder from your hard drive to the catalog. Click Continue Anyway in the warning message (or delete the .scanlock file in File Explorer before starting the process). Wait until the scanning is completed (do you hear the ta-da sound at the end?). Please check if the .scanlock file remains to exist next to your catalog file.
Since version 17.2 WinCatalog allows disabling the .scanlock file for a single user environment. If WinCatalog still does not delete the .scanlock file after the scanning is finished, and if you are the only person who uses WinCatalog, please run WinCatalog, click the Catalog button (left from the Main tab of the Ribbon toolbar) and then click Options.
Follow to the Administrative tab and unmark the following option: “Use a .scanlock file to protect the catalog file in a multi-user mode”. Click OK. After that WinCatalog will stop using the .scanlock file.
Read more
CantAddRootItem / CantSyncRootItem Error Messages
The errors “CantAddRoot” or “CantSyncRoot” may occur if the catalog file is in a read-only mode (or stored in a write-protected folder, for example, in the WinCatalog folder in Program Files).
The screenshot below was reproduced by running WinCatalog as administrator (just after the installation), creating a new catalog file inside Program Files folders, and then restarting WinCatalog with the normal rights and trying to add a disk:
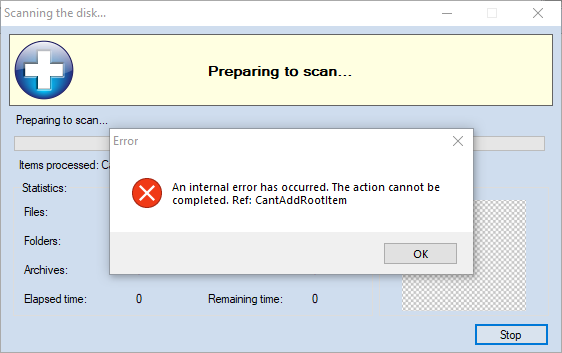
To solve the problem, please try to copy the catalog file into another location, for example, into Documents folder, or create a folder called “My Catalog” on drive C:\ and copy the catalog file there.
To ensure that WinCatalog does not have writing rights to the catalog file, please perform the following experiment: please run WinCatalog and try to add a virtual folder or a custom item by clicking one of the following buttons:


Were these items added to the catalog? If you cant add these items, simply moving the catalog file to another location should solve the problem.
Otherwise, please enable the debug logging and send the log file to us for the investigation, we will do our best to solve the issue.
Read more
Debug Logging
While scanning a disk or a folder, WinCatalog can save a log information about the scanning session.
If you experience any problems scanning a disk, please follow to the Administrative tab of the Program Options, enable the debug logging, set logging level to “Debug " and the log file location to “Desktop” or “Documents” (if you click the Explorer button next to the value field, the selected folder will be open in Explorer). Unmark “Delete log file on success” option and start the scanning session.
Then please try to add or update a disk and recreate the error, then please send the log file to us for the investigations.
To open Program Options please click the Catalog button (left from the Main tab of the Ribbon toolbar), and then click Options.
Please read more about the Administrative tab here.
Read more
Missing or Mysterious Search Results
or the “A fast search index was not created” error message
In order to provide a fast search experience, WinCatalog creates and maintains a series of files, we call them “external search index”. WinCatalog performs the maintenance of the external search index automatically in the background. If you noticed that the search results do not contain some entries or contain some mysterious entries (with empty fields) may mean that something went wrong and the external search index is outdated. Recreating the search index will fix the problem.
You can read more about the Fast Search Index configuration here.
How to recreate Fast Search Index
Please run WinCatalog, click the Catalog button (left from the Main tab of the Ribbon toolbar), then click the Search Index button. The Search Index Options window will appear. Click the button with the green icon next to the “Use external search index”:
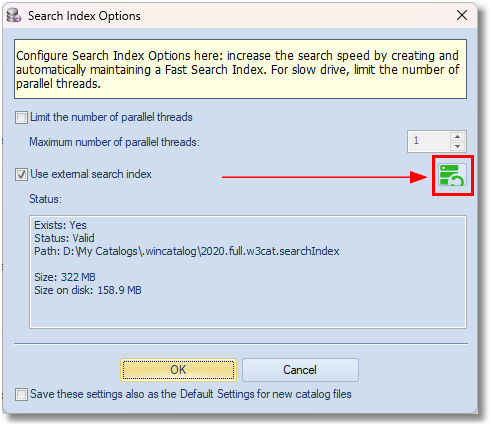
Click Yes to confirm that you want to recreate the search index. Wait until the operation is completed and then please try to search again. The problem should be solved.
Usually recreating the search index helps, however, if you continue get incorrect search results or the “Fast Search Index cannot be updated”, turning the external search index off will help you not to see these messages until we fix the issue. To turn the external search index off unmark the “Use external search index” checkbox in the Search Index Options window. The search speed decreases without the external search index, but it is still way faster than in previous versions.
A Fast Search Index Was Not Created
Recreating the Fast Search Index should solve the problem.
Restoring Catalog Files from Backup
WinCatalog creates backup copies of catalog files by compressing the catalog file by Zip and copying the compressed copy to a backup location.
To restore a catalog file from the backup, open the backup files location, find the latest backup copy (by default WinCatalog adds timestamps to filenames), unpack the file to any folder, and copy the unpacked file to the folder hosting your catalog files. Replace existing files if needed.
If you don’t know where the debug files are located, please run WinCatalog, click the Catalog button (left from the Main tab of the Ribbon toolbar), and then click Options. Open the Backup Options page. You can find the backup files location in the “Specify the folder for keeping copies of your catalog files”.
AI Tools
Please read the AI Tools Troubleshooting section
Scan Errors and Warnings
When Disk Scanner finishes scanning a disk or folder, it might present the Scan Errors and Warnings dialog. This dialog helps you understand what went wrong, which items were skipped, and whether the scan was mostly successful or failed.
The Dialog Interface
The dialog lists everything that failed during the scan. The summary at the top shows the exact count of errors and warnings. If the scan encountered at least one error, the dialog adds a retry hint suggesting you run the scan again after fixing the underlying issue (like reconnecting an external drive).
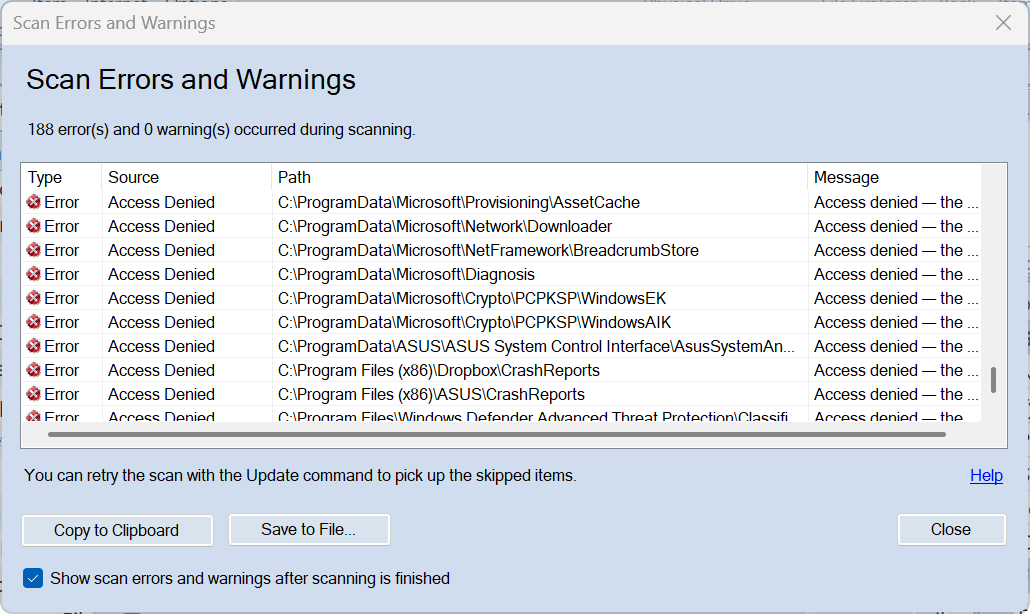
The data grid contains four columns:
-
Type : Either an Error or a Warning.
-
Source : The subsystem that generated the error.
-
Path : The exact file or folder path where the issue occurred.
-
Message : A description of the issue.
You can select rows and press Ctrl+C (or click Copy to clipboard) to copy the details as tab-separated text. You can also click Save to file to write the entire list to a text file for support or later review.
The checkbox at the bottom — Show scan errors and warnings after scanning is finished — lets you disable this dialog for future scans.
Categorization: Errors vs. Warnings
Not every failure ruins the scan. The system categorizes issues into Errors and Warnings based on their severity.
Errors mark a complete failure to process an item. If the scanner cannot read a directory tree because of an “Access Denied” restriction or a dead drive, it skips that item entirely.
Common error sources include:
-
IO : Physical drive failures, bad sectors, or disconnected network drives.
-
AccessDenied : Windows blocked the scanner from reading the folder because of file-system permissions.
-
Transaction : The internal SQLite database failed to write the item, often due to disk space issues.
Warnings are less severe. The scanner successfully found the file and added it to the database, but failed to extract extra details.
Typical warnings include:
-
Missing transient files : Sometimes an application deletes a temporary file right after the scanner lists the directory but before it can open the file. The engine treats Win32
FILE_NOT_FOUND(Error 2) andPATH_NOT_FOUND(Error 3) during directory listings as warnings, since temporary file thrashing is a normal part of Windows operation. -
PluginTimeout : An external plugin took too long to read media details (like looking inside a massive archive or reading corrupted video headers).
-
Checksum : The scanner added the file but failed to calculate its MD5 or SHA256 hash.
Presentation Logic
When the active scan ends, the application checks if the error list is empty. If it found problems, it checks your preferences before displaying the dialog.
There’s the option in the Finishing section of each scanning profile — Show scan errors and warnings after scanning is finished — based on this option, the application decides if Scan Errors and Warnings appear at the end of the scanning process: If checked, the modal window appears. The system can override this preference. For example, if you run a background or automated scan, an override forces the engine to suppress the dialog so the application doesn’t freeze waiting for you to click “Close.”
The same may be achieved via command line using the -ScanErrors / -se keys with [skip|show] parameters.
Changelog
What changed in each release of WinCatalog 2026. The newest version is listed first.
Changelog for WinCatalog 2026.3 and 2026.3.1
WinCatalog 2026.3
Released on July 31, 2026.
New features
- GPS search for photos. WinCatalog reads GPS coordinates from images and RAW files and lets you search by location offline. Two new rows on the Exif tab, Has GPS coordinates and Within a distance of a place, plus a location picker that lists the places already in your catalog. Right-click a photo to show it on a map or to find photos taken nearby. New Place and Map link property rows and the
%gps_city%/%gps_link%tokens for Dynamic Columns. Place data by GeoNames (CC BY 4.0). - Path filter on the Main tab of the additional search options. Filter search results by the full file path, with Contains and Advanced query conditions.
- Duplicate selection commands. A toolbar above duplicate search results selects copies by date, size, path length, folder depth, drive or folder in one click. See Selecting Duplicates in Search Results.
- Drag or paste an image to set a thumbnail. Drop an image file onto any Properties page, or paste one from the clipboard, and it becomes the item’s thumbnail. See the Thumbnails tab.
- Reorder report columns by dragging column headers. See Configure Columns in the Grid View.
- New
%drive_letter%token for Dynamic Columns: a bare drive letter for local disks, the server name for network paths. - Explorer button on the Info page of the backstage view, opening the folder that holds the current catalog file.
Improvements
- Faster folder sorting in large catalogs.
- Files that failed to scan once are marked and skipped on later updates instead of being retried every time.
- Scan plugins now stop when they stall rather than after a fixed timeout, so one stuck file no longer holds up the scan.
- More accurate scanning speed shown during a scan.
- The post-scan errors and warnings window is hidden by default. Turn it back on in the scanning profile options.
- The Tags, Locations and User-Defined Fields managers scale with the zoom setting.
- Custom keyboard shortcuts now carry over correctly when upgrading from an earlier version.
- Refreshed translations for all supported languages.
Fixes
- The Contains condition in text search filters no longer loses its wildcard, so partial-word searches return the expected results.
- Fixed filter chaining when conditions are combined with duplicate search or restrict by fields.
- Fixed a crash when deleting more than about three duplicate files or folders at once.
- Deleting real files runs as a single batch through the Windows shell, which fixes a race condition and correctly reports success when files go to the Recycle Bin. Deleting a folder also removes its children from the file operation queue.
- Fixed the false “Scanning Interrupted” message after restoring a minimized update window.
- Fixed a case where WinCatalog refused to open a catalog that was not actually open.
- Fixed pop-up menus collapsing as they opened, and flickering of the backstage view on mouse movement.
WinCatalog 2026.3.1
Released on August 5, 2026.
A maintenance release. AI Bridge now works with Bionic, and the translations added in 2026.3 were revised.
AI Bridge
Bionic is LM Studio’s new app. AI Bridge finds it and uses it the same way it uses LM Studio (Classic), including on machines where Bionic is the only one installed. Bionic runs on the same engine as LM Studio, with the same models and the same local server on port 1234, so there is no separate provider to choose. The setting is now called LM Studio / Bionic and covers both apps. See Getting started with AI Bridge.
- Per-user installations are found as well, not only machine-wide ones. A per-user install of LM Studio (Classic) could previously be reported as not installed.
- Status messages name the app that AI Bridge found, such as “Bionic is installed and running”.
- If Bionic is installed but has never been started, AI Bridge asks you to run it once. Bionic unpacks its command line tools on the first start.
Languages updated (in Unicode order)
Bahasa Indonesia, Dansk, Deutsch, Español Europeo and Español Latino, Français, Italiano, Magyar, Nederlands, Polski, Português Brasileiro and Português (Portugal), Română, Slovak, Slovenski, Suomi, Svenska, Türkçe, Český, Ελληνικά, Русский, العربية (Arabic), 日本語, 简体中文 and 繁體中文, 한국어.
If a phrase in your language still reads wrong, please let us know. These releases are built from user reports.
Changelog for WinCatalog 2026.2
Released on June 29, 2026.
New features
- Rating items with 1 to 5 stars. A star control on the General tab of the item properties, a Rating column in the grid view, a Rating submenu in the right-click menu, the Ctrl+1–5 and Ctrl+0 shortcuts, and a search filter by rating. See Rating Items (1–5 Stars).
- Dynamic Columns. Build your own grid columns from metadata tokens, stored per catalog. See Dynamic Columns.
- Customizable keyboard shortcuts. A new shortcut engine with a settings page where you can assign, filter and search commands by category.
- Thumbnail background color. Pick the background color used behind thumbnails, useful for transparent PNGs and logos, and apply it to the thumbnails view as well. A Stretch thumbnails toggle was added to the View menu. See Changing the Thumbnail Background Color.
- Quick tag assignment from the right-click menu. See the Tags tab.
- CATVids import for bringing video collections into WinCatalog.
64-bit version
WinCatalog now ships as a 64-bit application only.
- Upgrading from a 32-bit installation reuses the previous folder and cleans up leftover x86 files.
- On 32-bit Windows the installer points you to the correct setup file.
- Fixed pointer-truncation problems affecting disk-image playback and ribbon controls.
- 7z archives are processed by SharpCompress for more reliable extraction.
Improvements
- Much faster deletion of large numbers of entries, and automatic catalog compacting afterwards.
- Catalog import up to 20 times faster, with a fix for very deep folder trees.
- Faster scanning through single-pass file hashing and quicker folder enumeration.
- Faster startup, and a more responsive interface during bulk updates and filtering.
- Report column layouts survive upgrades and language changes. See Configure Columns in the Grid View.
- The thumbnail zoom level set with Ctrl+mouse wheel is remembered per catalog. See Switching between Grid View and Thumbnails View.
- The Disk Scanner window supports zoom.
- New option to stop writing scan errors into file comments. See Scan Errors and Warnings.
- AI Bridge returns image descriptions in the language you selected.
- The offline CHM help file was replaced with online help.
Fixes
- PNG transparency stays crisp at display scaling above 100%.
- Fixed white flashes when switching tabs and after renaming an entry then clicking away.
- Fixed per-folder view modes, thumbnail switching and the blink during navigation.
- Fixed dynamic columns showing blank values or failing to repaint after being added, shown or reordered.
- Fixed the main window dropping behind other applications after closing a child window or dialog.
- Fixed a scanner crash on MP3 files with embedded cover art, plus media handle leaks.
- Fixed EXE icon transparency, thumbnail panel background bleeding, and star icon alignment.
- Custom keyboard shortcuts from older versions are imported correctly.
Changelog for WinCatalog 2026.1 and 2026.1.1
WinCatalog 2026.1
Released April 15, 2026. The first release of the 2026 generation.
New features
- AI Bridge: AI-generated image descriptions. A local AI model running on your own computer analyses the thumbnails already stored in your catalog and writes captions, keywords, category labels and shot types. Works with LM Studio and Ollama, covers JPEG, PNG, TIFF, BMP and RAW images as well as video files with thumbnails. Everything runs on your machine, with no subscription. See Getting Started with AI Bridge.
- eComic scanning. CBZ, CBR and CB7 archives are scanned and their ComicInfo metadata (title, series, author and more) is added to the catalog.
- Font preview thumbnails. TTF and OTF files get a rendered preview showing the font name and a phrase you can configure. The default is “The quick brown fox jumps over the lazy dog 0123456789”.
- Disk image scanning. ISO, VHD, VMDK, VDI and WIM images are scanned directly, without mounting them first.
- 3D model previews. Thumbnails are generated for STL and 3MF files.
- Configurable EXE icon extraction. Icons stored inside executable files can be extracted during a scan.
Improvements
- The Multimedia tab of the item properties was renamed to Metadata and now shows comic book metadata and AI-generated descriptions. See the item properties.
- Folder and file comments are read from readme files by a new parser.
- The post-scan error and warning dialog was redesigned: sorting, copying to the clipboard, saving to a file and resizing. See Scan Errors and Warnings.
- Scanning profiles can be marked as default with a star toggle, and renaming a profile updates the whole interface at once. See Sets of the Scanning Options.
- Better maintenance of the external search index, plus performance and stability fixes.
WinCatalog 2026.1.1
Released on April 24, 2026.
Scan error reporting
- Well-known system folders are skipped entirely, which removes spurious partial scan warnings.
- Scanning and syncing now use the same folder-listing error logic, so a race condition is reported as a warning instead of failing the whole folder.
- A Show errors after scan checkbox was added to the error dialog itself. See Scan Errors and Warnings.
- New
-ScanErrors [Show|Skip|Default]command-line flag for batch scripts. See the full list of commands.
AI Bridge
- The response parser extracts the description reliably even when a local model returns slightly malformed output.
- Images are capped at 448×448 pixels before being sent to the model. This suits the Gemma 4 family, keeps the visual detail and speeds up generation.
- The AI Queue column state is kept between sessions.
Fixes
- Window focus returns to WinCatalog after an external dialog closes.
- Single-click renaming works reliably.
- Syncing an individual file no longer reports a false Error 267.